372
Upgrade and Maintenance Manual
RX2540 M4
Liquid cooling (LC)
Ê
Hold the LC device with both hands and lift up the complete LC device
together with the CPUs.
12.2.3 Removing the CPU
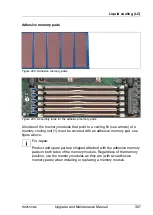
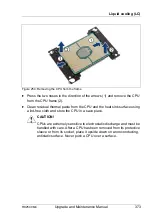
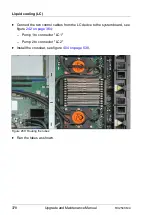
Figure 253: Removing the CPU from the pump
Ê
Release the four hooks (see circles).
Ê
Carefully twist the CPU back and forth to detach the CPU frame from the
pump (see arrows).
I
This may be necessary due to the adhesive quality of the thermal
paste located between the heat sink and CPU.
Summary of Contents for PRIMERGY RX2540 M4
Page 40: ...40 Upgrade and Maintenance Manual RX2540 M4 Before you start ...
Page 90: ...90 Upgrade and Maintenance Manual RX2540 M4 Basic hardware procedures ...
Page 136: ...136 Upgrade and Maintenance Manual RX2540 M4 Power supply unit PSU ...
Page 228: ...228 Upgrade and Maintenance Manual RX2540 M4 Hard disk drives HDD and solid state drives SSD ...
Page 344: ...344 Upgrade and Maintenance Manual RX2540 M4 Main memory ...
Page 362: ...362 Upgrade and Maintenance Manual RX2540 M4 Processor CPU ...
Page 390: ...390 Upgrade and Maintenance Manual RX2540 M4 Liquid cooling LC ...
Page 498: ...498 Upgrade and Maintenance Manual RX2540 M4 Additional interfaces ...
Page 572: ...572 Upgrade and Maintenance Manual RX2540 M4 Appendix A ...
Page 574: ...574 Upgrade and Maintenance Manual RX2540 M4 Appendix B ...
Page 582: ...8 RX2540 M4 Basic Serial RS 232 Cable plan System Board D3384 RS 232 onboard RS 232 rear C6 ...
Page 634: ...List of all used screws for PRIMERGY Servers Assembled in Germany and Japan January 2017 ...


