70
3.6
Using the Network Settings Menus
3.6.1 Giving the Scanner an IP Address
An IP address must be set in order to connect the scanner to a network.
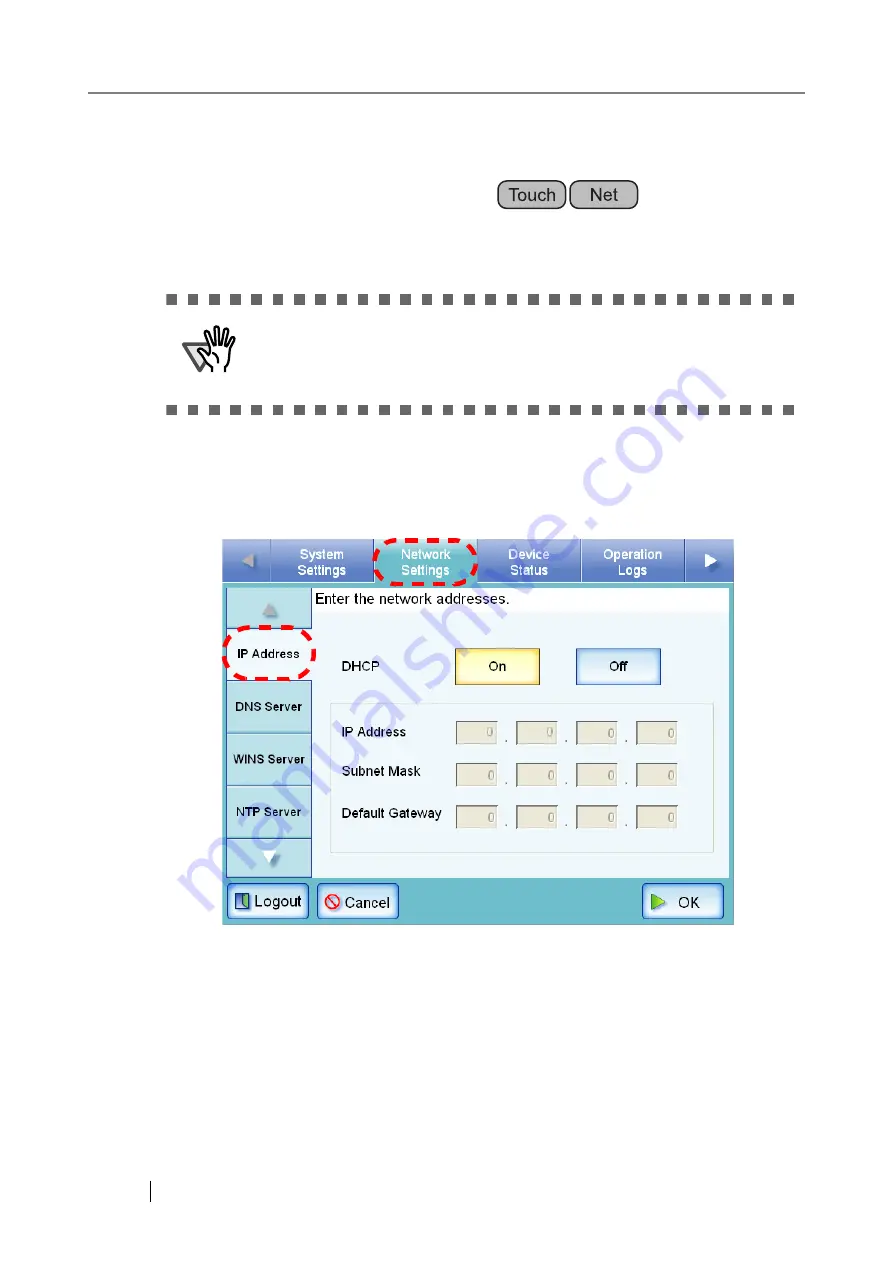
1. Select the [Network Settings] tab on the top menu.
2. Select the [IP Address] tab on the left side menu.
⇒
The DHCP or IP address setting screen appears.
ATTENTION
Do not use an IP address that already exists in the network. IP address
duplication will cause a network connection error. For more details about
how to deal with such errors, refer to
"C.1.1 Administrator Screen Mes-
.
Summary of Contents for FI-6000NS
Page 1: ...P3PC 1852 06ENZ0 ...
Page 2: ......
Page 10: ...x ...
Page 28: ...xxviii ...
Page 70: ...42 3 Press the Connect button The Login screen appears ...
Page 78: ...50 5 Press the Now button The system is restarted ...
Page 122: ...94 4 Press the Add button The screen for adding a network printer is displayed ...
Page 202: ...174 ...
Page 296: ...268 ...
Page 316: ...288 6 Press the OK button The Maintenance screen is shown again ...
Page 348: ...320 ...
Page 358: ...330 ...
Page 362: ...334 ...
Page 426: ...398 ...
Page 427: ...Network Scanner fi 6000NS Operator s Guide 399 D Appendix D Glossary ...
Page 432: ...404 ...


