252
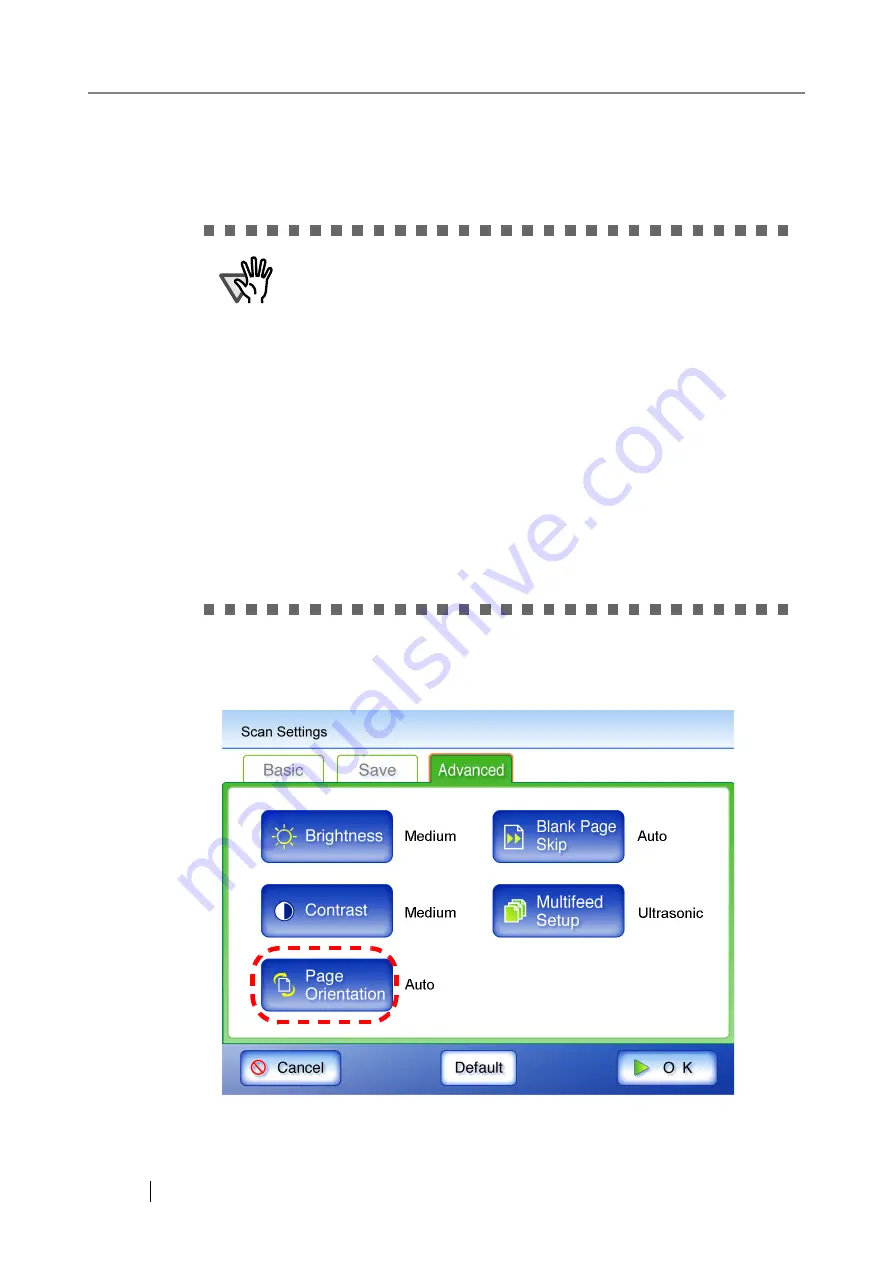
4.8.11 Page Orientation
Automatically rotates each scanned data page that contains text through 0
°
, 90
°
, 180
°
, or 270
°
, so
the text is upright.
1. On the "Scan Settings" screen, select the [Advanced] tab.
2. Press the [Page Orientation] button.
⇒
The "Page Orientation" screen appears.
ATTENTION
This function determines a document orientation based on Roman
characters printed on the document. Therefore, it may not work prop-
erly for the following kinds of documents: When scanning such docu-
ments, do not set automatic page orientation.
•
Documents with many extremely large/small characters
•
Documents on which the pitch of lines or characters is extremely nar-
row, or characters overlap
•
Documents with many characters that contact underlines or ruled
lines
•
Documents with many photographs or figures and only a few charac-
ters
•
Documents which have a background pattern behind characters
•
Documents with characters printed in various direction (e.g. plans)
•
Documents written in languages other than English
•
Documents with only capital letters
•
Handwritten documents
•
Unclear or smeared characters
Summary of Contents for FI-6000NS
Page 1: ...P3PC 1852 06ENZ0 ...
Page 2: ......
Page 10: ...x ...
Page 28: ...xxviii ...
Page 70: ...42 3 Press the Connect button The Login screen appears ...
Page 78: ...50 5 Press the Now button The system is restarted ...
Page 122: ...94 4 Press the Add button The screen for adding a network printer is displayed ...
Page 202: ...174 ...
Page 296: ...268 ...
Page 316: ...288 6 Press the OK button The Maintenance screen is shown again ...
Page 348: ...320 ...
Page 358: ...330 ...
Page 362: ...334 ...
Page 426: ...398 ...
Page 427: ...Network Scanner fi 6000NS Operator s Guide 399 D Appendix D Glossary ...
Page 432: ...404 ...


