background image

fi-5120C / fi-5220C Image Scanner Operator 

Guide


TROUBLE SHOOTING


CONTENTS MAP


TOP


 2.5 How to Use the Scanner Driver (5)


 1   2   3   4 

 5 

 6   7   8   9   10   11   12   13   14   15 


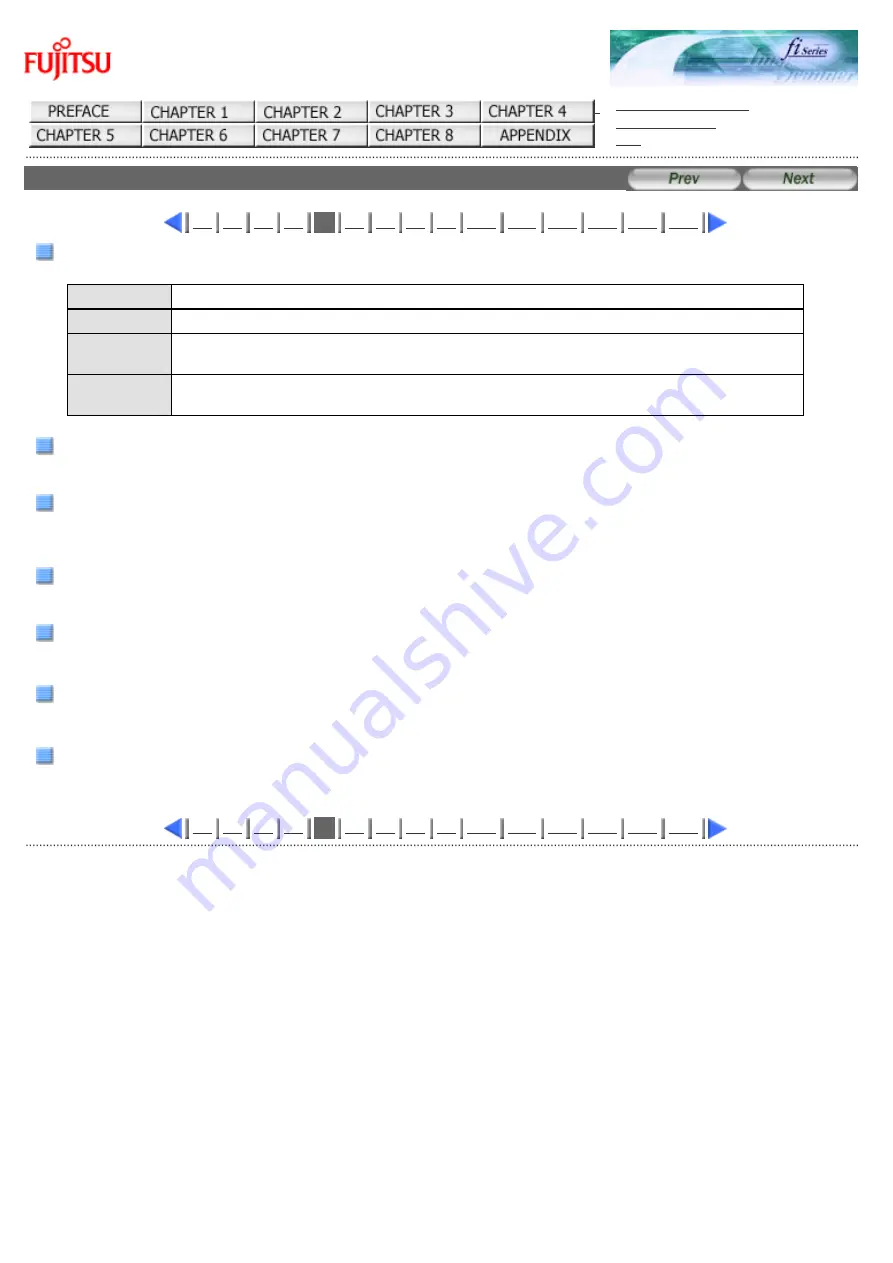
Image Mode 

Specifies the image type for the scanned documents 

Black & White Documents are scanned in binary (black and white).
Halftone

Documents are scanned through halftone processing in black and white.

Grayscale

Documents are scanned in gradations from black to white. For this mode you can select 

256 gradations or 4 bit (16 gardations). 

Color

Documents are scanned in color. For this mode, you can select 24 bit Color, 256 Color or 

8 Color.

[Scan] button

Starts scanning documents with the current settings.

[Preview] button

Documents are scanned preliminarily before the actual scanning. 

You can confirm the image of the documents in the preview window.

[Close] button

Saves the current settings and closes this window.

[Reset] button


Used to undo changes of settings.

[Help] button


Opens the "FUJITSU TWAIN32 Scanner Driver Help" window. The window also opens by pushing the [F1] key.

[About...] button


Opens an information window about the FUJITSU TWAIN32 Scanner Driver's version.


 1   2   3   4 

 5 

 6   7   8   9   10   11   12   13   14   15 


All Rights Reserved Copyright 2006-2009 © PFU LIMITED

Summary of Contents for fi-5120C

Page 1: ...fi 5120C fi 5220C Image Scanner Operator Guide TROUBLE SHOOTING CONTENTS MAP fi 5120C fi 5220C Image Scanner Operator Guide P3PC 1322 05ENZ2 All Rights Reserved Copyright 2006 2009 PFU LIMITED ...

Page 2: ...use This manual describes the scanning method using ScandAll 21 For users using ScandAll PRO refer to the manual How to use ScandAll PRO CONTENTS Copying of the contents of this manual in whole or in part and copying of the scanner application is forbidden under the copyright law The contents of this manual are subject to change without notice PFU LIMITED is not liable whatsoever for any damages r...

Page 3: ... experienced radio TV technician FCC warning Changes or modifications not expressly approved by the party responsible for compliance could void the user s authority to operate the equipment ATTENTION The use of a shielded interface cable is required to comply with the Class B limits of Part 15 of FCC rules The length of the AC cable must be 2 meters 6 6 feet or less Canadian DOC Regulations This d...

Page 4: ...plications simply called high safety applications from here on that directly involve danger to life and health when a high degree of safety is required for example in the control of nuclear reactions at nuclear power facilities automatic flight control of aircraft air traffic control operation control in mass transport systems medical equipment for sustaining life and missile firing control in wea...

Page 5: ...indows Server 2003 Standard Edition operating system 32 64 bit Windows Vista Microsoft Windows Vista Home Basic operating system 32 64 bit Microsoft Windows Vista Home Premium operating system 32 64 bit Microsoft Windows Vista Business operating system 32 64 bit Microsoft Windows Vista Enterprise operating system 32 64 bit Microsoft Windows Vista Ultimate operating system 32 64 bit Where there is ...

Page 6: ...nual PFU assumes no liability to any party for any damage caused by errors or omissions or by statements of any kind in this manual its updates or supplements whether such errors are omissions or statements resulting from negligence accidents or any other cause PFU further assumes no liability arising from the application or use of any product or system described herein nor any liability for incid...

Page 7: ...ors to an operation that if not strictly observed may result in safety hazards to personnel or damage to equipment Symbols Used In This Manual This manual uses the following symbols in the explanations in addition to the warning indications This symbol alerts operators to particularly important information Be sure to read this information This symbol alerts operators to helpful advice regarding op...

Page 8: ...IN32 scanner driver ScandAll 21 Image Capturing Utility Software FUJITSU ISIS scanner driver QuickScan image capturing software and Adobe Acrobat Warning Label The following picture shows the warning label used in this scanner High Temperature The glass surface inside the ADF becomes hot during the operation Be careful not to touch the glass surface inside the ADF ATTENTION Do NOT remove from the ...

Page 9: ...t failure and other troubles or an electric shock Use this scanner only at the indicated power voltage Do not connect to multiple power strips Use this scanner only at the indicated power voltage and current Improper power voltage and current might cause fire or electric shock Do not connect to multiple power strips Do not touch the AC cable with wet hands Do not touch the power plug with wet hand...

Page 10: ...ner service provider Do not put liquids inside the scanner Do not insert or drop metal objects in to the scanner Do not scan wet documents or documents with paper clips or staples Do not splash or allow the scanner to get wet If foreign objects water small metal objects liquids etc get inside the scanner immediately turn off the scanner and disconnect the power plug from the power outlet Then cont...

Page 11: ...ult in fire or scanner failure Do not place heavy objects or stand on top of the scanner Do not place heavy objects on the scanner or use the scanner s surface top to perform other work Improper installation might cause injuries and equipment failure Do not use the scanner immediately after moving it from a cold place into a warm room Do not use the device immediately after moving it from a cold p...

Page 12: ...s not used for a long period of time When the scanner is not going to be used for a long period of time be sure to disconnect the power plug from the power outlet Do not install the scanner in direct sunlight Do not install the scanner under direct sunlight or near heating apparatus Doing so might cause excessive heat to build up inside the scanner which can cause scanner trouble or even fire Inst...

Page 13: ...C Image Scanner Operator Guide TROUBLE SHOOTING CONTENTS MAP TOP Chapter 1 NAMAES AND FUNCTIONS OF PARTS This chapter describes the scanner parts and their functions All Rights Reserved Copyright 2006 2009 PFU LIMITED ...

Page 14: ...kage please handle the main unit and its attachments carefully Make sure it contains all the parts listed in the package contents list that is included in the package box If any parts are missing or defective contact the dealer were you purchased the scanner or an authorized FUJITSU scanner service provider All Rights Reserved Copyright 2006 2009 PFU LIMITED ...

Page 15: ...y 2 ADF paper chute Holds in place the document pages sheets that are fed into the ADF 3 Side Guide It is adjusted to the width of the paper in order not to scan skewed pages 4 ADF button Puch this button to open the ADF 5 Operator panel This panel consists of a Function No display four operating push buttons and a LED 6 Stacker Scanned documents are ejected from the ADF onto this tray 7 Flatbed F...

Page 16: ...CONTENTS MAP TOP 1 2 Names and Functions of Parts 2 1 2 3 4 Rear No Name 1 Security Slot 2 Imprinter connector fi 5120C only 3 SCSI Interface connector 4 SCSI ID switch 5 USB Interface connector 6 DC Inlet 1 2 3 4 All Rights Reserved Copyright 2006 2009 PFU LIMITED ...

Page 17: ...ROUBLE SHOOTING CONTENTS MAP TOP 1 2 Names and Functions of Parts 3 1 2 3 4 Inside for fi 5220C No Name 1 Document cover 2 Document holding pad 3 Document bed 4 Shipping lock located on base 1 2 3 4 All Rights Reserved Copyright 2006 2009 PFU LIMITED ...

Page 18: ...ames and Functions of Parts 4 1 2 3 4 Removable Parts Parts that can be removed from the scanner are displayed below No Name 1 Document cover fi 5220C only 2 Pad ASSY 3 Pick roller can be removed 4 ADF paper shute 5 Sheet guide 1 2 3 4 All Rights Reserved Copyright 2006 2009 PFU LIMITED ...

Page 19: ... 8 Blinks only one time upon turning on the scanner P Indicates that the scanner has been turned ON and is being initialized 0 Indicates that initialization will soon end 1 Indicates that initialization has ended successfully The scanner is now in Ready Status U Indicates that a temporary error occurred when documents were being scanned A number appearing in alternation following the U i e 1 or 2 ...

Page 20: ...canner operations In this chapter Windows XP screenshots are illustrated The screens and operations may differ slightly if the OS that you are using is other than Windows XP Also when FUJITSU TWAIN32 or FUJITSU ISIS is updated the screens and operations noted in this chapter will differ slightly All Rights Reserved Copyright 2006 2009 PFU LIMITED ...

Page 21: ...mber display changes as follows 8 P 0 1 The indication 1 means that the operator panel is in the ready status Power button HINT To turn the scanner OFF hold the power button down for at least two seconds About Power ON OFF Control You can select to power the scanner on off either by pressing the Power button or by connecting disconnecting the AC cable The procedure is as follows 1 Open Scanner s P...

Page 22: ...2 Double click the Printer and Other Hardware icon on the Control panel of your PC The Printer and Other Hardware window appears 3 On the Printers and Other Hardware window double click the Scanners and Cameras icon The Scanners and Cameras window is displayed 1 2 3 4 5 6 All Rights Reserved Copyright 2006 2009 PFU LIMITED ...

Page 23: ...S MAP TOP 2 1 Turning the Scanner ON 3 1 2 3 4 5 6 4 Right click fi 5120Cdj or fi 5220Cdj and select Properties from the menu The properties dialogbox of fi 5120C or fi 5220C appears 5 Click the Device Set tab 1 2 3 4 5 6 All Rights Reserved Copyright 2006 2009 PFU LIMITED ...

Page 24: ...0C fi 5220C Image Scanner Operator Guide TROUBLE SHOOTING CONTENTS MAP TOP 2 1 Turning the Scanner ON 4 1 2 3 4 5 6 The following screen appears 1 2 3 4 5 6 All Rights Reserved Copyright 2006 2009 PFU LIMITED ...

Page 25: ...Power Control button The following screen is displayed 3 Select a power ON OFF control To power on off the scanner by pressing the Power button select Enable power switch To power on off the scanner by connecting disconnecting the AC cable select Disable power switch 1 2 3 4 5 6 All Rights Reserved Copyright 2006 2009 PFU LIMITED ...

Page 26: ...cally switches to the Power Save mode In the Power Save mode the indication of the Function Number display on the operator panel goes out but the green LED stays lit To return from the Power Save mode perform one of the following Load the document on the ADF paper chute Press any button on the operator panel The scanner will be turned OFF when pressing down the power button for at least two second...

Page 27: ...ls see 7 3 Maximum Document Loading Capacity A4 size paper or smaller that makes a document stack of 5mm or less Maximum 50 sheet at A4 20 lb or 80 g m2 2 Fan the documents as follows Lightly grip both ends of the document with both hands and bend the document as follows Firmly holding the document with both hands bend back the document as follows so that the bent section rises up in the middle of...

Page 28: ...wards the ADF paper chute Load the document facing the ADF paper chute face down ATTENTION This scanner can scan ID cards through the Automatic Document Feeder with the following precautions Place one card at a time into the Auto Document Feeder ID card feeding requires the card to be fed through the Auto Document Feeder in portrait mode as in the following figure Smooth cards should be placed fac...

Page 29: ...cetate Dimensions 3 4 inch height x 2 1 inch width 86 mm x 54 mm Thickness 0 03 0 003inch 0 76 0 08mm Cards that are excessively rigid or less flexible may not feed smoothly and excessive noise may occur Cards should be clean from oil and without labels Cards cannot be scanned when the imprinter is installed 1 2 3 4 All Rights Reserved Copyright 2006 2009 PFU LIMITED ...

Page 30: ...DF for Scanning 3 1 2 3 4 4 Adjust the side guides to the width of the documents Move the side guides so that they touch both sides of the documents If there is any space between the side guides and the edges of documents the scanned image may be skewed 1 2 3 4 All Rights Reserved Copyright 2006 2009 PFU LIMITED ...

Page 31: ...ropping after they are scanned Lift the paper stop and swing it forward by inserting your fingertips into the indentaitons on the scanner as shown in the figure below 5 Start up the scanner application and scan the document For details on how to scan documents using the ScandAll 21 application refer to 2 4 Scanning Documents 1 2 3 4 All Rights Reserved Copyright 2006 2009 PFU LIMITED ...

Page 32: ... document on the document bed with the scanning face down and the top left corner aligned with the reference point Reference Point 3 Gently close the document cover 4 Start up the scanner application and scan the document For details on how to scan documents using the ScandAll 21 application see 2 4 Scanning Documents All Rights Reserved Copyright 2006 2009 PFU LIMITED ...

Page 33: ...ing Documents on the Flatbed for Scanning 2 Start up ScandAll 21 Select Start Program Scanner Utility for Microsoft Windows ScandAll 21 This starts up ScandAll 21 3 Select the scanner to be used Select Select Source from the Scan menu The Select Source dialog box appears Select FUJITSU fi 5120Cdj or FUJITSU fi 5220Cdj and click the Select button 4 Click the Scan To View button on the tool bar The ...

Page 34: ...All Rights Reserved Copyright 2006 2009 PFU LIMITED ...

Page 35: ...can button For details on settings in the TWAIN Driver dialog box refer to 2 5 How to Use the Scanner Driver The document is scanned and an image of the scanned document appears on the ScandAll 21 screen For details on scanning other types of documents refer to Chapter 3 SCANNING VARIOUS TYPES OF DOCUMENTS For details on ScandAll 21 functions and operations refer to ScandAll 21 Help 1 2 ...

Page 36: ...All Rights Reserved Copyright 2006 2009 PFU LIMITED ...

Page 37: ...ndard The following describes the procedure with examples of ScandAll 21 for ordinary scanning by using this driver software 1 Procedure for Basic Scanning Operation Startup the application From the Start menu select Programs Scanner Utility for Microsoft Window and click ScandAll 21 Select your scanner on the window below Select Select Source from the Scan menu Select the scanner to use then clic...

Page 38: ...File Saves scanned images as files BMP TIF JPG To FTP Transfers scanned images to a FTP server To Adobe PDF Saves scanned images as PDF files Adobe Acrobat must be installed beforehand To Microsoft SharePoint Portal Server Transfers scanned images to Microsoft Share Point Portal Server To Mail Launches mailer software and attaches scanned images to e mail For details refer to ScandAll 21 Help Conf...

Page 39: ...ot be displayed For details refer to the documentation or Help file of your application e x When you select To File from the Scan menu of ScandAll 21 images of scanned documents are not displayed on the window Save the scanned images Select Save As from the File menu to save the scanned images If you wish to start another scanning return to procedure 4 End the application Select Exit from the File...

Page 40: ...ny resolution in 1 dpi unit By marking the Predefine checkbox you can select one from three predefined settings as Normal Fine Super Fine to scan documents instead of setting details by yourself Otherwise you can change the details of the predefined settings on the Resolution Setting window which appears when you click on the button Scan Type Specifies the feeding method the side s to be scanned F...

Page 41: ...cuments are scanned in color For this mode you can select 24 bit Color 256 Color or 8 Color Scan button Starts scanning documents with the current settings Preview button Documents are scanned preliminarily before the actual scanning You can confirm the image of the documents in the preview window Close button Saves the current settings and closes this window Reset button Used to undo changes of s...

Page 42: ...er Operation Panel Filter tab Selects this tab for setting the image processing filter s Page Edge Filler Fills up the margins of the scanned documents with a selected color Digital Endoser A character string such as the alphabet and numbers can be added in the scanned document Compression tab Selects this tab for setting the compression rate of JPEG Transfer Advance button Click this button for s...

Page 43: ...All Rights Reserved Copyright 2006 2009 PFU LIMITED ...

Page 44: ... ordinary scanning by using this driver software The procedure may vary depending on your application If you use an application other than QuickScan please refer to its Guide or Help for further information 1 Procedure for Basic Scanning Operation Startup the application From the Start menu select Programs QuickScan and click QuickScan Select your scanner on the window below Select Scan Select Sca...

Page 45: ...file you select When changing the settings of already existing profiles Select one from already existing profiles and click Edit Profile button The settings of the selected profile can be changed When using an existing profile Select one from an already existing profiles Scanning will be started according to the settings of the selected profile Go to procedure 9 Open the window of ISIS Driver Sele...

Page 46: ...1 2 3 4 5 6 7 8 9 10 11 12 13 14 15 All Rights Reserved Copyright 2006 2009 PFU LIMITED ...

Page 47: ... ISIS Scanner Driver The Profile Editor window appears Click the OK button to return to New batch dialog Load the documents on the scanner Click the Scan button Scanned images are displayed on the window Refer to the QuickScan Overview or the QuickScan Help for further information on functions and operations of QuickScan After the installation of QuickScan it is registered in the Start menu 1 2 3 ...

Page 48: ...ata by 254 shades of gray plus black and white This mode uses 8 bits per pixel This mode is switable for scanning monochrome photographs 24 bit Color Scans data as full colored image using 24 bits per pixel This mode is suitable for scanning color photographs Image Processing Binary processing is applied to the scanned images This mode is available only when Image Processing Software Option separa...

Page 49: ...rn specified in the dithered download file Brightness Sets the brightness of the entire image Specify the brightness as a number within the range of 1 dark to 255 bright To brighten the entire image increase the value of the setting To darken the entire image decrease the value Contrast Sets the contrast between light and shadow of the scanned image Specify the contrast as a number within the rang...

Page 50: ...ze and Skew detection This option will adjust the output to the detected page size and it will detect and automatically correct the skew of the document With Priority slider control you can change accuracy of Automatic Page Size Detection Move the slider to the right when improving the detection accuracy Area button Opens the Scan Area dialog box Specify scan area for the document size The size ca...

Page 51: ...Scanner Driver 13 1 2 3 4 5 6 7 8 9 10 11 12 13 14 15 JPEG button Opens the JPEG Settings dialog box Used for setting the compression rate of JPEG transfer About button This button displays the version information 1 2 3 4 5 6 7 8 9 10 11 12 13 14 15 All Rights Reserved Copyright 2006 2009 PFU LIMITED ...

Page 52: ...er Size is included the output size is adjusted to the detected short size Overscan This function makes the scanned images larger than the original documents by adding margins Backing With this function the outside of document paper becomes black white by selecting black white background Gamma Specifies Gamma correction Correction patterns are Normal Soft Sharp Custom or Download DTC Variance This...

Page 53: ...d images For example if the document contains black text in a red frame and when the red color is selected the scanner reads only the text and eliminate drop out the red frame If you do not wish to have any colors dropped out select None Reverse Colors of scanned images are reversed Multi feed Detection Detects Multi feeds phenomena that two or more sheets are accidentally fed You can set conditio...

Page 54: ...an various types of documents In this chapter Windows XP screenshots are illustrated The screens and operations may differ slightly if the OS that you are using is other than Windows XP Also when FUJITSU TWAIN32 or FUJITSU ISIS is updated the screens and operations noted in this chapter will differ slightly All Rights Reserved Copyright 2006 2009 PFU LIMITED ...

Page 55: ...ading Documents on the ADF for Scanning Load the doccument facing the ADF paper chute face down 2 Adjust the side guides to the width of the documents 3 Start up ScandAll 21 From Start menu select Program Scanner Utility for Microsoft Windows ScandAll 21 This starts up ScandAll 21 4 Select fi 5120C or fi 5220C From the Scan menu select Select Source Then select the scanner to use and click the Sel...

Page 56: ...All Rights Reserved Copyright 2006 2009 PFU LIMITED ...

Page 57: ...uplex from Scan Type 7 Click the Scan button For TWAIN Driver dialog box setting refer to 2 5 How to Use the Scanner Driver The document is scanned and an image of the scanned document appears on the ScandAll 21 screen For ScandAll functions and operation refer to ScandAll 21 Help 1 2 All Rights Reserved Copyright 2006 2009 PFU LIMITED ...

Page 58: ... Scanning Books fi 5220C only 1 1 2 CAUTION Never look directly the light source during scanning 1 Open the document cover 2 Remove the document cover as shown in the figure below 3 Read the document on the document bed face down 1 2 All Rights Reserved Copyright 2006 2009 PFU LIMITED ...

Page 59: ...P TOP 3 2 Scanning Books fi 5220C only 2 1 2 4 Refer to 2 4 Scanning Documents and perform the scanning ATTENTION Do not move the document during scanning 5 When scanning ends re attach and gently close the document cover 1 2 All Rights Reserved Copyright 2006 2009 PFU LIMITED ...

Page 60: ...y 1 Remove the document cover as shown in the figure below 2 Load the document on the document bed face down 3 Refer to 2 4 Scanning Documents and perform the scanning ATTENTION Do not move the document during scanning 4 When scanning ends re attach and gently close the document cover All Rights Reserved Copyright 2006 2009 PFU LIMITED ...

Page 61: ...cument facing the ADF paper chute face down 2 Adjust the side guides to the document width 3 Start up ScandAll 21 For starting up ScandAll 21 select Programs Scanner Utility for Microsoft Windows ScandAll 21 from Start 4 Select fi 5120C or fi 5220C From the Scan menu select Select Source Then select the scanner to use and click the Select button 5 Click Scan To View on the tool bar The TWAIN Drive...

Page 62: ...OTING CONTENTS MAP TOP 3 4 Scanning Documents longer than A4 size 2 1 2 3 6 Select Long page Front Side or Long page Duplex from Scan Type 7 Specify the length of documents and then click the OK button 1 2 3 All Rights Reserved Copyright 2006 2009 PFU LIMITED ...

Page 63: ... 1 2 3 8 Click the Scan button For settings in the TWAIN Driver dialogbox refer to 2 5 How to Use the Scanner Driver Images of scanned documents are displayed on the window of ScandAll 21 For details on functions and operations of ScandAll 21 refer to ScandAll 21 Help 1 2 3 All Rights Reserved Copyright 2006 2009 PFU LIMITED ...

Page 64: ...ed documents Be sure to scan only documents of the same width together The following shows the procedure for scanning a batch of mixed size documents 1 Sort out the batch into stacks of the same width 2 Adjust the side guides to the width of each document stack 3 Scan the batches of the same widths separately one by one For details on how to scan documents see 2 4 Scanning Documents All Rights Res...

Page 65: ...olution Scan Type and Image Mode The following functions cannot be used 256 Color or 8 Color Rotation Degree selection when End of Page Detection is selected Long Page Scanning When scanning a paper document and converting the image to PDF using Acrobat unexpected images may be output when 1 Setting Edge Shadow Removal in Acrobat and setting Digital Endorser or Black Background options in the TWAI...

Page 66: ...on the ADF paper chute or flatbed 2 Start up ScandAll 21 From Start menu select Program Scanner Utility for Microsoft Windows ScandAll 21 This starts up ScandAll 21 3 From the menu bar select Scan and then To Adobe PDF from the pull down menu TWAIN Driver dialog box is displayed 4 Select the scan resolution document size and other scan conditions and then click the Scan button ...

Page 67: ...1 2 3 4 5 6 7 8 All Rights Reserved Copyright 2006 2009 PFU LIMITED ...

Page 68: ...P 3 6 Saving Scanned Images in PDF Format 3 1 2 3 4 5 6 7 8 5 To end scanning click the Close button 6 Enter the file name and select the destination to save the scanned image For details refer to ScandAll 21 Help 1 2 3 4 5 6 7 8 All Rights Reserved Copyright 2006 2009 PFU LIMITED ...

Page 69: ... Acrobat 1 Load the documents on the ADF paper chute or flatbed 2 Start up Adobe Acrobat Select All Programs Adobe Acrobat from the Start menu This starts up Adobe Acrobat 3 From the File menu select Create PDF From Scanner Acrobat Scan Plug in dialog box is displayed 4 Select FUJITSU fi 5120Cdj or FUJITSU fi 5220Cdj at Scanner and click Scan button ...

Page 70: ...re 1 Uncheck Recognize Text Using OCR 2 Click the Image Settings button The Image Settings dialog box appears 3 Change the following items as showing below Color Grayscale none Monochrome JBIG2 or CCITT Group 4 Background removal Off Edge shadow removal Off TWAIN driver dialog box is displayed 1 2 3 4 5 6 7 8 All Rights Reserved Copyright 2006 2009 PFU LIMITED ...

Page 71: ...TS MAP TOP 3 6 Saving Scanned Images in PDF Format 5 1 2 3 4 5 6 7 8 5 Select the scan resolution document size and other scan conditions and click the Scan button 6 To end scanning click the Done button 1 2 3 4 5 6 7 8 All Rights Reserved Copyright 2006 2009 PFU LIMITED ...

Page 72: ...anned Images in PDF Format 6 1 2 3 4 5 6 7 8 The scanned image is displayed 7 Select Save as or Save from File menu to save the scanned image For the details on Adobe Acrobat operations refer to the Adobe Acrobat manual and Help 1 2 3 4 5 6 7 8 All Rights Reserved Copyright 2006 2009 PFU LIMITED ...

Page 73: ...ned documents using this procedure the file size may increase For reducing the file size please follow the procedure below It may take more time than usual 1 Select File Print 2 On the following dialog specify Adobe PDF for Name 3 Click the Properties button 4 Click the Adobe PDF settings tab 1 2 3 4 5 6 7 8 All Rights Reserved Copyright 2006 2009 PFU LIMITED ...

Page 74: ...d Images in PDF Format 8 1 2 3 4 5 6 7 8 HINT 5 Select one from Default Settings The following shows an example of Smallest File Size 6 Click OK button 7 Enter a file name and click the Save button on the Save PDF File As dialogbox 1 2 3 4 5 6 7 8 All Rights Reserved Copyright 2006 2009 PFU LIMITED ...

Page 75: ...er to read only the text and eliminate drop out the green frame To set the scanner to drop out a color change the settings in the TWAIN Driver dialogbox before scanning 1 Click the Advance button in the TWAIN Driver dialogbox The Advance dialogbox appears 2 Select the color to be drop out from Dropout Color under More For example if the document contains black text in green frame select Green so t...

Page 76: ...3 Click the OK button The TWAIN Driver dialog box will be redisplayed Continue scanning from this dialog box All Rights Reserved Copyright 2006 2009 PFU LIMITED ...

Page 77: ...8 Skipping blank pages 1 1 2 Change settings in the TWAIN Driver dialog box for skipping blank pages at scanning documents 1 Click Option button in the TWAIN Driver dialogbox The Option dialogbox appears 2 Click the Job Cache tab 1 2 All Rights Reserved Copyright 2006 2009 PFU LIMITED ...

Page 78: ...ts Ratio slider bar to set the skip condition For black pages use the White Dots Ratio scroll bar to set the skip condition The value displayed to the right of the scroll bar displays the noise ratio 1 If a scanned document is below this value it is recognized as a blank page The setting range is OFF and 0 2 to 3 0 in increments of 0 2 1 Ratio of black dots included in the scanning area for white ...

Page 79: ...e fed simultaneously into the scanner You can set the scanner to detect multi feed stop scanner operation and display an error message To set the scanner to detect multi feed change the settings in the TWAIN Driver dialogbox 1 Click the Option button in the TWAIN Driver dialogbox The Option dialog box appears 2 Click the Job Cache tab 3 Select the detection conditions from Multi Feed Detection und...

Page 80: ...1 2 3 4 5 6 All Rights Reserved Copyright 2006 2009 PFU LIMITED ...

Page 81: ...rom this dialogbox To Specify the Area for Multi feed Detection By default multi feed detection will monitor paper overlap over the central column width 35mm of the document to be scanned See Multi feed detection monitoring area illustration on section 7 5 This may cause to certain documents such as resumes and postcards which are partially pasted with photographs or stamps to be accidently recogn...

Page 82: ...Multi feeds 3 1 2 3 4 5 6 3 On the Printers and Other Hardware window double click the Scanners and Cameras icon The Scanners and Cameras window is displayed 4 Right click fi 5120Cdj or fi 5220Cdj and select Properties from the menu 1 2 3 4 5 6 All Rights Reserved Copyright 2006 2009 PFU LIMITED ...

Page 83: ...UBLE SHOOTING CONTENTS MAP TOP 3 9 Detecting Multi feeds 4 1 2 3 4 5 6 The properties dialogbox of fi 5120Cdj or fi 5220Cdj appears 5 Click the Device Set tab The following screen appears 1 2 3 4 5 6 All Rights Reserved Copyright 2006 2009 PFU LIMITED ...

Page 84: ... Scanner Operator Guide TROUBLE SHOOTING CONTENTS MAP TOP 3 9 Detecting Multi feeds 5 1 2 3 4 5 6 2 Click the Multi feed button The following screen is displayed 1 2 3 4 5 6 All Rights Reserved Copyright 2006 2009 PFU LIMITED ...

Page 85: ...sable Multi feed Detection will not be available 2 Select if the Multi Feed Detection shall be applied or not for a set area To specify an area for which the Multi Feed Detection will be conducted check Select area for applying Multi feed Detection To specify an area for which the Multi Feed Detection will NOT be conducted check Select area for not applying Multi feed Detection 3 Specify the Start...

Page 86: ...tomatically when skewed documents are fed into the ADF Change the setting in the TWAIN Driver dialog box to enable this function The following shows the procedure for changing the setting in the dialogbox 1 Click Option button in the TWAIN Driver dialogbox The Option dialog box appears 2 Click the Rotation tab Select the Automatic page size detection from the Automatic Size and Skew Detection menu...

Page 87: ...1 2 All Rights Reserved Copyright 2006 2009 PFU LIMITED ...

Page 88: ... you can change accuracy of Automatic Page Size Detection Move the slider to the right when improving the detection accuracy Note that higher accuracy setting requires much more processing time and scanning speed becomes slower ATTENTION When using either of the following documents the Automatic Page Size Detection may not function correctly Paper of weight 52g m2 or less Not rectangular documents...

Page 89: ...w to clean the scanner WARNING When operating the scanner the ADF s glass becomes very hot Before you clean inside the scanner turn off its power and unplug the AC adapter from the outlet Wait for at least 15 minutes Do not turn off the scanner when you clean the Feed rollers All Rights Reserved Copyright 2006 2009 PFU LIMITED ...

Page 90: ...quantities of the cleaner In addition wipe off the cleaner completely with a soft lint free cloth to leave no residue on the surface of the cleaned parts For details on Cleaner F1 consult the agent where you bought your scanne or an authorized FUJITSU service providerr Locations and Cycle for Cleaning Location Standard Cleaning Cycle Pad ASSY Clean every 1 000 scanned sheets Pick roller Feed rolle...

Page 91: ... 2 ATTENTION Detergent for cleaning windows or glass cleaner can be used instead of cleaner F1 However do not use paint thinner or other organic solvents Cleaning the Flatbed The following parts needs to be cleaned in the Flatbed area Document holding pad Document bed 1 2 All Rights Reserved Copyright 2006 2009 PFU LIMITED ...

Page 92: ...ng pad Document bed ATTENTION Do not allow moisture to get inside the device during cleaning It may take long before the cleaner vaporizes if a large quantity is used When cleaning the scanner parts dampen a cloth with modest quantities of the cleaner In addition wipe off the cleaner completely with a soft lint free cloth to leave no residue on the surface of the cleaned parts 3 Wait for cleaned p...

Page 93: ...1 2 All Rights Reserved Copyright 2006 2009 PFU LIMITED ...

Page 94: ...ration of the scanner Before you start to clean the inner parts of the scanner disconnect the AC adapter from the power outlet and wait at least 15 minutes to let the glass cool down When you perform cleaning make sure that the inside of the scanner is free of any foreign object and be careful not to get your hand or the cloth caught on the pick spring metal part as a deformed pick spring metal pa...

Page 95: ... x 4 5 Glass x 2 6 Ultrasonic sensors x 2 ATTENTION To avoid damaging the document sensors take care that the cloth does not get hooked into them when cleaning the inside of the ADF It may take long before the cleaner vaporizes if a large quantity is used When cleaning the scanner parts dampen a cloth with modest quantities of the cleaner In addition wipe off the cleaner completely with a soft lin...

Page 96: ...1 2 3 4 All Rights Reserved Copyright 2006 2009 PFU LIMITED ...

Page 97: ...cular care in cleaning this roller as black debris on it adversely affects the pickup performance Mylar sheet Plastic roller Clean lightly taking care not to damage the surface of these rollers Take particular care when cleaning these rollers as black debris matter on it affects document pick performance Be careful no to damage the sponges beside the rollers Glass Clean lightly HINT If the glass i...

Page 98: ...1 2 3 4 All Rights Reserved Copyright 2006 2009 PFU LIMITED ...

Page 99: ...w 2 Simultaneously hold down the Send to and Scan buttons on the operator panel The Feed rollers start to rotate slowly 3 Hold a soft cloth moistened with cleaning fluid against the surface of the rotating Feed rollers so that it lightly cleans the surface of the rollers As a guideline seven presses of the Send to and Scan buttons make the Feed rollers to rotate one full turn Button Send to Button...

Page 100: ...ION When the ADF has returned to its original position make sure that it is completely closed Paper jams or feeding errors may occur if the ADF is not closed completely 1 2 3 4 All Rights Reserved Copyright 2006 2009 PFU LIMITED ...

Page 101: ...ns may differ slightly if the OS that you are using is other than Windows XP Also when FUJITSU TWAIN32 or FUJITSU ISIS is updated the screens and operations noted in this chapter will differ slightly WARNING When operating the scanner the ADFfs inside glass becomes very hot Before you replace the consumables turn off its power and unplug the AC adapter from the outlet Wait for at least 15 minutes ...

Page 102: ...ar The replacement cycles above are rough guidelines for the case of using A4 Letter woodfree or wood containing paper 64 g m2 17 lb This cycle varies according to the type of the used paper and how frequently the scanner is used and cleaned ATTENTION Use only the consumables specified by PFU LIMITED Do not use consumables and parts made by other manufacturers To purchase the consumables contact t...

Page 103: ...ck that the scanner is connected to the PC Refer to 3 2 Connecting the Scanner to a PC in fi 5120C fi 5220CGetting Started on the Setup CD ROM for information about connecting the scanner to a personal computer 2 Double click the Printer and Other Hardware icon on the operator panel of the PC The Printer and Other Hardware screen is displayed 3 In the Printer and Other Hardware screen double click...

Page 104: ... 1 Consumable and Replacement Cycle 3 1 2 3 4 4 Right click on fi 5120Cdj or fi 5220Cdj icon and select Properties for Windows XP or double click for Windows 2000 The properties dialogbox of fi 5120Cdj or fi 5220Cdj appears 1 2 3 4 All Rights Reserved Copyright 2006 2009 PFU LIMITED ...

Page 105: ...vice Set tab The following screen is displayed You can confirm the following information in this panel Total number of scans Pad counter approximate number of scans after resetting the pad counter Pick roller counter approximate number of scans after resetting the Pick roller counter 1 2 3 4 All Rights Reserved Copyright 2006 2009 PFU LIMITED ...

Page 106: ... to catch the pick springs 4 Attach the new Pad ASSY Hold both ends of the new Pad ASSY and attach it to its installation location When doing this take care not to catch the pick springs ATTENTION Make sure that the Pad ASSY is firmly attached When the Pad ASSY is not correctly attached document jams or other feeding errors may occur 5 Press down on the center of the ADF to return it into its orig...

Page 107: ...he Control Panel of your PC Open the properties dialogbox of fi 5120Cdj or fi 5220Cdj from the Scanners and Cameras The properties dialogbox of fi 5120C or fi 5220C appears Click the Device Set tab The following screen is displayed After clicking the Clear button beside Pad in Page Counter click the OK button The following screen is displayed Click the OK button The Pad counter returns to 0 1 2 Al...

Page 108: ...Open the ADF by pulling the ADF Open Lever ATTENTION Be careful the ADF may close and pinch your finger 4 Remove the Pick roller from the scanner 1 Grip the knobs on the sheet guide with your fingers and lift it up to remove 2 Rotate the Pick roller bushing in the direction of the arrow Pick Roller Bushing Pick Roller Shaft 3 Remove the Pick roller while lifting it up in the direction of the arrow...

Page 109: ...roller Bushing is hard Do not turn this bearing with your fingernails Use a paper clip for turning the roller bushing if you can not rotate it with your finger 1 2 3 4 All Rights Reserved Copyright 2006 2009 PFU LIMITED ...

Page 110: ...ur fingernail it may heart or get chipped your fingernail If you worry about that you push up the pick roller tab using a paper clip 6 Attach the new Pick roller Insert the new Pick roller aligning the protrusion on the shaft with the slot for the screw in the Pick roller Pick Roller Shaft Protusion Pick Roller ATTENTION Make sure that the Pick roller is completely attached An incompletely attache...

Page 111: ...g in the direction indicated by the arrow Pick Roller Bushing Pick Roller Shaft 2 Move the sheet guide claws in the direction indicated by the arrow to fix the sheet guide 8 Press down the center of the ADF to return it to its original position You should hear the ADF click when it returns to its original position 9 Attach the ADF paper chute With the movie below review the replacement procedure o...

Page 112: ...e Control Panel of your PC Open the properties dialogbox of fi 5120Cdj or fi 5220Cdj from the Scanners and Cameras The properties dialogbox of fi 5120C or fi 5220C appears Click the Device Set tab The following screen is displayed After clicking the Clear button beside Pick Roller in Page Counter click the OK button The following screen is displayed Click the OK button This returns the pick counte...

Page 113: ...s how to remedy document jams other trouble items to check before contacting the agent where you bought the scanner and how to check device labels ATTENTION About troubles that are not described here and the details of the errors refer to the FUJITSU TWAIN32 Scanner Driver Help All Rights Reserved Copyright 2006 2009 PFU LIMITED ...

Page 114: ... hot during operation Take care not to get burned 1 Remove any documents on the ADF paper chute 2 Open the ADF by pushing on the ADF button ADF button CAUTION Be careful the ADF cover may close and pinch your finger 3 Remove the jammed document ATTENTION Staples paper clips etc cause document jams Be sure to fully check the document and feed path and remove any small metal objects such as these Al...

Page 115: ...ely closed document jams or feeding errors may occur When the scanning is completed or canceled the documents might remain inside the ADF even though any error message is not displayed Follow the procedure below to remove the documetns remaining in the ADF 1 Remove all documents from the ADF paper chute 2 Open the ADF by pushing down the ADF button 3 Remove the remaining documents 4 Push in the ce...

Page 116: ...requenlty follow the procedures below 1 Align the edges of the document sheets 2 Hold both the left and right sides of the document with both hands and as shown below bend the document bring back and release one side of the stack 3 The document edges will be slightly misaligned as shown in the picture 4 Load the documents into the ADF chute as shown in the picture ...

Page 117: ...1 2 3 All Rights Reserved Copyright 2006 2009 PFU LIMITED ...

Page 118: ...ry Errors Indication Meaning Remedy U0 Shipping lock error fi 5220C only Confirm that the shipping lock is released For details refer toA fi 5120C fi 5220C Getting Start section 2 1 Installing the Scanner U1 Paper Feed Error Remove the jammed documents Refer to 6 1 Removing JammedDocuments Confirm that the documents meet the paper conditions for scanning Refer to 7 2 Document Quality U2 Multi Feed...

Page 119: ...hased the scanner or an authorized FUJITSU scanner service provider E1 Trouble in the optical system Flatbed E2 Trouble in the optical system front E3 Trouble in the optical system back E4 The motorfs fuse has blown out E6 Trouble in the operator panel E7 Trouble occurred in the EEPROM E8 The SCSI interface fuse has blown out E9 An error in the image memory EA Trouble with the imprinter Ec An alar...

Page 120: ...ught the scanner or an authorized FUJITSU scanner service provider Scanner cannot be turned On Indication on Function No display goes out The scanning does not start Quality of scanned pictures or photos is not satisfactory Quality of scanned text of lines is unsatisfactory Images are distorted or blurred Vertical lines appear in the scanned image The Function No display indicates alarm after the ...

Page 121: ... from the manufacturer NO You must use the AC adapter and cable supplied with your scanner by the anufacturer Please get the correct AC adapter and cable to connect to your scanner YES Did you pushed the power button NO Press power button YES If you cannot solve the problem after taking measures check the items in 6 4 Items to check before contacting the dealer where you bought the scanner and con...

Page 122: ...operator panel NO The scanner operation is normal YES Does the display remain blank even after running ON the scanner again NO The scanner operation is normal YES If you cannot solve the problem after taking measures check the items in 6 4 Items to check before contacting the dealer where you bought the scanner and contact the dealer or an authorized FUJITSU scanner service provider All Rights Res...

Page 123: ...ocument correctly on ADF paper chute YES Is the ADF closed completely NO Close the ADF completely YES Is the interface cable connected correctly NO Connect interface cable correctly 2 YES Is the connector of interface cable broken YES Use a new interface cable and correctly connect it Yes when using scanner on SCSI interface Is the SCSI ID set correctly NO Turn OFF the scanner and set the SCSI ID ...

Page 124: ...ing the dealer where you bought the scanner and contact the dealer or an authorized FUJITSU scanner service provider 1 For details refer to Getting Started 2 1 Installing the Scanner 2 For details refer to Getting Started 2 2 Connecting the scanner to your PC All Rights Reserved Copyright 2006 2009 PFU LIMITED ...

Page 125: ...ES Are the upper lower glasses inside the ADF the document bed and the document holding pad clean NO Clean dirty locations YES If you cannot solve the problem after taking measures check the items in 6 4 Items to check before contacting the dealer where you bought the scanner and contact the dealer or an authorized FUJITSU scanner service provider For details on how to clean dirty locations see Ch...

Page 126: ...e document bed and the document holding pad clean NO Clean dirty locations YES If you cannot solve the problem after taking measures check the items in 6 4 Items to check before contacting the dealer where you bought the scanner and contact the dealer or an authorized FUJITSU scanner service provider For details on how to clean dirty locations see Chapter 4 DAILY CARE All Rights Reserved Copyright...

Page 127: ...ct on the ADF during scanning NO Is something causing the scanner to vibrate during scanning YES Do not allow anything to cause the scanner to vibrate while scanning NO Is the scanner installed on a flat level surface NO Install the scanner on a flat level surface YES If you cannot solve the problem after taking measures check the items in 6 4 Items to check before contacting the dealer where you ...

Page 128: ...ses inside the ADF 2 NO Do the lines disappear on images with low resolution settings YES Scan the documents with low resolution settings NO If you cannot solve the problem after taking measures check the items in 6 4 Items to check before contacting the dealer where you bought the scanner and contact the dealer or an authorized FUJITSU scanner service provider 1 For cleaning the Flatbed refer to ...

Page 129: ... unlock the shipping lock then turn ON the scanner again YES Does the Function No display indicate any alarm after turning ON the scanner again NO The scanner operation is normal YES If you cannot solve the problem after taking measures check the items in 6 4 Items to check before contacting the dealer where you bought the scanner and contact the dealer or an authorized FUJITSU scanner service pro...

Page 130: ...e the documents fanned before loaded onto the ADF paper chute NO Fan the document before loading or reduce the number of sheets of the documents YES Have you scanned a very thick paper or plastic document YES When scanning documents like this disable the multifeed detection NO Have the documents just been printed out on a copier or laser printer YES Fan the documents 3 or 4 times to remove static ...

Page 131: ...ontacting the dealer where you bought the scanner and contact the dealer or an authorized FUJITSU scanner service provider 1 For details on requirements see 7 2 Document Quality 2 For details on multi feed see 7 5 Multi feed Detection Conditions 3 For details on requirements see 7 3 Maximum Document Loading Capacity 4 For details on how to clean the consumables see 4 3 Cleaning the ADF 5 For detai...

Page 132: ...er and Pad ASSY if needed 2 YES Is any of consumables Pick roller Pad ASSY dirty YES Clean the dirty consumable 3 NO Is any of consumables Pick roller and Pad ASSY worn out Check the consumable counter YES Replace the consumable if needed 4 NO If you cannot solve the problem after taking measures check the items in 6 4 Items to check before contacting the dealer where you bought the scanner and co...

Page 133: ...All Rights Reserved Copyright 2006 2009 PFU LIMITED ...

Page 134: ... Pick roller and Pad ASSY if needed 3 YES Is any of consumables Pick roller Pad ASSY dirty YES Clean the dirty consumable 2 NO Is any of consumables Pick roller and Pad ASSY worn out Check the consumable counter YES Replace the consumable if needed 3 NO If you cannot solve the problem after taking measures check the items in 6 4 Items to check before contacting the dealer where you bought the scan...

Page 135: ...All Rights Reserved Copyright 2006 2009 PFU LIMITED ...

Page 136: ... scale YES Check the items in 6 4 Items to check before contacting the dealer where you bought the scanner and contact the dealer or an authorized FUJITSU scanner service provider NO Set the scan scale Display the properties of the scanner that you are using on Scanners and Cameras in the control panel then adjust the scan scale For details on how to clean the rollers see 4 3 Cleaning the ADF All ...

Page 137: ...ng position for scanning the document YES Check the items in 6 4 Items to check before contacting the dealer where you bought the scanner and contact the dealer or an authorized FUJITSU scanner service provider NO Adjust the offset Display the properties of the scanner that you are using on Scanners and Cameras in the control panel then adjust the Sub scan Setting All Rights Reserved Copyright 200...

Page 138: ...canner General Details Item findings Model Example fi 5120C For details on model see 6 5 Checking Labels on the Scanner Serial No Example 000001 For details on serial No see 6 5 Checking Labels on the Scanner Production date Year Month 2006 05 May 2006 For details on production date see 6 5 Checking Labels on the Scanner Date of purchase Year Month Symptom Frequency of trouble Total number of scan...

Page 139: ...yed error message Application Example SCSI interface Interface controllers Example made by Adaptec SCSI Card 2940AU Feed system trouble Item findings Document type Main purpose of use Last cleaning date Year Month Last consumables replacement date Year Month Operator panel status at trouble Windows Vista 2006 1 1 2006 1 1 ...

Page 140: ...e controller Example made by Adaptec SCSI Card 2940AU OS Windows Application software Example ScandAll 21 Acrobat Other Item findings Can both the original document and scanner image be sent by e mail or Fax All Rights Reserved Copyright 2006 2009 PFU LIMITED Windows Vista available Print ...

Page 141: ...on describes how to check the labels on the scanner Positions of Labels on the Scanner The following shows where the two labels are located on the scanner Label A example Indicates scanner information Label B example Indicates various standards that the scanner conforms with All Rights Reserved Copyright 2006 2009 PFU LIMITED ...

Page 142: ...BLE SHOOTING CONTENTS MAP TOP Chapter 7 ADF AND PAPER SPECIFICATION This chapter describes the required document size and paper quality for ensuring correct operation when scanning documents on the ADF All Rights Reserved Copyright 2006 2009 PFU LIMITED ...

Page 143: ...TROUBLE SHOOTING CONTENTS MAP TOP 7 1 Document Size The following shows the size of documents that can be scanned on the ADF Maximum Minimum A B A B 216 8 5 in 356 14 in 53 2 1 in 74 2 9 in Unit mm All Rights Reserved Copyright 2006 2009 PFU LIMITED ...

Page 144: ...orm thickness e g envelopes and documents with photographs attached Wrinkled or curled documents See HINT below Folded or torn documents Tracing paper Coated paper Carbon paper Carbonless paper Photosensitive paper Perforated or punched documents Documents that are not square or rectangular Very thin documents Photographs Do not use the following documents Paper clipped or stapled documents Docume...

Page 145: ...aper containing wood is scanned the service life of the Pad and Pick roller may become shorter than that of the Pad and Pick roller used for scanning only woodfree paper The pad or rollers of the scanner could be damaged if photographs or sheets of paper attached to the scanned document have contact with the pad or rollers during scanning Scanning documents of calendered paper such as photographs ...

Page 146: ...n the Auto Document Feeder Embossed cards raised lettering should be placed with the embossed side down The card to be scanned should be within the ISO7810 compliance type ID 1 ISO7810 compliant Type ID 1 card Material PVC Poly vinyl chloride or PVCA Polyvinyl chloride acetate Dimensions 3 4 inch height x 2 1 inch width 86 mm x 54 mm Thickness 0 03 0 003inch 0 76 0 08mm Cards that are excessively ...

Page 147: ...eets that can be loaded on the ADF paper chute is determined by the size and weight of the document The following graph shows the maximum document loading capacity of ADF according to paper weight Unit Conversion g m2 52 64 75 80 90 104 127 lb 14 17 20 21 24 28 34 kg 45 55 64 5 69 77 5 90 110 All Rights Reserved Copyright 2006 2009 PFU LIMITED ...

Page 148: ...ENTS MAP TOP 7 4 Area not to be perforated When using the ADF document trouble might occur if there are punched holes in the shaded area in the following figure If hole punched documents must be scanned use the Flatbed All Rights Reserved Copyright 2006 2009 PFU LIMITED ...

Page 149: ...e document Detection by Document Length Sheets of the same length shall be set in the ADF at a time Document length deviation 1 or less Punched holes are not allowed within 35mm of the vertical center line of the document Detection by Document Overlapping and Length Sheets of the same thickness and length shall be set in the ADF at a time Document thickness 0 065 to 0 15mm Document length deviatio...

Page 150: ...TING CONTENTS MAP TOP 7 5 Multi feed Detection Conditions 2 1 2 HINT The type of document and document conditions sometimes cause the multi feed detection rate to drop Multi feed detection monitoring area 1 2 All Rights Reserved Copyright 2006 2009 PFU LIMITED ...

Page 151: ...120C fi 5220C Image Scanner Operator Guide TROUBLE SHOOTING CONTENTS MAP TOP Chapter 8 SCANNER SPECIFICATION This chapter lists the scanner specifications All Rights Reserved Copyright 2006 2009 PFU LIMITED ...

Page 152: ...Scalable in 1 dpi increments Grayscale 50 600 dpi Scalable in 1 dpi increments Color 50 600 dpi Scalable in 1 dpi increments 10 Grayscale level internal 8 bits per color Internal 10 bits 11 Halftone Patterns Dither error diffusion 12 Interface Note 7 Ultra SCSI Shield type 50 pin pin type halfpich USB2 0 1 1 Note 8 B type 13 Other function JPEG compression Imprinter Port fi 5120C only 1 The minimu...

Page 153: ...IFICATION 7 The Ultra SCSI and USB 2 0 1 1 interfaces cannot be used at the same time 8 If you connect the scanner with USB 2 0 it is required that the USB port and the Hub are compliant with USB 2 0 The scanning speed may slow down when you connect the scanner with USB 1 1 If your omputer has the compatible USB 2 0 port please use it All Rights Reserved Copyright 2006 2009 PFU LIMITED ...

Page 154: ...mm 15 0 in fi 5220C 450 mm 17 8 in Weight kg fi 5120C 3 8 8 39lb fi 5220C 8 4 18 54 lb Input power Voltage AC100V 120V 10 AC220V 240V 10 Phases Single phase Frequency 50 60 3 Hz Power consumption fi 5120C 33 W or less fi 5220C 38 W or less ATTENTION Installation Space is the reference value of an installation space required to read A4 size documents Item Specification Ambient condition Device stat...

Page 155: ...5220C Image Scanner Operator Guide TROUBLE SHOOTING CONTENTS MAP TOP 8 3 External Dimensions The following shows the external dimensions fi 5120C fi 5220C Unit mm All Rights Reserved Copyright 2006 2009 PFU LIMITED ...

Page 156: ...ication software to the Scan or Send to button you can launch the linked application by simply pushing the button 1 Select Start Control Panel 2 Select Scanners and Cameras Properties 3 Select the Events tab 4 Select an Event For Windows XP select the event for starting up any application from the Select an event menu 1 2 All Rights Reserved Copyright 2006 2009 PFU LIMITED ...

Page 157: ...can button When pushing the Scan button Send to 1 9 When pushing the Send to button 5 Select the application with its process excuted by the event For Windows XP click Start this program under Actions and select the application and process from the menu 6 Click OK button HINT The window and operations may vary depending on your OS 1 2 All Rights Reserved Copyright 2006 2009 PFU LIMITED ...

Reviews: