58
•
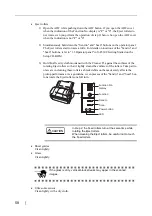
Eject rollers
1) Open the ADF while pushing down the ADF button. If you open the ADF cover
when the indication of the Function No. display is "P" or "0", the Eject rollers do
not rotate even you perform the operation of step 2) below. So open the ADF cover
when the indication is not "P" or "0".
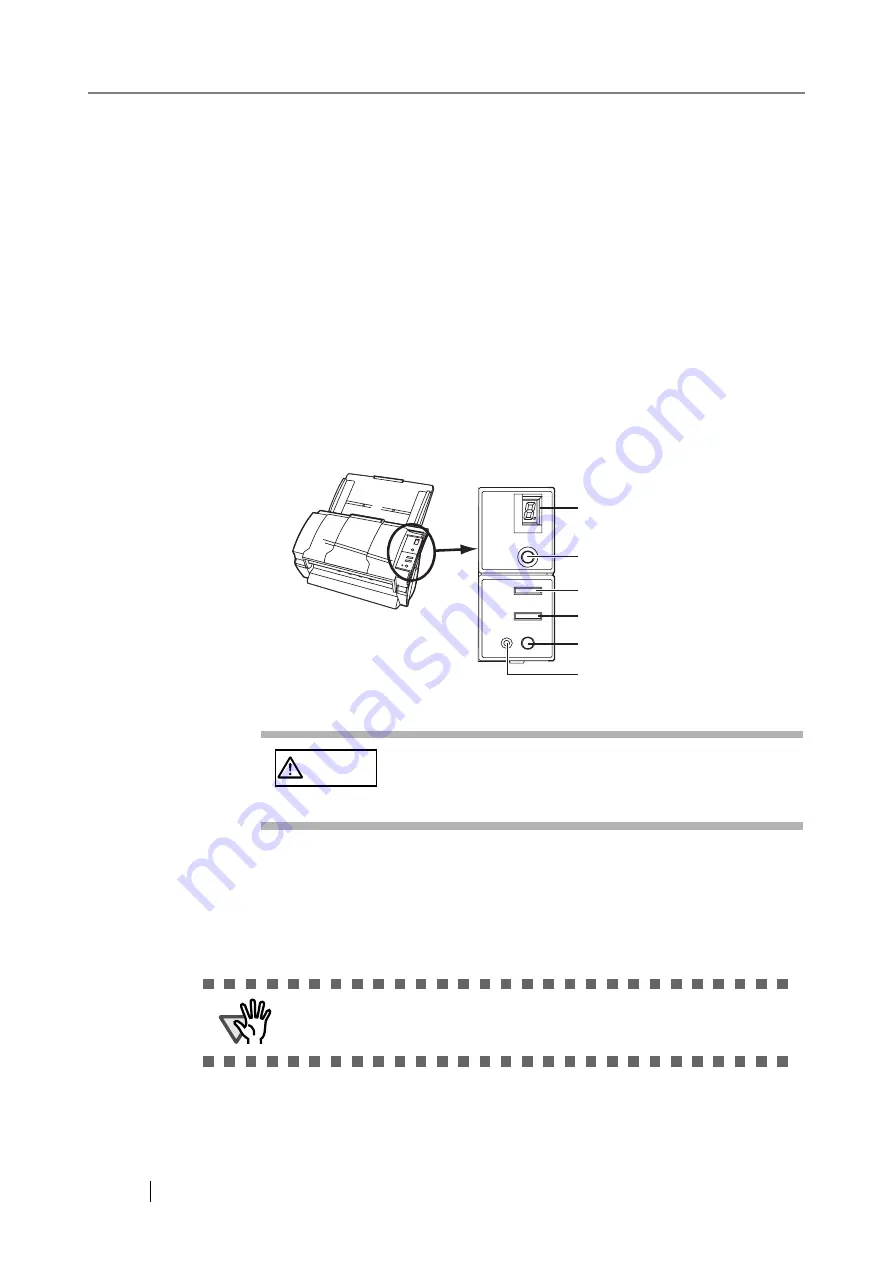
2) Simultaneously hold down the "Send to" and "Scan" buttons on the operator panel.
The Eject rollers start to rotate a little. For details on locations of the "Send to" and
"Scan" buttons, refer to "1.3 Operator panel" in fi-4530C Getting Started on the
Setup CD-ROM.
3) Hold lint-free dry cloth moistened with the Cleaner F1 against the surfaces of the
rotating Eject rollers so that it lightly cleans the surfaces of the rollers. Take partic-
ular care in cleaning these rollers as black debris on them adversely affects the
pickup performance. As a guideline, seven presses of the "Send to" and "Scan" but-
tons rotate the Eject rollers one full turn.
•
Sheet guides
Clean lightly.
•
Glass
Clean lightly.
•
Ultra sonic sensor
Clean lightly with a dry cloth.
CAUTION
In step 2, the Feed rollers turn at the same time while
rotating the Eject rollers.
When cleaning the Eject rollers, be careful not to touch
the Feed rollers.
ATTENTION
If the glass is dirty, vertical black streaks may apper in the scanned
images.
Function No.
display
Function
Send to
Scan
LED
Power button
Summary of Contents for fi-4530C
Page 1: ...Operator s Guide fi 4530C Image Scanner P3PC E577 01EN ...
Page 5: ...iv ...
Page 39: ...24 ...
Page 57: ...42 6 Click OK 7 Enter a file name and click the Save button on the Save PDF File As dialogbox ...
Page 75: ...60 ...
Page 125: ...110 ...
Page 131: ...116 ...
Page 139: ...AP 8 ...
Page 143: ......

