Chapter 5 Servicing the Tape Library
5.3 Removing and Replacing a Tape Drive
FUJITSU Storage ETERNUS LT40 S2/LT60 S2 LTO Library Installing, Starting Up and Maintaining
Copyright 2018 FUJITSU LIMITED
P3AM-5392-07ENZ0
86
5.3
Removing and Replacing a Tape Drive
Tape drives are installed at the back of the library.
When replacing one drive in a two drive configuration, you can power down the drive that you are replacing
without interrupting power to the rest of the library.
■
To remove a tape drive
Procedure
1
Using your Remote Management Unit or the Operator Control Panel, unload the tape
cartridge(s) from the drive to be removed.
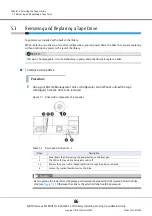
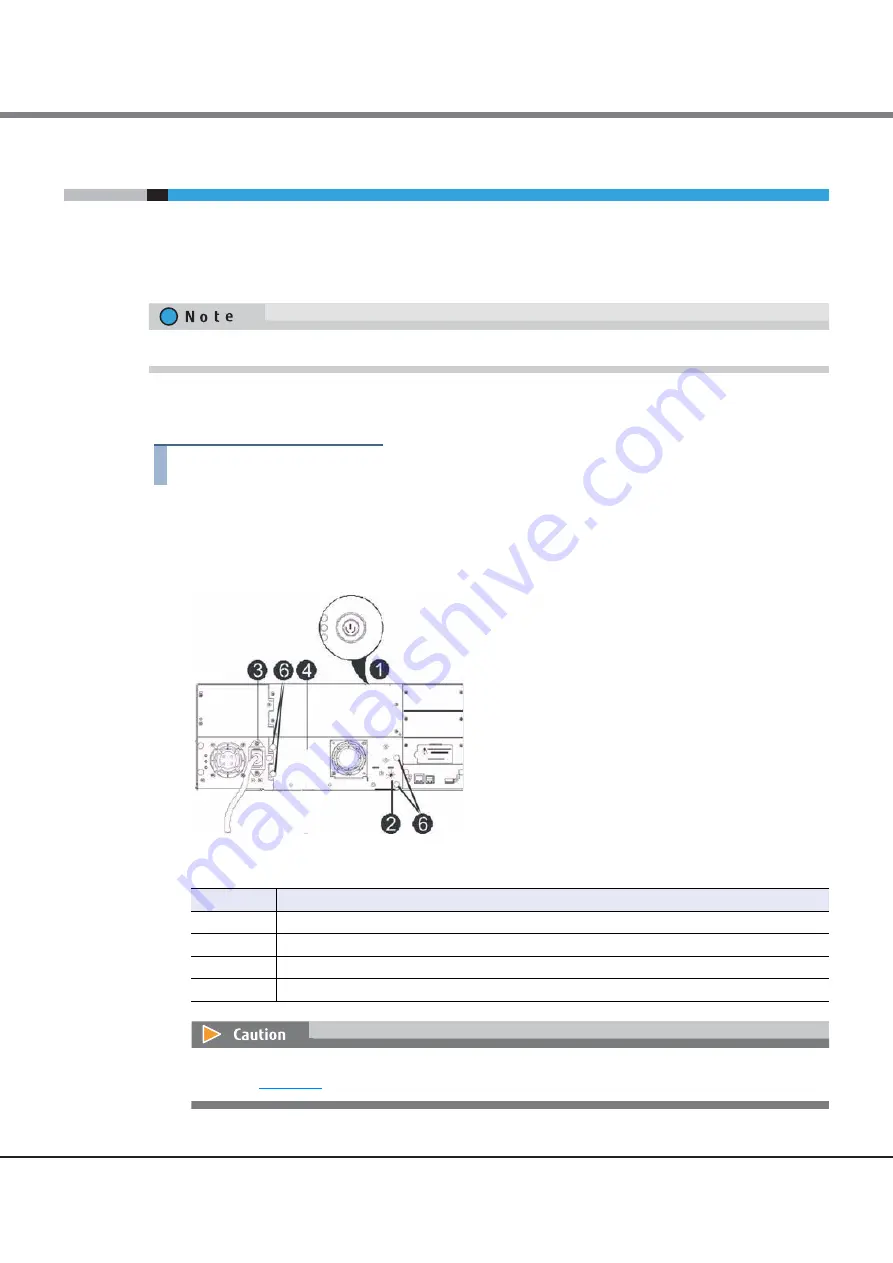
Figure 5.1 Drive sled components of rear panel
Table 5.1 Description for Figure 5.1
This part is hot pluggable. It is not mandatory to power down the library to replace a drive.
Steps
Description
1
Power down the library using the power button on the front pan.
2
The LED on the tape drive being removed is off.
3,4
Remove the power cable, if applicable from the tape drive being removed.
6
Loosen the captive thumbscrews on the drive.
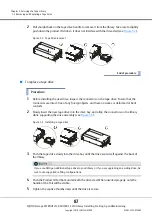
Before pulling the lower drive sled please pull forward the product ID slide located below the drive
sled (see
). Otherwise the slide or the attached label could be damaged.
Summary of Contents for ETERNUS LT40 S2
Page 2: ...This page is intentionally left blank ...
Page 110: ......


