Running the Getting Started Wizard
Initial Configuration, Connecting with the Network
118
U41840-J-Z125-7-76
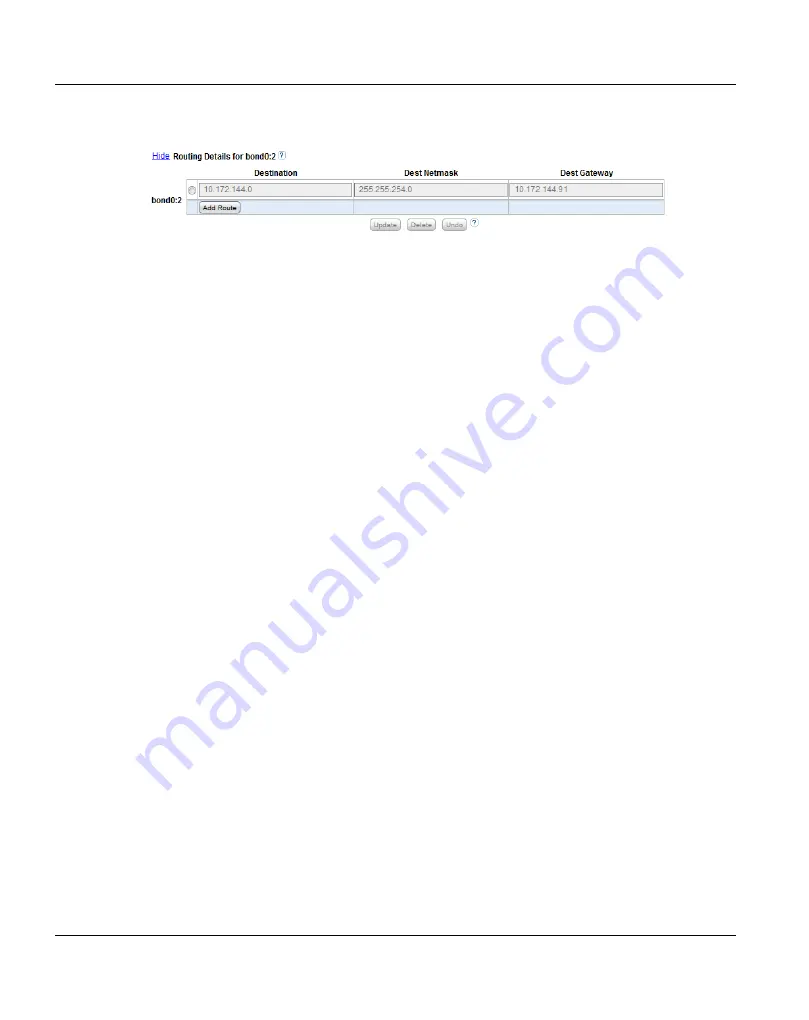
Figure 74: Network Page: Routing Details
1. In the
IP Address Table
(above routing details), select an interface to add or modify
routing data. (To select an interface, click the radio button next to the interface index
name, for example,
bond0:2
.)
After selecting an interface in the
IP Address Table
, the
Routing Details
table below
expands to display available routes (if any).
I
A maximum of 8 routes per interface are allowed.
2. If necessary, click the
Show
link to show the routing details table.
3. Click
Add Route
to add a route to the selected interface.
Or select a route to edit its settings.
4. Enter the following network information as provided by your network administrator:
●
Destination
- The destination network for the route.
●
Dest Netmask
- The network mask for the route.
●
Dest Gateway
- The gateway IP address used for
outgoing
traffic sent from the
interface to a host or client. (This is usually not the same as the default gateway.)
I
In the example shown in
, to reach a host on the 10.50.50.x subnet,
you would enter 10.50.50.0 for destination network, 255.255.255.0 for the
destination netmask, and 10.20.20.1 as the destination gateway.
5. Click
Update
to save the changes you made to the
Routing Details
table. (Clicking
Update
does not yet apply the new network settings to the ETERNUS CS800.)
Click
Delete
to remove IP routing information for the selected interface. Or click
Undo
to revert all current Routing Details changes to the last update.
Applying Network Settings
For network changes to take effect, you must apply the changes, finalize the confirmation,
and reboot the system. To apply all changed settings on the
Network
page to the
ETERNUS CS800, click
Apply
at the bottom of the page. Follow the prompts to confirm the
changes and reboot the system.
Summary of Contents for ETERNUS CS800 S5
Page 1: ...Edition June 2014 English ETERNUS CS800 S5 V2 3 1 User Guide ...
Page 14: ...Contents U41840 J Z125 7 76 ...
Page 30: ...Environmental Protection Important Information 28 U41840 J Z125 7 76 ...
Page 48: ...Network Configuration System Description 46 U41840 J Z125 7 76 ...
Page 80: ...Locating the Serial Number Hardware Description and Basic Operations 78 U41840 J Z125 7 76 ...
Page 116: ...Further Configurations Installing the ETERNUS CS800 S5 Modules 102 U41840 J Z125 7 76 ...
Page 150: ...The Remote Management Console Remote Management 136 U41840 J Z125 7 76 ...
Page 190: ...AIS Connect Configuration Wizards 176 U41840 J Z125 7 76 ...
Page 200: ...Current Activity Overview Home Page 186 U41840 J Z125 7 76 ...
Page 301: ...Configuration System U41840 J Z125 7 76 287 Figure 177 Network Configuration ...
Page 353: ...Configuration Contacts U41840 J Z125 7 76 339 Figure 211 Primary and Secondary Pages ...
Page 402: ...Reports Replication 388 U41840 J Z125 7 76 ...
Page 406: ...Hardware Status 392 U41840 J Z125 7 76 Figure 236 System Board Page ...
Page 432: ...Activity Log Status 418 U41840 J Z125 7 76 ...
Page 442: ...Service Tickets Alerts 428 U41840 J Z125 7 76 ...
Page 462: ...Reboot Shutdown Utilities 448 U41840 J Z125 7 76 ...
Page 470: ...Common Problems and Solutions Troubleshooting 456 U41840 J Z125 7 76 ...
Page 496: ...Additional Specifications for Scale Mode System Specifications S5 626 U41840 J Z125 7 76 ...
Page 634: ...Index 634 U41840 J Z125 7 76 ...


