background image

4

Installing the App

Please install the instax SQUARE Link app on your smartphone 
before using the printer.

•  If you are using an Android OS smartphone, please search for 

the instax SQUARE Link app in the Google Play Store and install 
it.

*Requirements for Android OS smartphones: Android Ver. 7.0 

or higher with Google Play Store installed

•  If you are using an iOS smartphone, please search for the 

instax SQUARE Link app in the App Store and install it.

*Requirements for iOS smartphones: iOS Ver. 12.0 or higher

•  Even if you have downloaded the app and your smartphone 

meets the above requirements, you may not be able to use the 
instax SQUARE Link app. This is dependent upon your 
smartphone model. 

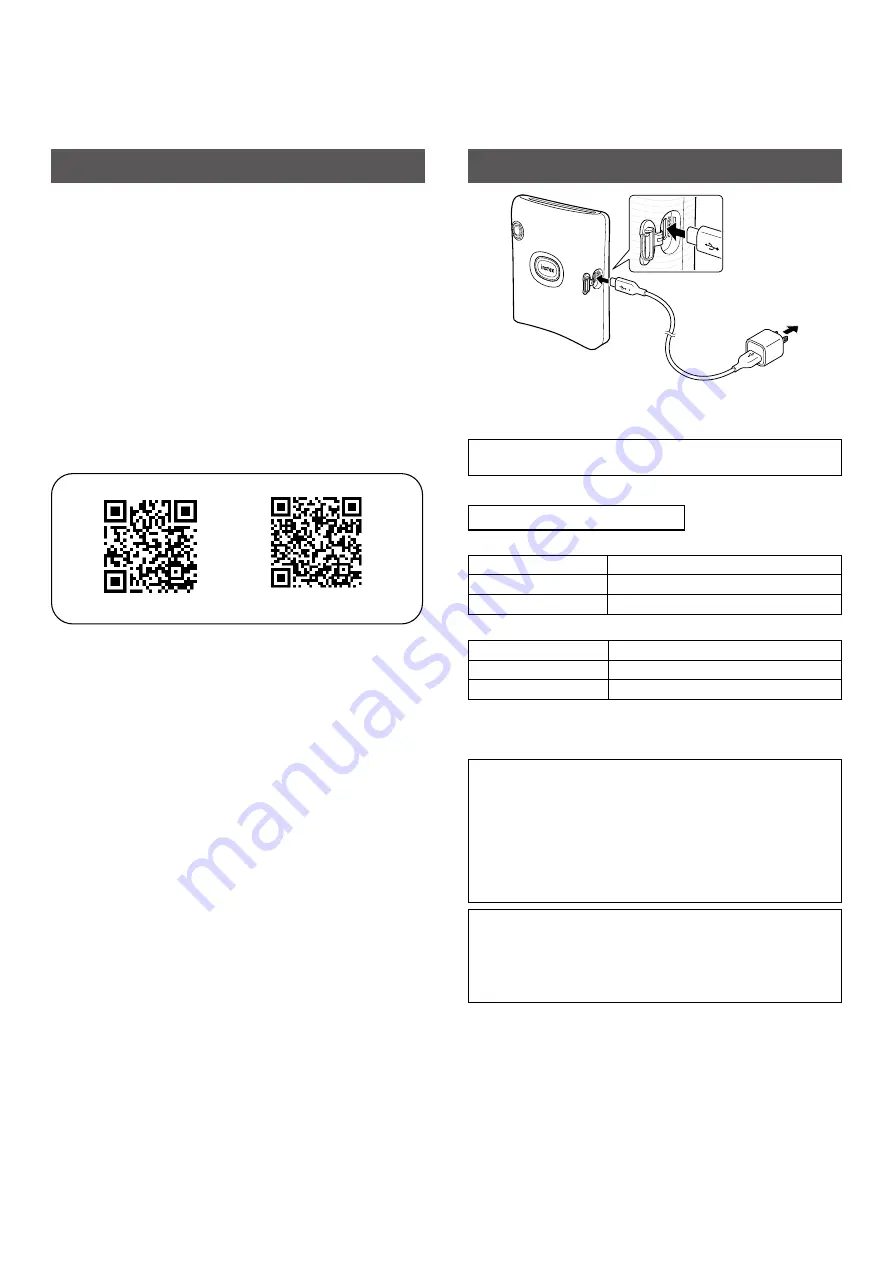
Access the instax SQUARE Link app download site for the latest 
information on system requirements�

Android OS

iOS

Scan to download the instax SQUARE Link Smartphone App

The text QR Code itself is a registered trademark and wordmark of 
Denso Wave Incorporated.

Charging the Battery

Connect the printer using the supplied USB Type-C cable to a USB 
AC adapter (supplied with your smartphone) then connect the 
USB AC adapter to an indoor power supply.

•  You can print an image while charging is in progress.
•  Charging time is approximately 80 to 120 minutes.

LED charging status indicator

When the printer is turned on:

Indicator

Charging status

LED lights up white

Not charging or charging is complete

LED flashes white

Charging

When the printer is turned off:

Indicator

Charging status

LED is turned off

Not charging or charging is complete

LED flashes green

Charging

Check the charging status with your smartphone when connected 
to the app.

Charging from a PC:

•  Connect the printer and PC directly. Do not connect via a USB 

hub or keyboard.

•  If the PC goes into sleep mode while charging, charging is 

paused. To continue charging, exit sleep mode and then 
reconnect the USB Type-C cable.

•  The battery may not be able to charge depending on the 

specifications, settings or conditions of the PC.

Notes

•  The battery is not fully charged at the factory, be sure to 

charge the battery before using the printer.

•  The battery cannot be removed.
•  For notes about the battery, see “Simple printer care”. (p.13)

Summary of Contents for instax square Link

Page 1: ...User s Guide Full version WW_EN model number FI017W FI017 EN WW 01...

Page 2: ...Indicator 6 Connecting and Printing 6 When connecting to the printer for the first time 6 When the Printer and Smartphone are Already Connected 9 Reprinting an Image 10 Taking a Photo with the App 11...

Page 3: ...iate collection point for the recycling of electrical and electronic equipment By ensuring this product is disposed of correctly you will help prevent potential negative consequences to the environmen...

Page 4: ...e printer using the supplied USB Type C cable to a USB AC adapter supplied with your smartphone then connect the USB AC adapter to an indoor power supply You can print an image while charging is in pr...

Page 5: ...heets Do not remove the film pack from its inner foil packaging until you are ready to load the film into the printer The film cover is ejected automatically when the film door is closed For details r...

Page 6: ...s even after charging there may be a malfunction In such cases contact a FUJIFILM authorized dealer LED continues flashing yellow Print error occurred If this phenomenon frequently occurs there may be...

Page 7: ...7 3 Setup the app as indicated below 4 Read the terms of use then put a checkmark in the Agree box and tap Agree 5 Quick instructions are displayed Read the instructions and tap Let s Play...

Page 8: ...s Zooms in out and can rotate images Applies a filter to images Adjusts the brightness of images 6 Tap Set Bluetooth connection can also be set in the process of printing 7 When a printer is detected...

Page 9: ...er of prints remaining in the app When the Printer and Smartphone are Already Connected 1 Press and hold the Power button for approximately 1 second to turn the printer on The LED lights up 2 Open the...

Page 10: ...stops making a sound hold the edge of the film and remove from the printer You can view the number of prints remaining in the app Reprinting an Image The last image printed can be reprinted by pressin...

Page 11: ...ilms 10 films pack Image size 62 mm 62 mm Exposure pixel count 800 800 dots Exposure resolution 12 5 dots mm 318 dpi 80 m dot pitch Exposure gradation RGB gradation of 256 colors Interface Bluetooth V...

Page 12: ...ge contact your FUJIFILM dealer or support center The printer does not function normally There may be a temporary malfunction Please press the reset button If the printer still does not function norma...

Page 13: ...y Assessed Simple printer care Handling the printer and battery CAUTION Do not expose to excessive heat such as sunshine fire or the like This can result in an explosion or the leakage of flammable li...

Page 14: ...to the aircraft as carry on luggage Check with each airport for more information 7 Avoid strong light and keep the developed prints in a cool and dry place 8 Do not puncture or cut the film as it cont...

Page 15: ...to magnetic fields static electricity or radio interference that may prevent reception of wireless signals Mutual interference may occur when the transmitter is used in the vicinity of other wireless...

Reviews: