24
2 Network Settings
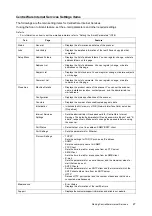
7.
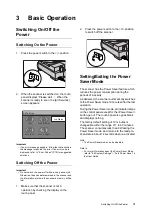
Select the method of obtaining an IP
address, and select [Save].
In this example, we will select [Manual].
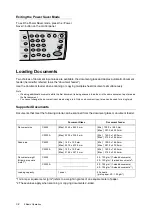
The [Protocol Settings] screen appears.
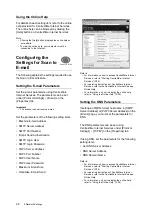
8.
Select [3. IP Address], and select [Change].
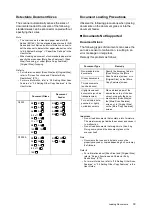
9.
Enter the IP address using the numeric
keypad. The IP address must be in a format
of xxx.xxx.xxx.xxx (where xxx is a number
between 0 to 255).
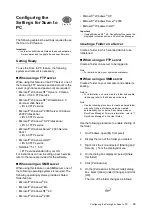
10. Select [Save].
11. As necessary, repeat the preceding steps to
set a subnet mask and gateway.
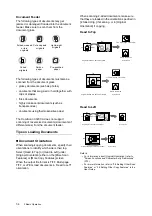
12. Select [Close] repeatedly until you return to
the [System Settings] screen.
Starting CentreWare
Internet Services
CentreWare Internet Services is a service that
allows you monitor or remotely configure the
scanner using a web browser on a TCP/IP
network.
Before using the Scan to E-mail or Scan to PC
feature on the scanner, configure the following
settings using CentreWare Internet Services.
To use Scan to E-mail:
• Set the e-mail parameters.
• Set the DNS parameters.
Refer to
• "Setting the E-mail Parameters" (P.28)
• "Setting the DNS Parameters" (P.28)
To use Scan to PC:
• Set the DNS parameters.
• Set the WINS parameters.
Refer to
• "Setting the DNS Parameters" (P.28)
• "Setting the WINS Parameters" (P.30)
Note
• Set the DNS and WINS parameters as necessary.
Getting Ready
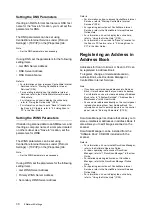
Check the control panel to see if CentreWare
Internet Services is acivated.
1.
Select [Network Settings].
2. Get IP Address
Cancel
Save
DHCP
BOOTP
RARP
DHCP/Autonet
Manual
Protocol Settings
Close
1.
2.
3.
Ethernet Setting
IGet IP Address
IP Address
Auto
Manual
0.0.0.0
4.
Subnet Mask
0.0.0.0
0.0.0.0
5.
Gateway
1/1
Change
Items
Current Settings
192 . 168 . 1 . 100
3. IP Address
Cancel
Save
System Settings
Close
Network Settings
Common Settings
Scan Settings
Copy Settings
System Admin.
Settings


