
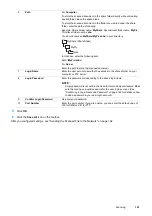

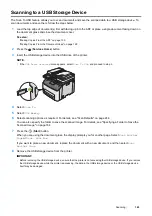

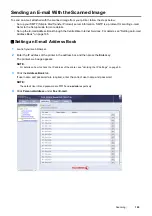


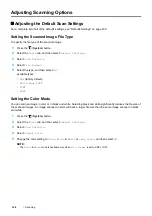


174
Faxing
Configuring Fax Initial Settings
NOTE:
•
The following settings can be configured also using
Fax Setup
on the
FX Printer Installation
screen which is launched from
the
Software Pack CD-ROM
.
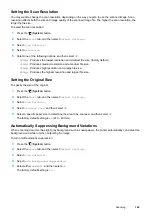
Setting Your Region
You need to set the region where your printer is used for using the fax service on the printer.
1
Press the
(
System
) button.
2
Select the
Tools
tab, and then select
Admin Settings
.
3
Select
Fax Settings
.
4
Select
Fax Line Settings
.
5
Select
Region
.
6
Select the region where the printer is used, and then select
OK
.
7
Select
Yes, Save
.
The printer restarts automatically to apply the settings.
NOTE:
•
When you configure the region setting, the information, which is registered to the device, is initialized.
Setting the Printer ID
You may be required to indicate your fax number on any fax you send. The printer ID, containing your telephone
number and name or company name, will be printed at the top of each page sent from your printer.
1
Press the
(
System
) button.
2
Select the
Tools
tab, and then select
Admin Settings
.
3
Select
Fax Settings
.
4
Select
Fax Line Settings
.
5
Select
Fax Number
.
6
Enter your fax number using the number pad.
NOTE:
•
If you make a mistake while entering numbers, press the
C
(
Clear
) button to delete the last digit.
7
Select
OK
when the number on the display is correct.
8
Select
Company Name
.
9
Enter your name or company name using the keyboard.
10
Select
OK
when the name on the display is correct.
To return to the top level of the System menu, press the (
Clear All
) button.
Summary of Contents for DocuPrint CM225FW
Page 1: ...DocuPrint CM225 fw User Guide ...
Page 10: ...10 Contents Technical Support 338 Online Services 339 Index 340 ...
Page 260: ...260 Digital Certificates 11 Digital Certificates Using Digital Certificates on page 261 ...
Page 272: ...272 Troubleshooting 4 Lower the levers to their original position 5 Close the rear cover ...