356
7 Maintenance
7.12
Adjusting the Paper Regi
The following explains how to adjust the print position vertically (Lead Regi) or horizontally (Side
Regi) from the control panel when the position is out of alignment.
You can set the value between -2.0 mm to +2.0 mm, with 0.5mm increments.
Note
• The chart for Paper Regi adjustment is printed based on the loaded paper on the specified tray.
• When printing the chart for Paper Regi adjustment in Tray 5 (Bypass tray) that is not set for Auto tray selection,
load the A4
paper to Tray 5.
• Vertical adjustment (Lead Regi) can be set per tray, however, all the values are the same.
The following explains the case where adjusting the face side (1 sided) using Tray 2.
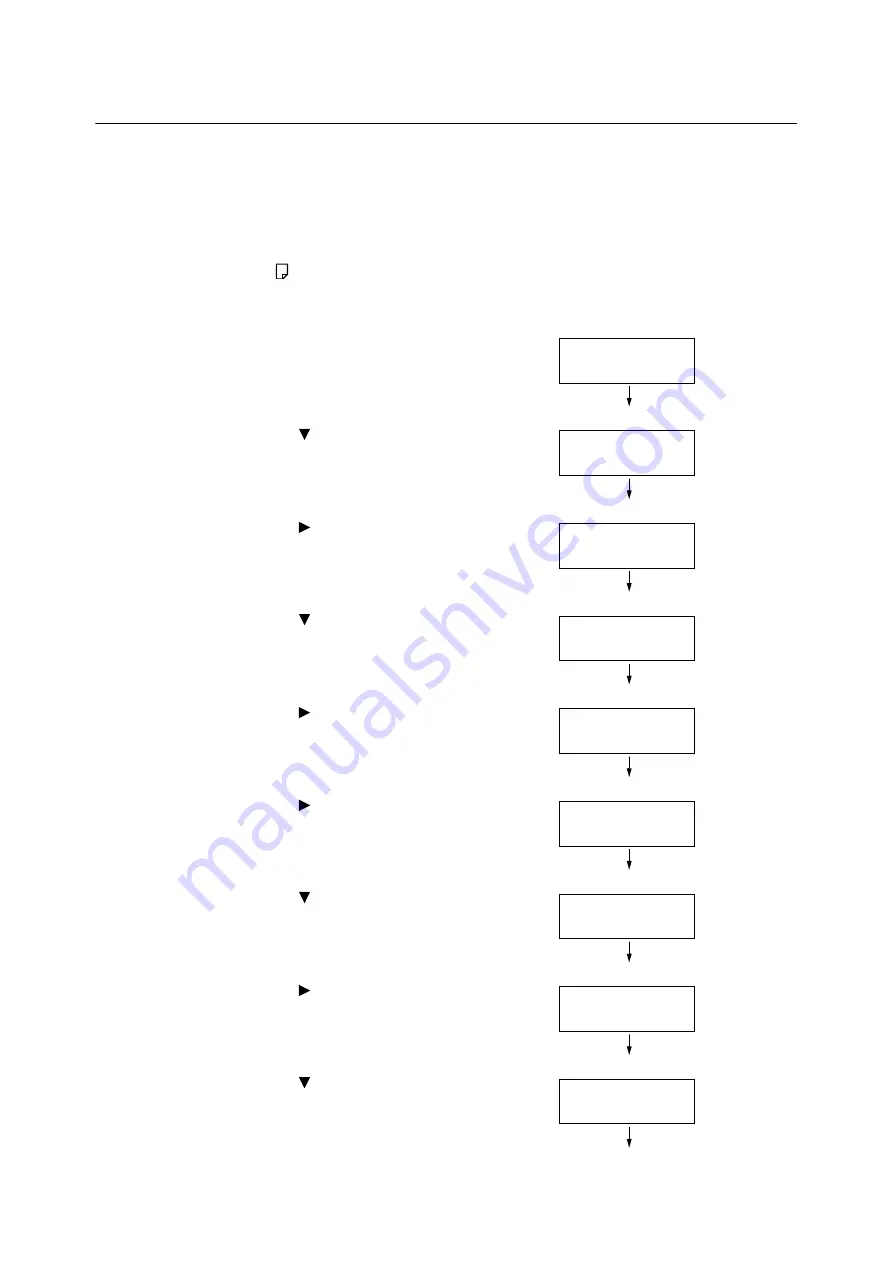
1.
Press the <Settings> button on the control
panel to display the menu screen.
2.
Press the <
> button until [Admin Menu] is
displayed.
3.
Press the <
> or <OK> button to select.
[Network/Port] is displayed.
4.
Press the <
> button until [Image Quality] is
displayed.
5.
Press the <
> or <OK> button to select.
[Adjust Paper Regi] is displayed.
6.
Press the <
> or <OK> button to select. [Tray
1] is displayed.
7.
Press the <
> button until [Tray 2] is
displayed.
8.
Press the <
> or <OK> button to select.
[
Adjust Side 1
] is displayed.
9.
Press the <
> button until [PrintChart-
1Sided] is displayed.
Settings
Print Reports
Settings
Admin Menu
Admin Menu
Network/Port
Admin Menu
Image Quality
Image Quality
Adjust Paper Regi
Adjust Paper Regi
Tray 1
Adjust Paper Regi
Tray 2
Tray 2
Adjust Side 1
Tray 2
PrintChart-1Sided
Summary of Contents for DocuPrint 5105 d
Page 1: ...DocuPrint 5105 d User Guide...
Page 75: ...3 3 Printing on Custom Size Paper 75 2 Click the Device Settings tab 3 Click Custom Paper Size...
Page 78: ...78 3 Printing 6 Click Print on the Print dialog box to start printing...
Page 94: ...94 3 Printing 8 Press the Print Menu button to return to the Ready to print screen...
Page 418: ...418 Control Panel Menu Tree...


