User Guide
76
3.6.2
Loading a Document on the Document Glass
Automatically Detected Document Sizes
The document size is detected automatically when [Original Size] is set to [Auto].
The following document sizes can be detected automatically: A3, B4, A4
, A4, B5
, B5, A5, 11 x 17", 8.5 x
11"
, 8K, 16K
, and 16K.
You can specify the document sizes to be automatically detected on [Device] > [General] > [Original Size
Detected]. For details, see "[Original Size Detected] (P.237)."
Supported Document Sizes
You can select one of the following document sizes except [Auto] from [Original Size]: A3, B4, A4
, A4, B5
,
B5, A5, 11 x 17", 8.5 x 14", 8.5 x 13", 8.5 x 11"
, 8.5 x 11", 8K, 16K
, and 16K.
CAUTION
• Do not apply excessive force to hold thick document on the document glass. It may break the glass and cause
injuries.
Note
• When [Original Size] is set to [Auto], an error screen appears when you place a non-standard size document on the
document glass. In this case, select a document size manually instead of selecting [Auto]. Depending on the selected
document size, the printout may be too large for the paper or may have shadows at the edges.
• Make sure that a document is not loaded in the Duplex Automatic Document Feeder (DADF). The document loaded in
the Duplex Automatic Document Feeder (DADF) is given priority over the document on the document glass.
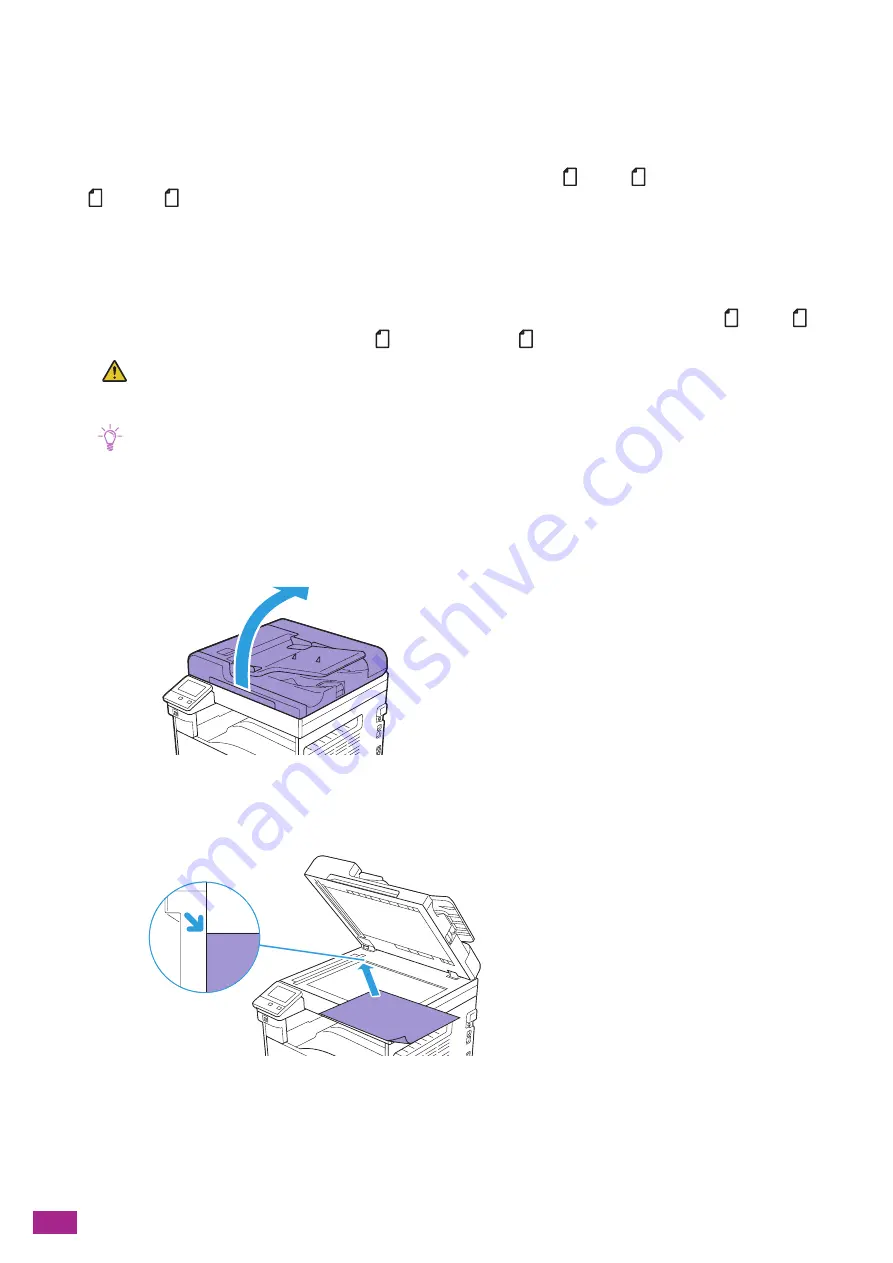
1.
Open the document glass cover.
2.
Place a document facing down on the document glass and align it to the top left corner of the
document glass.
3.
Close the document glass cover.
Summary of Contents for DocuCentre SC2022
Page 1: ...DocuCentre SC2022 User Guide...
Page 100: ...User Guide 100 5 Copying 5 1 Making a Copy 101 5 2 Making ID Card Copies 110...
Page 156: ...User Guide 156 2 Click Devices 3 Click Printers scanners Add a printer or scanner...
Page 227: ...10 Changing the Machine Settings 227 10 2 Language You can select the display language...
Page 289: ...11 Making Better Use of Your Machine 289 7 For Fax Tap Send For Scan to Email Tap OK Send...
Page 328: ...User Guide 328 4 Click Permissions on the left pane of the screen 5 Click Add...
Page 353: ...12 Maintenance 353 9 Turn the lock lever clockwise 10 Close the front cover...
Page 362: ...User Guide 362 2 Tap Device 3 Tap Information Pages Printer Meter...


