


Fax
260
Fax
4
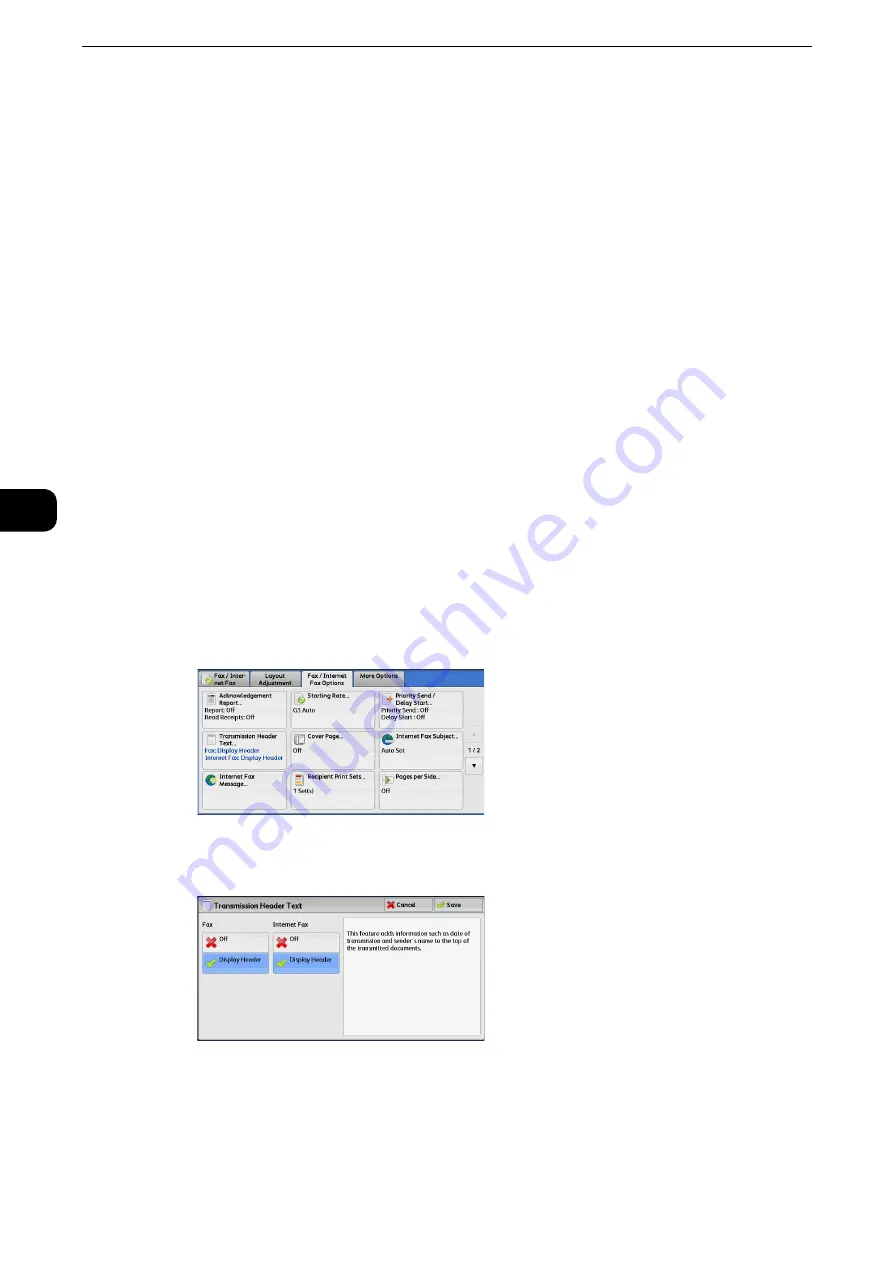
Transmission Header Text (Adding Sender Name and Phone Number to
Faxes)
The Transmission Header Text feature adds the start time, sender name, recipient name,
G3 ID, and number of pages onto the transmitted document.
This feature enables the recipient to confirm when and from whom the fax was sent.
Important
z
Header information is printed at the top of the document, so an area of about 3 to 5 mm may not be printed
at the top of each page at the remote machine.
Note
z
If the document is resent, "Resend" is printed at the left of the date and time indication.
z
If this feature is enabled for Broadcast Send, header information is attached to faxes for all the recipients.
z
The start time is printed in the format set on the machine (12 or 24 hour clock). For information on how to set
the time, refer to "Tools" > "Common Service Settings" > "Machine Clock/Timers" in the Administrator Guide.
z
The recipient name is only added if it has been registered in the address number.
z
If you specify the line to send a fax, the sender name registered for the selected line is printed. If you do not
specify a line, the sender name (company logo) of the machine is printed, but not the sender name of the
line.
Reference
z
For information on the sender name and G3 ID, refer to "Tools" > "Fax Service Settings" > "Local Terminal Information" in the
Administrator Guide.
z
You can change the default value of [Transmission Header Text] in the System Administration mode. For
information on how to change the default value, refer to "Tools" > "Fax Service Settings" > "Fax Defaults" >
"Transmission Header Text" in the Administrator Guide.
1
Select [Transmission Header Text].
2
Select [Display Header].
Off
No header information is attached.
Display Header
Header information is attached.
Summary of Contents for ApeosPort-VI C2271
Page 12: ...12...
Page 13: ...1 1Before Using the Machine...
Page 36: ...Before Using the Machine 36 Before Using the Machine 1...
Page 37: ...2 2Product Overview...
Page 54: ...Product Overview 54 Product Overview 2 3 Click OK...
Page 79: ...3 3Copy...
Page 185: ...4 4Fax...
Page 300: ...Fax 300 Fax 4...
Page 301: ...5 5Scan...
Page 413: ...6 6Send from Folder...
Page 434: ...Send from Folder 434 Send from Folder 6...
Page 435: ...7 7Job Flow Sheets...
Page 442: ...Job Flow Sheets 442 Job Flow Sheets 7...
Page 443: ...8 8Stored Programming...
Page 454: ...Stored Programming 454 Stored Programming 8...
Page 455: ...9 9Web Applications...
Page 458: ...Web Applications 458 Web Applications 9 Close Menu Hides the pop up menu...
Page 460: ...Web Applications 460 Web Applications 9...
Page 461: ...10 10Media Print Text and Photos...
Page 478: ...Media Print Text and Photos 478 Media Print Text and Photos 10...
Page 479: ...11 11Job Status...
Page 484: ...Job Status 484 Job Status 11 Print this Job Report Prints the Job Report...
Page 513: ...12 12Computer Operations...
Page 540: ...Computer Operations 540 Computer Operations 12...
Page 541: ...13 13Appendix...


