5 Tools
154
To
ols
5
z
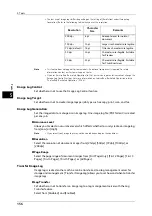
Print E-mail
z
Report
Note
•
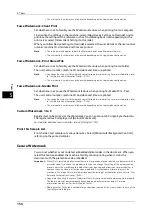
You can associate a layout template with Client Print when a print job is sent from a computer.
•
You can associate a layout template with Print Stored File when printing a file in a folder.
Delete Layout Template
Deletes a layout template.
Important •
The provided layout templates, Preset 1 to Preset 4, cannot be deleted.
Create Text String
Register text strings for the Force Annotation feature. You can register up to eight types of
strings in [Create Text String 1] to [Create Text String 8]. You can enter up to 64 single-byte
characters.
Important •
The available text for the provided layout templates, Preset 1 to Preset 4, is the text strings
registered in [Create Text String 1].
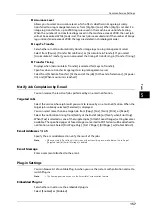
Print Universal Unique ID (ApeosPort Series Models Only)
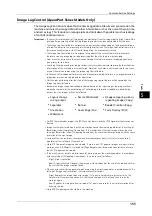
You can print UUIDs (Universal Unique IDs) for each print job to identify each job.
The printed UUIDs can be used as a search key to retrieve print job logs using an application,
such as ApeosWare Log Management (sold separately) or ApeosWare Accounting Service
(sold separately). Retrieving the image log with the UUID enables you to verify "when", "by
whom", and "with what service" the document was processed. This prevents leakage of
confidential information.
Note
•
You can authorize a user to temporarily cancel force watermark printing. For more information, refer
to "User Roles and Authorization Groups" (P.384).
•
If a layout template is specified in [Apply Layout Template to Copy/Print Jobs] under [Force
Annotation], UUIDs are overlapped with the text on the layout template.
For details on image logs, refer to "Image Log Control (ApeosPort Series Models Only)" (P.155).
For details on Force Annotation, refer to "Force Annotation" (P.153).
Print Universal Unique ID
Select whether or not to print Universal Unique IDs.
Important •
If [Print Universal Unique ID] is set to [Yes], you cannot select [Auto Detect] for [Tray 5].
Print Position
Select a print position from six positions: [Top Left], [Bottom Left], [Top Center], [Bottom
Center], [Top Right], or [Bottom Right].
Print Position Adjustment
Adjust print positions vertically and horizontally from 0 to 100 mm and from 0 to 200 mm
respectively, in 0.5 mm increments.
Note
•
0 mm is at the edge of paper. Increasing the value moves the print position toward the center of the
paper. However, for [Top Center] or [Bottom Center], the horizontal value for the center of paper is
set to 100 mm. Therefore, when you select [Top Center] or [Bottom Center], set the value to 100 mm
and then specify desired value.
Print Position (Side 2)
Select the position to print the UUID on Side 2 from [Same as Side 1] or [Mirror Side 1] when
making 2 sided copies.
Summary of Contents for ApeosPort-V 6080
Page 1: ...ApeosPort V 7080 ApeosPort V 6080 DocuCentre V 7080 DocuCentre V 6080 Administrator Guide ...
Page 13: ...13 Activity Report 727 EP System 731 Glossary 732 Index 735 ...
Page 14: ...14 ...
Page 62: ...2 Paper and Other Media 62 Paper and Other Media 2 ...
Page 88: ...3 Maintenance 88 Maintenance 3 ...
Page 110: ...4 Machine Status 110 Machine Status 4 ...
Page 296: ...5 Tools 296 Tools 5 ...
Page 346: ...9 Scanner Environment Settings 346 Scanner Environment Settings 9 ...
Page 354: ...10 Using IP Fax SIP 354 Using IP Fax SIP 10 ...
Page 366: ...12 Using the Server Fax Service 366 Using the Server Fax Service 12 ...
Page 382: ...13 Encryption and Digital Signature Settings 382 Encryption and Digital Signature Settings 13 ...
Page 734: ...16 Appendix 734 Appendix 16 ...
Page 744: ...Index 744 Index ...

