background image

2-22

• 

Before installing an RS-485 Communications Card, turn off the power, wait more than five 
minutes, and make sure, using a circuit tester or a similar instrument, that the DC link bus 
voltage between the terminals P (+) and N (-) has dropped below a safe voltage (+25 
VDC)

.

• 

Do not remove the terminal cover for the control circuits while power is applied, because 
a high voltage exists on the RS-485 Communications Card. 

Failure to observe these precautions could cause electric shock.  

• 

In general, sheaths and covers of the control signal cables and wires are not specifically 
designed to withstand a high electric field (i.e., reinforced insulation is not applied). 
Therefore, if a control signal cable or wire comes into direct contact with a live conductor 
of the main circuit, the insulation of the sheath or the cover might break down, which 
would expose the signal wire to a high voltage of the main circuit. Make sure that the 
control signal cables and wires will not come into contact with live conductors of the main 
circuit. 

Failure to observe these precautions could cause electric shock and/or an acci-
dent. 

2.3.10  Replacing the control circuit terminal block (TB) cover 

Upon completion of the wiring of the control circuits, fit the latches provided on the upper end of the 
control circuit TB cover into the openings in the front face of the inverter, and then close the TB cover 
as shown in Figure 2.21. 

Note:

 Take care not to pinch the control signal wires between the TB cover and inverter body. 

(*When connecting an extension cable for remote operation or an off-the-shelf LAN cable, snip off the barrier 
of the RS-485 communications cable port using nippers.) 

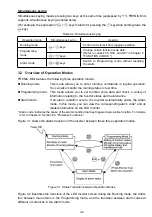
Figure 2.21  Putting Back the Control Circuit Terminal Block (TB) Cover

Summary of Contents for Frenic Mini FRN001C1E-2U

Page 1: ...correct use Improper handling might result in incorrect operation a short life or even a failure of this product as well as the motor Deliver this manual to the end user of this product Keep this manual in a safe place until this product is discarded For how to use an optional device refer to the instruction and installation manuals for that optional device Fuji Electric FA Components Systems Co L...

Page 2: ...e reproduced or copied without prior written permission from Fuji Electric FA Components Systems Co Ltd All products and company names mentioned in this manual are trademarks or registered trademarks of their respective holders The information contained herein is subject to change without prior notice for improvement ...

Page 3: ...hrough this instruction manual and be familiar with proper handling and operation of this product Improper handling might result in incorrect operation a short life or even a failure of this product as well as the motor Have this manual delivered to the end user of this product Keep this manual in a safe place until this product is discarded ...

Page 4: ...r substantial property damage Failure to heed the information contained under the CAUTION title can also result in serious con sequences These safety precautions are of utmost importance and must be observed at all times Application FRENIC Mini is designed to drive a three phase induction motor Do not use it for sin gle phase motors or for other purposes Fire or an accident could occur FRENIC Mini...

Page 5: ...r the single phase 115 V class series of inverters be sure to connect an optional DC reactor DCR Otherwise fire could occur Do not use one multicore cable in order to connect several inverters with motors Do not connect a surge killer to the inverter s output secondary circuit Doing so could cause fire Be sure to connect the grounding wires without fail Otherwise electric shock or fire could occur...

Page 6: ...perate switches with wet hands Doing so could cause electric shock If the retry function has been selected the inverter may automatically restart and drive the motor depending on the cause of tripping Design the machinery or equipment so that human safety is ensured after restarting If the stall prevention function current limiter automatic deceleration and overload prevention control have been se...

Page 7: ...the inverter to high speeds is easy Before changing the frequency speed setting check the specifications of the motor and machinery The brake function of the inverter does not provide mechanical holding means Injuries could occur Wiring length for EMC filter built in type When the wiring length between the inverter and motor exceeds 33ft 10 m the filter circuit may be overheated and damaged due to...

Page 8: ...wait for at least five minutes before starting inspection Further check that the LED monitor is unlit and check the DC link bus voltage between the P and N terminals to be lower than 25 VDC Otherwise electric shock could occur Maintenance inspection and parts replacement should be made only by qualified per sons Take off the watch rings and other metallic matter before starting work Use insulated ...

Page 9: ...the electric equipment using an isolation transformer 4 The inverter should be used in an environment that does not exceed Pollution Degree 2 requirements If the environment conforms to Pollution Degree 3 or 4 install the inverter in an enclosure of IP54 or higher 5 Install the inverter AC or DC reactor input or output filter in an enclosure with minimum degree of protection of IP2X Top surface of...

Page 10: ... the effective input current calculated under the condition that the power supply capacity and impedance are 500 kVA and 5 respectively Recommended wire size mm2 1 Rated current A of MCCB or RCD GFCI 2 Main circuit power input L1 R L2 S L3 T L1 L L2 N Grounding G Power supply voltage Appli cable motor rating HP Inverter type w DCR 3 w o DCR w DCR 3 w o DCR 2 Inverter output U V W 2 DCR P1 P Brakin...

Page 11: ...Certified closed loop ter minal connector sized for the wire gauge involved Connector must be fixed using the crimp tool specified by the connector manufacturer Short circuit rating Suitable for use on a circuit capable of delivering not more than B rms symmetrical amperes A volts maximum Notes 1 A box in the above table replaces S or E depending on the enclosure Power supply voltage Inverter type...

Page 12: ...Main terminal 1 TERM1 2 TERM2 1 TERM2 2 Class J fuse current A Circuit Breaker Trip Size㧔A㧕 FRNF12C1 2U 3 5 FRNF25C1 2U 6 5 FRNF50C1 2U 10 5 FRN001C1 2U 10 6 1 2 15 10 FRN002C1 2U 20 15 FRN003C1 2U 14 2 0 30 20 Three phase 230V FRN005C1 2U 15 9 1 8 3 5 0 4 1 8 0 2 10 5 5 20 0 5 40 30 FRNF50C1 4U 3 5 FRN001C1 4U 6 5 FRN002C1 4U 10 10 FRN003C1 4U 15 15 Three phase 460V FRN005C1 4U 15 9 1 8 3 5 0 4 1...

Page 13: ...skip the resonance frequency zone s In running general purpose motors Noise When an inverter is used with a general purpose motor the motor noise level is higher than that with a commercial power supply To reduce noise raise carrier frequency of the in verter Operation at 60 Hz or higher can also result in higher noise level High speed mo tors If the reference frequency is set to 120 Hz or more to...

Page 14: ... input primary circuit of the inverter to protect the wiring Ensure that the circuit breaker capacity is equivalent to or lower than the recommended capacity Installing an MC in the secondary circuit If a magnetic contactor MC is mounted in the inverter s secondary circuit for switching the motor to commercial power or for any other purpose ensure that both the inverter and the motor are completel...

Page 15: ...erheat or trip as a result of overcurrent high frequency current flowing into the stray capacitance in the wires connected to the phases Ensure that the wiring is shorter than 164ft 50m If this length must be exceeded lower the carrier frequency or mount an output circuit filter OFL Wiring size Select wires with a sufficient capacity by referring to the current value or recommended wire size Wirin...

Page 16: ...ion codes to be used often and irregular ones are described individually Chapter 6 TROUBLESHOOTING This chapter describes troubleshooting procedures to be followed when the inverter malfunctions or detects an alarm condition In this chapter first check whether any alarm code is displayed or not and then proceed to the troubleshooting items Chapter 7 MAINTENANCE AND INSPECTION This chapter describe...

Page 17: ...n result in the inverter not operating to full efficiency as well as information concerning incorrect operations and settings which can result in accidents This icon indicates information that can prove handy when performing certain settings or operations This icon indicates a reference to more detailed information ...

Page 18: ...ding alarm information Alarm Information 3 29 3 2 3 Alarm mode 3 32 Chapter 4 RUNNING THE MOTOR 4 1 4 1 Running the Motor for a Test 4 1 4 1 1 Inspection and preparation prior to the operation 4 1 4 1 2 Turning on power and checking 4 1 4 1 3 Preparation before running the motor for a test Setting function code data 4 2 4 1 4 Test run 4 3 4 2 Operation 4 3 Chapter 5 FUNCTION CODES 5 1 5 1 Function...

Page 19: ...1 3 1 General 11 2 11 3 2 Recommended installation procedure 11 2 11 3 3 Leakage current of EMC filter built in type inverter and outboard EMC complaint filter 11 5 11 4 Harmonic Component Regulation in the EU 11 7 11 4 1 General comments 11 7 11 4 2 Compliance with the harmonic component regulation 11 8 11 5 Compliance with the Low Voltage Directive in the EU 11 8 11 5 1 General 11 8 11 5 2 Point...

Page 20: ... following page a Main Nameplate b Sub Nameplate Figure 1 1 Nameplates TYPE Type of inverter SOURCE Number of input phases three phase 3PH single phase 1PH input voltage input frequency input current OUTPUT Number of output phases rated output capacity rated output voltage output frequency range rated output current overload capacity SER No Product number 7 1 A 1 2 3 A 0 0 0 1 Z Serial number of p...

Page 21: ...at the front and rear sides with both hands Do not hold covers or individual parts only You may drop the inverter or break it Avoid applying excessively strong force to the terminal block covers as they are made of plastic and are easily broken Barrier for the RS 485 communications port Control signal cable port Cooling fan L1 R L2 S L3 T P1 P N wire port L1 R L2 S L3 T U V W grounding wire port D...

Page 22: ...airtight vinyl sheet or the like for storage 3 If the inverter is to be stored in an environment with a high level of humidity put a drying agent such as silica gel in the airtight package described in item 2 1 4 2 Long term storage The long term storage methods for the inverter vary largely according to the environment of the storage site General storage methods are described below 1 The storage ...

Page 23: ...ade of metal or other non flammable material A fire may result with other material 2 Clearances Ensure that the minimum clearances indicated in Figure 2 1 are maintained at all times When installing the inverter in the panel of your system take extra care with ventilation inside the panel as the temperature around the inverter tends to increase Table 2 2 Output Current Derating Factor in Relation ...

Page 24: ...pside down or horizontally Doing so will reduce the heat dissipation efficiency of the inverter and cause the overheat protection function to operate so the inverter will not run Prevent lint paper fibers sawdust dust metallic chips or other foreign materials from getting into the inverter or from accumulating on the heat sink This may result in a fire or accident 2 3 Wiring Follow the procedure b...

Page 25: ...cable motor rating HP Inverter type Terminal screw size Tightening torque lb in N m Refer to 1 8 FRNF12C1 2U 1 4 FRNF25C1 2U 1 2 FRNF50C1 2U 1 FRN001C1 2U M3 5 10 6 1 2 Figure A 2 FRN002C1 2U 3 FRN003C1 2U Three phase 230 V 5 FRN005C1 2U 1 2 FRNF50C1 4U 1 FRN001C1 4U 2 FRN002C1 4U 3 FRN003C1 4U Three phase 460 V 5 FRN005C1 4U M4 15 9 1 8 Figure B 1 8 FRNF12C1 7U 1 4 FRNF25C1 7U 1 2 FRNF50C1 7U 1 F...

Page 26: ...for ferrule 30A 30B 30C Phillips screwdriver JIS standard No 1 screw tip AWG22 to AWG18 0 34 to 0 75 mm2 0 24 to 0 31 6 to 8 mm 0 11 W x0 07 H 2 7 mm x 1 8 mm Others Phillips screwdriver for precision machinery JCIS standard No 0 screw tip AWG24 to AWG18 0 25 to 0 75 mm2 0 2 to 0 28 5 to 7 mm 0 07 W x 0 06 H 1 7 mm x 1 6 mm 2 3 3 Recommended wire sizes Table 2 5 lists the recommended wire sizes Th...

Page 27: ... 14 13 2 FRN002C1 7U 14 14 13 14 11 11 14 14 13 Single phase 230 V 3 FRN003C1 7U 14 11 11 11 9 9 14 14 13 14 11 11 14 14 13 1 8 FRNF12C1 6U 1 4 FRNF25C1 6U 1 2 FRNF50C1 6U 14 14 Single phase 115 V 1 FRN001C1 6U 14 14 14 11 14 14 3 14 14 20 DCR DC reactor 1 Use crimp terminals covered with an insulated sheath or insulating tube Recommended wire sizes are for HIV IV PVC in the EU 2 Wire sizes are ca...

Page 28: ...ith overcurrent protection with overcurrent protection in the path of power lines Use the devices within the related current range Use wires in the specified size Otherwise fire could occur Do not use one multicore cable in order to connect several inverters with motors Do not connect a surge killer to the inverter s output secondary circuit Doing so could cause fire Be sure to connect the groundi...

Page 29: ...minals P and DB 2 g DC link bus terminals P and N 2 h Main circuit power input terminals L1 R L2 S and L3 T or L1 L and L2 N 1 Use either one of these two grounding terminals on the main circuit terminal block 2 Perform wiring as necessary Figure 2 3 Wiring Procedure for Peripheral Equipment Wiring procedure This figure is a virtual representation CAUTION When wiring the inverter to the power supp...

Page 30: ...rge surface area and which meets the grounding resistance requirements listed in Table 2 6 Keep the wiring length as short as possible Above requirements are for Japan Ground the inverter according to your national or local Electric code require ments d Inverter output terminals U V W and grounding terminal G 1 Connect the three wires of the three phase motor to terminals U V and W aligning phases...

Page 31: ...e carrier frequency Function code F26 Motor sound Sound tune If the motor is driven by a PWM type inverter surge voltage that is generated by switching the inverter component may be superimposed on the output voltage and may be applied to the motor terminals Particularly if the wiring length is long the surge voltage may deteriorate the insulation resistance of the motor Consider any of the follow...

Page 32: ...ected to the inverter secure both wires of the DC reactor and braking resistor together to terminal P Refer to item f on the next page Do not remove the jumper bar if a DC reactor is not going to be used When wiring the inverter to the power supply of 500 kVA or more 50 kVA or more for the sin gle phase 115 V class series of inverters be sure to connect an optional DC reactor DCR Otherwise fire co...

Page 33: ...tion without DC Reactor When a DC reactor is not to be connected together with the braking resistor 1 Remove the screws from terminals P and P1 together with the jumper bar 2 Connect the wire from terminal P of the braking resistor to terminal P of the inverter and put the jumper bar back into place Then secure the wire and jumper bar with the screw 3 Tighten the screw of terminal P1 on the jumper...

Page 34: ...resistor with FRN002C1S 2U If both wires of the built in braking resistor have been disconnected you may con nect them to terminals P and DB in either combination The option braking resistor type is avail able only in three phase 230 V and three phase 460 V models of 2HP or more Never insert a braking resistor between terminals P and N P1 and N P and P1 DB and N or P1 and DB Doing so could cause f...

Page 35: ...Input Terminal Connection It is recommended that a magnetic contactor be inserted that can be manually activated This is to allow you to disconnect the inverter from the power supply in an emergency e g when the protective function is activated so as to prevent a failure or accident from causing the secondary problems 2 3 6 Replacing the main circuit terminal block TB cover 1 As shown in Figure 2 ...

Page 36: ...hese precautions could cause electric shock and or an accident Noise may be emitted from the inverter motor and wires Implement appropriate measure to prevent the nearby sensors and devices from malfunctioning due to such noise An accident could occur Figure 2 12 Example of Control Circuit Wiring Table 2 7 lists the symbols names and functions of the con trol circuit terminals The wiring to the co...

Page 37: ...m mands Input impedance 22 k Allowable maximum input voltage is 15 VDC If the input voltage is 10 VDC or more the inverter will limit it at 10 VDC C1 Current input 1 The frequency is commanded according to the external analog input current 4 to 20 mA DC 0 to 100 Normal mode operation 20 to 4 mA DC 0 to 100 Inverse mode operation 2 Used for reference signal PID process command or PID feedback signa...

Page 38: ...s if the relay is used in the control circuit Do not connect the relay s contact to terminal 11 When the inverter is connected to an external device outputting the analog signal a malfunction may be caused by electric noise generated by the inverter If this happens according to the circumstances connect a ferrite core a toroidal core or an equivalent to the device outputting the analog signal and ...

Page 39: ...d E99 For details refer to Chapter 5 Section 5 2 Overview of Function Codes 2 Input mode i e Sink Source is changeable by using the internal jumper switch 3 Switches the logic value 1 0 for ON OFF of the terminals between X1 to X3 FWD or REV and CM If the logic value for ON between X1 and CM is 1 in the normal logic system for example OFF is 1 in the negative logic system and vice versa 4 The nega...

Page 40: ... two examples of a circuit that turns on or off control signal input X1 X2 X3 FWD or REV using a programmable logic controller PLC Circuit a has a connecting jumper applied to SINK whereas circuit b has one that is applied to SOURCE In circuit a below short circuiting or opening the transistor s open collector circuit in the PLC using an external power source turns on or off control signal X1 X2 X...

Page 41: ...lue 1 0 for ON OFF of the terminals between Y1 and Y1E If the logic value for ON between Y1 and Y1E is 1 in the normal logic system for example OFF is 1 in the negative logic system and vice versa Digital input circuit specification Figure 2 17 shows examples of connection between the control circuit and a PLC Y1 Transistor output Check the polarity of the external power inputs When connecting a c...

Page 42: ...ut signal and use it for signal output 3 Switching of the normal negative logic output is applicable to the fol lowing two contact outputs Terminals 30A and 30C are short circuited for ON signal output or the terminals 30B and 30C are short circuited non excite for ON signal output Communication RS 485 port RS 485 communi cations I O 1 Used to connect the inverter with PC or PLC using RS 485 port ...

Page 43: ...Jumper Switch To switch the sink source of the digital input signal change the position of the jumper switch using a pair of long nose pliers as shown in Figure 2 19 At the factory setting the jumper switch is positioned at SOURCE for the EU version except three phase 230 V model and at SINK for the US Asian and Japanese versions 2 3 9 Installing an RS 485 communications card option Figure 2 20 In...

Page 44: ...uit the insulation of the sheath or the cover might break down which would expose the signal wire to a high voltage of the main circuit Make sure that the control signal cables and wires will not come into contact with live conductors of the main circuit Failure to observe these precautions could cause electric shock and or an acci dent 2 3 10 Replacing the control circuit terminal block TB cover ...

Page 45: ...on the metal switchboard and connect the whole board to the ground Connect a noise filter to the inverter power wires 3 When implementing measures against noise generated from peripheral equipment For the control signal wires use twisted or shielded twisted wires When using shielded twisted wires connect the shield of the shielded wires to the common terminals of the control circuit Connect a surg...

Page 46: ... key Press this key to stop the motor UP DOWN keys Press these keys to select the setting items and change the function data displayed on the LED monitor Program Reset key which switches the operation modes of the inverter In Running mode Pressing this key switches the inverter to Program ming mode In Programming mode Pressing this key switches the inverter to Running mode In Alarm mode Pressing t...

Page 47: ...ration You can also monitor the running status in real time Programming mode This mode allows you to set function code data and check a variety of information relating to the inverter status and maintenance Alarm mode If an alarm condition occurs the inverter automatically enters the Alarm mode In this mode you can view the corresponding alarm code and its related information on the LED monitor Al...

Page 48: ...d m min and Constant Rate of Feeding Time min 2 Applicable only when PID control is employed 3 Applicable only when timer operation is selected by the setting of function code C21 4 Applicable only when a remote keypad optional is installed 5 Alarm can be reset with the key only when the current alarm code is displayed Figure 3 2 Transition between Basic Display Figures by Operation Mode ...

Page 49: ...nt C alternative expression for A ampere 3 Output voltage V W Specified output voltage W alternative expression for V voltage 4 Input power kW R Electric power input to the inverter R alternative expression for kW kilo watt 9 PID process command Note 1 Note 2 10 PID feedback amount Note 1 Note 3 PID process command or PID feedback amount u PID display coefficient A B B PID display coefficients A a...

Page 50: ...code E48 2 The PID related information will appear only when the inverter is under PID control When PID control is not in effect J01 0 while data of the function code E43 is 10 or 12 or immediately after power on will be displayed 3 This will appear only when timer operation is enabled by function code C21 When timer operation is not in effect C21 0 while data of the function code E43 is 13 or imm...

Page 51: ... Constant rate of feeding time min 6 Displayed value E39 frequency Output E50 When the value is equal to or more than 10000 will be displayed Output frequencies contained in these formulas are output frequencies before slip compensation 2 Setting up reference frequency etc You can set up the desired frequency command and PID process command by using the potenti ometer and and keys on the keypad Yo...

Page 52: ...upper digit places and the upper digits will be changeable If you press the or key once and then hold down the key for more than 1 second after the lowest digit starts blinking blinking will move to the next upper digit place to allow you to change the value of that digit cursor movement This way you can easily change the values of the higher digits By setting function code C30 to 0 keys on the bu...

Page 53: ...unning mode 3 Press the or key to display the PID process command The lowest digit of the displayed command and the decimal point blink 4 To change the PID process command press the or key again The PID process com mand you have specified will be automatically saved into the inverter s memory It is kept there even if you temporarily switch to another means of specifying the PID process command and...

Page 54: ...Speed Frequency Command Specified with Keys and Requirements Frequency command 1 F01 Frequency set ting via commu nications link Multi frequency setting PID control cancelled Display during or key operation PID enabled PID output as final frequency command 0 Disabled Disabled Cancelled Manual speed frequency command set by keypad PID enabled PID output as final frequency command Other than the abo...

Page 55: ...r details 2 Press the keys at the same time simultaneous keying The LED monitor will display the jogging frequency for approx 1 second and go back to the LQI display During jogging the jogging frequency specified by function code C20 and the acceleration deceleration time specified by function code H54 for jogging will apply They are exclusively prepared for jogging Set these codes individually as...

Page 56: ...ons EAA C codes Control functions of frequency RAA P codes Motor parameters JAA H codes High performance functions LAA J codes Application functions 1 Data setting AA y codes Link functions Selecting each of these function codes enables its data to be dis played changed 1 2 Data checking TGR Displays only function codes that have been changed from their factory defaults You may refer to or change ...

Page 57: ...3 12 Figure 3 4 illustrates the menu transition in Programming mode Displayed only when a remote keypad option is set up for use Figure 3 4 Menu Transition in Programming Mode ...

Page 58: ...pad option is set up for use If the full menu mode is selected pressing the or key will cycle through the menu With the key you can select the desired menu item Once the entire menu has been cycled through the display will return to the first menu item 1 Setting function codes Data Setting Menu 1 Data setting in Programming mode allows you to set function codes for making the inverter functions ma...

Page 59: ...trol etc J codes J01 to J06 Application functions To be used for PID control y codes y01 to y99 Link functions To be used for communications Refer to Chapter 5 FUNCTION CODES for details on the function codes Function codes that require simultaneous keying To change data for function codes F00 Data protection H03 Data initialization and H97 Clear alarm data simultaneous keying operation is necessa...

Page 60: ...3 15 Figure 3 5 shows the status transition for Menu 1 Data setting Figure 3 5 Data Setting Status Transition ...

Page 61: ...le to transfer the display to a different function code group using the and keys 4 Select the desired function code using the and keys and press the key In this example select function code H The data of this function code will appear In this example data of H will appear 5 Change the function code data using the and keys In this example press the key four times to change data to 6 Press the key t...

Page 62: ... in Programming mode allows you to check function codes that have been changed Only the function code for the data that has been changed from the factory defaults are displayed on the LED monitor You may refer to the function code data and change it again if nec essary Figure 3 7 shows the status transition diagram for Data checking ...

Page 63: ...s made only to F01 F05 E52 Basic key operation The basic key operation is the same as for Data setting To check function codes in Menu 2 Data checking it is necessary to set function code E52 to 1 Function code data check mode or 2 Full menu mode For details refer to Limiting menus to be displayed on page 3 13 ...

Page 64: ...ive monitoring is used to check the running status during maintenance and test running The display items for Drive monitoring are listed in Table 3 11 Figure 3 8 shows the status transi tion diagram for Drive monitoring Figure 3 8 Drive Monitoring Status Transition ...

Page 65: ... current A Output voltage V Output voltage A Reference frequency Hz Reference frequency A Running direction N A Displays the running direction currently being outputted F forward R reverse stop A Running status N A Displays the running status in hex format Refer to Displaying running status on the next page A Load shaft speed line speed r min m min The unit for load shaft speed is r min and that f...

Page 66: ... 5 NUV 1 when the DC link bus voltage is higher than the undervoltage level 12 RL 1 when communication is enabled when ready for run and frequency commands via communications link 4 BRK Always 0 11 ALM 1 when an alarm has occurred 3 INT 1 when the inverter output is stopped 10 DEC 1 during deceleration 2 EXT 1 during DC braking 9 ACC 1 during acceleration 1 REV 1 during running in the reverse dire...

Page 67: ...the correspondence between the two notations The hexadecimals are shown as they appear on the LED monitor Table 3 14 Binary and Hexadecimal Conversion Binary Hexadecimal Binary Hexadecimal 0 0 0 0 1 0 0 0 0 0 0 1 1 0 0 1 0 0 1 0 1 0 1 0 C 0 0 1 1 1 0 1 1 D 0 1 0 0 1 1 0 0 E 0 1 0 1 1 1 0 1 F 0 1 1 0 1 1 1 0 G 0 1 1 1 1 1 1 1 H ...

Page 68: ... status of external signals without using a measuring instrument External signals that can be displayed include digital I O signals and analog I O signals Table 3 15 lists check items available The status transition for I O checking is shown in Figure 3 9 Figure 3 9 I O Checking Status Transition ...

Page 69: ...e for the digital I O terminals that received a command via RS 485 communica tions Refer to Displaying control I O signal ter minals and Displaying control I O signal termi nals under communication control below for de tails of the item displayed A Input voltage on terminal 12 Shows the input voltage on terminal 12 in volts V A Input current on terminal C1 Shows the input current on terminal C1 in...

Page 70: ...al digits 0 to F each With the FRENIC Mini digital input terminals FWD and REV are assigned to bit 0 and bit 1 respectively Terminals X1 through X3 are assigned to bits 2 through 4 The bit is set to 1 when the corresponding input terminal is short circuited with terminal CM or terminal PLC and is set to 0 when it is open For example when FWD and X1 are on short circuited and all the others are off...

Page 71: ...cation control Displaying control I O signal terminals under communication control During control via communication input commands sent via RS 485 communications cable can be displayed in two ways display with ON OFF of the LED segment and in hexadecimal format The content to be displayed is basically the same as that for the control I O signal terminal status display however XF XR and RST are add...

Page 72: ...ion Basic key operation Before viewing maintenance information set function code E52 to 2 full menu mode 1 When the inverter is powered on it automatically enters Running mode In Running mode press the key to enter Programming mode The menu for function selection will be displayed 2 With the menu displayed use the and keys to select Maintenance information EJG 3 Press the key to display the list o...

Page 73: ...urs the count stops and the display remains at 65 53 A Cumulative run time of the cooling fan Shows the cumulative run time of the cooling fan This counter does not work when the fan stops even if the cooling fan ON OFF control function code H06 is enabled The display method is the same as for Cumulative run time A above However when the total time exceeds 65535 hours the count stops and the displ...

Page 74: ...s of the past 4 alarms Further it is also possible to display alarm information that indicates the status of the inverter when the alarm condition occurred Figure 3 11 shows the status transition of the alarm information and Table 3 19 lists the details of the alarm information Figure 3 11 Alarm Information Status Transition ...

Page 75: ...uency Output frequency A Output current Output current A Output voltage Output voltage A Reference frequency Reference frequency A Rotational direction This shows the running direction being output F forward R reverse stop A Running status This shows the running status in hexadecimal Refer to Dis playing running status in 3 Monitoring the running status A Cumulative running time Shows the cumulati...

Page 76: ... if no alarms have occurred A Overlapping alarm 2 Simultaneously occurring alarm codes 2 is displayed if no alarms have occurred A Terminal I O signal status under commu nication control displayed with the ON OFF of LED seg ments A Terminal input signal status under commu nication control in hexadecimal for mat A Terminal output signal status under commu nication control in hexadecimal for mat Sho...

Page 77: ...us of Inverter at the time of Alarm If an alarm occurs you may check various running status information output frequency and output current etc by pressing the key when the alarm code is displayed The item number and data for each running information is displayed in alternation Further you can view various pieces of information on the status of the inverter using the or key The information display...

Page 78: ... back to Programming mode by pressing the keys simultaneously while the alarm is displayed and modify the setting of function codes Figure 3 12 summarizes the possible transitions between different menu items Figure 3 12 Alarm Mode Status Transition ...

Page 79: ...nverter does not start or operate erroneously at power on 6 Check if safety measures are taken against runaway of the system e g a defense to protect people from unexpectedly approaching your power system for three phase power supply Figure 4 1 Connection of Main Circuit Terminals Three phase power supply 4 1 2 Turning on power and checking Be sure to install the covers for both the main circuit t...

Page 80: ...Table 4 1 Settings of Function Code Data before Driving the Motor for a Test Function code Name Function code data Factory setting H Base frequency 60 0 Hz H Rated Voltage at base frequency 0 V Output voltage interlocked with the source voltage R Motor Parameter Rated capacity Applicable motor rated capacity R Motor Parameter Rated current Rated current of applicable motor R Motor Selection Motor ...

Page 81: ...ncy displayed on the LED monitor blinks 3 Press the key to start running the motor in the forward direction Check that the reference frequency is displayed on the LED monitor correctly 4 To stop the motor press the key Check the following points Check if the direction of rotation is correct Check for smooth rotation without motor humming or excessive vibration Check for smooth acceleration and dec...

Page 82: ... state then the changed data will be discarded and the previous data will take effect for the inverter operation Y Possible The data of the codes marked with Y can be changed with the and keys regardless of whether the motor is running or not Pressing the key will make the change effective and save it into the inverter s memory N Impossible Copying data Connecting a remote keypad option to an inve...

Page 83: ...a with the function code data setting To set the negative logic system for an I O terminal enter data of 1000s by adding 1000 to the data for the normal logic in the corresponding function code Some signals cannot switch to active OFF depending upon their assigned functions Example Coast to a stop command BX assigned to any of digital input terminals X1 to X3 using any of function codes E01 throug...

Page 84: ...des Fundamental Functions 1 Fuji s standard torque boost Nominal rated current of Fuji standard motor and Nominal rated capacity of Fuji standard motor differ depending upon the rated input voltage and rated capacity Refer to Table 5 1 Fuji Standard Motor Parameters on page 5 12 2 AVR Automatic Voltage Regulator Note 1 For the three phase 230 V single phase 230 V and single phase 115 V class serie...

Page 85: ...5 4 ...

Page 86: ...ttings for inverters with ROM version C1S11299 or earlier F43 0 and F44 200 For the ROM version checking procedure refer to Chapter 3 Section 3 2 2 5 Reading maintenance information E codes Extension Terminal Functions ...

Page 87: ...ted capacity of Fuji standard motor differ depending upon the rated input voltage and rated capacity Refer to Table 5 1 Fuji Standard Motor Parameters on page 5 12 Note Function codes E45 to E47 appear on the LED monitor however the FRENIC Mini series of inverters does not recognize these codes ...

Page 88: ...5 7 ...

Page 89: ...5 8 C codes Control Functions of Frequency ...

Page 90: ...tions 2 Fuji s standard torque boost Nominal rated current of Fuji standard motor and Nominal rated capacity of Fuji standard motor differ depending upon the rated input voltage and rated capacity Refer to Table 5 1 Fuji Standard Motor Parameters on page 5 12 ...

Page 91: ...5 10 Note 1 Function code H71 appears on the LED monitor however the FRENIC Mini series of inverters does not recognize this code ...

Page 92: ...5 11 J codes Application Functions y codes Link Functions ...

Page 93: ...codes F11 E34 and P03 Function code P02 1 8 FRNF12C1 2U 0 0 0 68 0 12 1 4 FRNF25C1 2U 0 0 1 4 0 25 1 2 FRNF50C1 2U 0 0 2 0 5 1 FRN001C1 2U 0 0 3 1 2 FRN002C1 2U 0 0 5 8 2 3 FRN003C1 2U 0 0 7 9 3 Three phase 230 V 5 FRN005C1 2U 0 0 12 6 5 1 2 FRNF50C1 4U 0 0 1 0 5 1 FRN001C1 4U 0 0 1 5 1 2 FRN002C1 4U 0 0 2 9 2 3 FRN003C1 4U 0 0 4 3 Three phase 460 V 5 FRN005C1 4U 0 0 6 3 5 1 8 FRNF12C1 7U 0 0 0 68...

Page 94: ...aximum frequency obtained at 20 mA DC 3 Enable the sum of voltage and current inputs to terminals 12 and C1 See the two items listed above for the setting range and maximum frequencies Note If the sum exceeds the maximum frequency the maximum frequency will apply 4 Enable the built in potentiometer POT Maximum frequency obtained at full scale of the POT There are other frequency command means such...

Page 95: ...ction assign the commands FWD and REV to terminals FWD and REV respectively Turn on the FWD or REV for the forward or re verse direction respectively If both of FWD and REV are turned on simultane ously the inverter immediately decelerates to stop the motor The table below lists the operational relationship between function code F02 Running Stopping and Rotational Direction the and key operation a...

Page 96: ...ld occur If you modify the data of F03 to apply a higher drive frequency concur rently change the data of F15 for a peak frequency limiter suitable to the drive frequency F04 F05 H50 H51 Base Frequency Rated Voltage at Base Frequency Non linear V f Pattern Frequency Non linear V f Pattern Voltage These function codes set the base frequency and the voltage at the base frequency essentially required...

Page 97: ...F05 is set to 0 the data settings of function codes H50 and H51 will be ignored If you set the data of H50 to 25 Hz or lower Operation under low base frequency the inverter output voltage may be limited Defining non linear V f patterns F04 F05 H50 and H51 Function codes F04 and F05 define a non linear V f pattern that forms the rela tionship between the inverter s output frequency and voltage Furt...

Page 98: ...tion Time 1 The acceleration time specifies the length of time the frequency increases from 0 Hz to the maximum frequency The deceleration time specifies the length of time the frequency decreases from the maximum frequency down to 0 Hz In case the reference frequency is equal to the maximum frequency F03 The actual acceleration and deceleration times are the same as the specified ac celeration ti...

Page 99: ...n times are longer than the specified times If you specify an improperly short acceleration deceleration time then the current limiting function or the automatic deceleration function may activated resulting in an actual acceleration deceleration time longer than the specified one F09 F37 Torque Boost Load Selection Auto Torque Boost Auto Energy Saving Operation In general there are two different ...

Page 100: ... set to 0 1 3 or 4 Automatic torque boost This feature automatically optimizes the output voltage to fit the motor and its load Under a light load it decreases the output voltage to prevent the motor from over excitation under a heavy load it increases the output voltage to increase torque Since this feature is related to the motor properties it is necessary to set the rated voltage at base freque...

Page 101: ...tics you need to consistently set the voltage at the base frequency F05 and motor parameters P02 P03 and P99 appropriately for the motor rating and characteristics Given below are examples of proper setting in combination with F09 and F37 If you do not select auto energy saving operation Load type To select manual torque boost set To select automatic torque boost set Variable torque F37 0 F09 0 0 ...

Page 102: ... Ordinarily set F11 to 1 0 to 1 1 times the allowable continuous current rated current of the motor P03 at the rated drive frequency base frequency of the motor To disable the electronic thermal function set F11 to 0 00 no effect F12 sets the thermal time constant of the motor The inverter interprets the time constant as an operation period of the electronic thermal function During the specified o...

Page 103: ...e inverter saves the current output frequency and stops its output to make the motor to coast to a stop When the power is recovered with any run command being on the inverter will re start at the saved frequency During the momentary power failure if the motor speed slows down the current limiter function of the inverter will be activated and automatically lower the output frequency Upon synchroniz...

Page 104: ...in 2 seconds it will restart If a run command arrives more than 2 seconds later then the inverter should be restarted at the starting frequency F23 The external circuitry should be so designed that it will issue a run command within 2 seconds in such an event otherwise it should incorporate a relay with a mechanical locking feature If a coast to stop command BX is issued during the time from the d...

Page 105: ...ut for frequency set 1 set by F01 you can define the relationship between the analog input and the reference frequency arbitrarily by combining the settings for bias F18 bias base point C50 gains C32 and C37 and gain base points C34 and C39 As illustrated in the graph below the relationship between the reference frequency and analog input level for frequency 1 is shown by a straight line passing t...

Page 106: ...equency at the maximum value Since 5 V is the gain base point and it is equal to 50 of 10 V set the gain base point at 50 C34 50 When using the function codes for setting a gain or bias alone without changing any base points the setting procedure for the function codes is the same as that of Fuji conventional inverter models FVR C9S FVR C11S etc F20 to F22 H95 DC Braking Braking starting frequency...

Page 107: ...0 V and single phase 230 V 115 V class series in verters The braking level setting for the three phase 230 V and single phase 230 V 115 V class series should be calculated from the DC braking level IDB A based on the reference current Iref A as shown below 100 A A Setting ref DB u I I Example Setting the braking level IDB at 4 2 Amp A for 1HP standard motors 84 100 A 5 0 A 4 2 Setting u Applicable...

Page 108: ...equency may decrease the motor run ning noise leakage current from the output lines and electric noise from the inverter Electric noise level Low to high Lowering the carrier frequency increases the ripple components har monic components on the output current waveform so as to increase the motor s power loss and raises the temperature of the motor If the carrier frequency is set at 0 75 kHz for ex...

Page 109: ... current to terminal FMA as an analog DC voltage that can be adjusted with F30 for the meter scale Voltage adjustment F30 Adjust the output voltage level within the range of 0 to 200 supposing the monitored amount of the monitor selected with function code F31 as 100 Function F31 F31 specifies what is output to the analog output terminal FMA ...

Page 110: ...utputting analog voltage 8V for 0 75 kW standard motors when the inverter output current is 4 2A 190 4 100 V 10 V 8 A 4 2 A 5 0 2 gain Output u u u 7 98 V 10 100 190 A 5 0 2 A 4 2 V voltage output Analog u u u Reference table If you want to output analog 10 V at 200 of the rated current of any of the single phase 115 V class series of inverters set the output gain at terminal FMA F30 as listed bel...

Page 111: ...deceleration time or frequency different from the set ones The machine should be so designed that safety is ensured even in any current limiter operation Otherwise an accident could occur F50 F51 Electronic Thermal Overload Protection for Braking Resistor Discharging capability and Allowable average loss These function codes specify the electronic thermal overload protection feature for the brakin...

Page 112: ...king Braking torque 100 Repetitive braking Period 100 sec or less Power supply voltage Inverter type Resis tance Ca pacity W Discharging capability kWs Braking time s Allowable average loss kW Duty cycle ED FRN002C1 2U 18 3 FRN003C1 2U 60 40 14 12 0 023 2 Three phase 230 V FRN005C1 2U 40 60 15 8 0 025 1 5 FRN002C1 4U 18 3 FRN003C1 4U 240 14 12 0 023 2 Three phase 460 V FRN005C1 4U 160 40 15 8 0 02...

Page 113: ...istor type Q ty Resis tance Ca pac ity W Discharg ing capability kWs Braking time s Allowable average loss kW Duty cycle ED FRNF50C1 2U 9 0 044 22 FRN001C1 2U DB0 75 2 100 200 17 0 068 18 FRN002C1 2U 34 45 0 075 10 FRN003C1 2U DB2 2 2 40 33 30 0 077 7 Three phase 230 V FRN005C1 2U DB3 7 2 33 400 37 20 0 093 5 FRNF50C1 4U 9 0 044 22 FRN001C1 4U DB0 75 4 200 200 17 0 068 18 FRN002C1 4U 34 45 0 075 1...

Page 114: ... 40 55 50 0 110 10 Three phase 230 V FRN005C1 2U DB3 7 2C 33 400 140 75 0 185 10 FRNF50C1 4U 250 37 FRN001C1 4U DB0 75 4C 200 200 50 133 0 075 20 FRN002C1 4U 73 14 FRN003C1 4U DB2 2 4C 160 55 50 0 110 10 Three phase 460 V FRN005C1 4U DB3 7 4C 130 400 140 75 0 185 10 FRNF50C1 7U 250 37 FRN001C1 7U DB0 75 2C 100 200 50 133 0 075 20 FRN002C1 7U 73 14 Single phase 230 V FRN003C1 7U DB2 2 2C 40 400 55 ...

Page 115: ... by 7 function codes C05 to C11 Multi frequency 0 to 7 With this the inverter can drive the motor at 16 different preset frequencies The table below lists the frequencies that can be obtained by the combination of switching SS1 SS2 and SS4 In the Selected frequency column Other than multi frequency represents the reference frequencies defined by frequency command 1 F01 frequency command 2 C30 or o...

Page 116: ...erminal and terminal CM will reset the alarm output on terminals Y1 and 30A B C Opening the circuit will release all the alarm indications to restart operation Allow 10 ms or more for the short circuit time RST should be kept off for normal inverter operation Enable external alarm trip THR Function code data 9 㩷 When the motor is running opening the circuit between the THR assigned terminal and te...

Page 117: ...cted Enable data change with keypad WE KP Function code data 19 㩷 Turning off the WE KP command prohibits changing of function code data from the keypad Only when the WE KP command is on you may access function code data from the keypad according to the setting of function code F00 as listed below If WE KP is set to Function code F00 data Function 0 Permit editing of function code data ON 1 Inhibi...

Page 118: ...mand ON assigns priorities to frequency commands or run commands received via the RS 485 communications link H30 option No LE assignment is functionally equivalent to the LE being ON Reset PID integral and differential components PID RST Function code data 33 㩷 Turning on the PID RST command resets the PID integral and differential com ponents Hold PID integral component PID HLD Function code data...

Page 119: ...le interlocking its operation with a power on signal Since terminals 30A B C are mechanical relay contacts they cannot withstand frequent on off operations If frequent signal outputs are ex pected e g assigning any current limiter signal and activating the current limiter actively then use Y1 For rare signal outputs e g for inverter protection purpose use 30A B C The service life of a mechanical r...

Page 120: ... overload early warning for enabling you to take corrective action before the inverter detects a motor overload N alarm and stops its output The motor temperature characteristics are specified by function codes F10 Elec tronic thermal overload protection for motor and F12 Thermal time constant If the value calculated from the settings of F10 and F12 exceeds the detection level set by Overload Earl...

Page 121: ...Current detected ID Function code data 37 㩷 This signal is turned on when the output current exceeds the operation level set by Overload Early Warning Current Detection Low Current Detection E34 Level for a duration longer than specified by Current Detection Low Current Detection E35 Timer The minimum ON duration is 100 ms Function codes E34 and E35 are used not only to set the current detection I...

Page 122: ...lusive con version factors to equate an indicated value with the process command and feedback amount in PID control E52 Keypad Menu display mode Allows you to select the display mode on the keypad For details of the operation of the remote keypad refer to Limiting menus to be displayed in Chapter 3 This feature is provided to simplify the operation of the keypad By default E52 is set at 0 Menu 1 D...

Page 123: ...un command with the key 1 Use the or key to set the timer count in seconds while monitoring the current count displayed on the LED monitor Note that the timer count is ex pressed as integers Valid range of Timer Operation time 1 9 999 sec 2 Press the key to run the motor and the timer will start the countdown The moment the timer finishes the countdown the inverter stops running the motor even if ...

Page 124: ...93 1 50 1 93 1 93 For this function which is related with the motor characteristics the volt age at the base frequency F05 and motor parameters P codes should be also set consistently P99 Motor Selection To use automatic control features e g the auto torque boost auto energy saving and slip compensation or overload protection for the motor electronic thermal the inverter invokes the parameters and...

Page 125: ...tion gain to 0 0 If you do initialization while H03 is set at 1 or 2 H03 will automatically go back to 0 factory default at the completion of initialization Procedure for initializing motor constants To initialize the motor constants set the related function codes as follows 1 P02 Motor Parameters Rated capacity Set the rated capacity of the motor to be used in HP or kW 2 P99 Motor Selection Selec...

Page 126: ... 50 to 10 99 7 5 25 72 25 72 25 72 0 01 to 0 09 0 06 0 21 0 21 0 21 0 10 to 0 19 0 1 0 32 0 32 0 32 0 20 to 0 39 0 2 0 61 0 6 0 61 0 40 to 0 74 0 4 1 06 1 09 1 06 0 75 to 1 49 0 75 1 63 1 64 1 63 1 50 to 2 19 1 5 2 76 2 76 2 76 2 20 to 3 69 2 2 4 12 4 12 4 12 3 70 to 5 49 3 7 6 7 6 71 6 7 5 50 to 7 49 5 5 10 24 9 8 10 24 Three phase 460 V 7 50 to 10 99 7 5 12 86 12 86 12 86 NOTE The above values i...

Page 127: ... 6 7 50 to 9 99 7 5 18 6 Three phase 230 V Single phase 230 V Single phase 115 V 10 00 to 14 99 10 25 3 0 01 to 0 11 0 1 0 22 0 12 to 0 24 0 12 0 34 0 25 to 0 49 0 25 0 7 0 50 to 0 99 0 5 1 1 00 to 1 99 1 1 5 2 00 to 2 99 2 2 9 3 00 to 4 99 3 4 5 00 to 7 49 5 6 3 7 50 to 9 99 7 5 9 3 Three phase 460 V 10 00 to 14 99 10 12 7 NOTE The rated current will be initialized to the value for motors rated f...

Page 128: ...overheated FDJ Overvoltage protection W W or W Motor overloaded N Heat sink overheated J Inverter overloaded NW Motor overheated J Number of reset times H04 Set the number of reset times for automatic exit from Alarm mode If the inverter has entered Alarm mode during the retry times specified the inverter issues a block alarm and will not exit from Alarm mode for restarting If the auto reset funct...

Page 129: ...ssing or cause an overcurrent trip if the output current exceeds the instantaneous overcurrent limit level If the instantaneous overcurrent limiting is enabled the inverter will immediately turn off its output gates to suppress the increase of current and control the output frequency If current limiting processing makes the motor decrease its torque temporarily so as to cause any problem then disa...

Page 130: ...s or disables the overload suppressing control If enabled this function code is used to set the deceleration Hz s Before the inverter enters Alarm mode due to the heat sink overheat or overload alarm code J or NW this control decreases the output frequency of the inverter to suppress the trip Apply this control to equipment such as pumps whose drive frequency drops in line with any decrease in loa...

Page 131: ...otect the system from any failure which could result from the inverter tripping due to the heat sink overheating J or overload NW ab normally high ambient temperature or a cooling mechanism failure This feature lowers the output frequency before the inverter enters Alarm mode However the level of motor noise may increase Input phase loss protection NKP If a phase loss is detected in the three phas...

Page 132: ...output to inverter output terminals U V and W Some electric charge may remain in the DC link bus capacitor even after the power is turned off Therefore it may take some time until the DC link bus voltage reaches a safe level Before touching the circuit wait for at least five minutes after the power has been turned off and check that the DC voltage between main circuit terminals P and N is less tha...

Page 133: ...keypad communications error p 6 16 NW Undervoltage protection p 6 10 GT CPU error p 6 16 NKP Input phase loss protection p 6 11 GT Operation protection p 6 17 RN Output phase loss protection p 6 12 GT RS 485 communications error p 6 17 J Overheat protection for heat sink p 6 12 J External alarm input p 6 13 GTH Data save error during undervoltage p 6 18 Note An under bar _ _ _ _ will be displayed ...

Page 134: ...using the keypad ÎInput the rotation direction F02 0 or select the keypad operation with which the rotation direction is fixed F02 2 or 3 4 The inverter could not accept any run commands from the keypad since it was in Programming mode Check which operation mode the inverter is in using the keypad ÎShift the operation mode to Running mode and enter a run command 5 A run command with higher priorit...

Page 135: ...ut current ÎLighten the load 11 Overload Check that a mechanical brake is in effect Î Release the mechanical brake if any Check that the motor starts running if the value of torque boost F09 is increased ÎIncrease the value of torque boost F09 and try to run the motor 12 Torque generated by the motor was insufficient Check the data of function codes F04 F05 H50 and H51 ÎChange the V f pattern to m...

Page 136: ...etting of F44 or disable the function of current limiting in F43 Decrease the value of torque boost F09 then turn the power off and back on again and check if the speed increases ÎAdjust the value of the torque boost F09 7 The current limiting operation did not increase the output frequency Check the data of function codes F04 F05 H50 and H51 to ensure that the V f pattern is right ÎMatch the V f ...

Page 137: ...ly set to appropriate values 4 The vibration system having low stiffness in a load caused hunting or the current is irregular due to special motor constants Check that the motor vibration is suppressed if you decrease the level of the motor sound carrier frequency F26 or set the motor sound tone to 0 F27 0 ÎDecrease the carrier frequency F26 or set the sound tone to 0 F27 0 5 If grating sound can ...

Page 138: ...r failure the motor does not restart Possible Causes What to Check and Suggested Measures 1 The setting of function code F14 is either 0 or 1 Check if an undervoltage trip occurs ÎChange the data of function code F14 Restart mode after momentary power failure mode selection to 4 or 5 2 The run command stayed off even after power has been restored Check the input signal with Menu 4 I O checking usi...

Page 139: ...low the undervoltage detection level Check the DC link bus voltage with Menu 5 Maintenance information and measure the input voltage using the keypad ÎConnect the inverter to a power supply that matches its input rating 2 The desired menu is not displayed Causes Check and Measures 1 The limiting menus function was not selected appropriately Check the data of function code E52 Menu display mode ÎCh...

Page 140: ...d value for your system design ÎIf the load is too heavy decrease it or raise the inverter capacity 3 Loads were too heavy Trace the current trend and check if there are any sudden changes in the current ÎIf there are any sudden changes make the load variation smaller or raise the inverter capacity ÎEnable instantaneous overcurrent limiting H12 1 4 The value set for torque boost F09 was too large ...

Page 141: ...ression level the inverter changes the deceleration time to three times longer than the set value ÎSet the rated voltage at base frequency F05 to 0 to improve braking ability ÎConsider the use of a braking resistor 4 Loads were suddenly removed Check if the alarm occurs when loads are suddenly removed Check if the inverter operation suddenly changes from driving operation to braking operation ÎCon...

Page 142: ... power voltage drop because power transformer capacity was insufficient Check if the alarm occurs when you switch on a molded case circuit breaker a ground fault circuit interrupter with overcurrent protection or a magnetic contactor ÎReconsider the capacity of the power transformer 4 NKP Input phase loss protection Problem Input phase loss occurred or interphase voltage unbalance rate was large P...

Page 143: ...mperature around the inverter exceeded that of inverter specifications Measure the temperature around the inverter ÎLower the temperature around the inverter e g ventilate the panel well ÎLighten the load Check the cumulative running time of the cooling fan Refer to Chapter 3 Section 3 2 2 5 Reading Maintenance Information ÎReplace the cooling fan 2 Accumulated running time of the cooling fan exce...

Page 144: ...ormally ÎRepair or replace the cooling system of the motor 3 Load was too heavy Measure the output current ÎLighten the load e g lighten the load before overload occurs using the overload early warning E34 function ÎDecrease the temperature around the motor ÎIncrease the motor sound carrier frequency F26 4 The set activation level H27 of the PTC thermistor for motor overheat protection was inadequ...

Page 145: ...herefore even if the surface temperature itself does not rise the alarm may be detected if the resistor is used more frequently than the set data of function codes F50 and F51 If you use the resistor to the limit of its capacity you must adjust the data of function codes F50 and F51 while checking the surface temperature of the resistor 10 N Electronic thermal overload relay Problem Electronic the...

Page 146: ... the load before overload occurs using the overload early warning E34 ÎDecrease the motor sound carrier frequency F26 ÎEnable overload prevention control H70 5 The acceleration deceleration time was too short Recalculate the required acceleration deceleration torque and time from the moment of inertia for the load and the deceleration time ÎIncrease the acceleration deceleration time F07 F08 E10 E...

Page 147: ... the inverter Possible Causes What to Check and Suggested Measures 1 Break in the communications cable or poor contact Check continuity of the cable contacts and connections ÎReplace the cable 2 A high intensity noise was given to the inverter Check if appropriate noise control measures have been implemented e g correct grounding and routing of control and main circuit wires ÎImprove noise control...

Page 148: ... to Check and Suggested Measures 1 Host controllers e g PLCs and personal computers did not operate due to incorrect settings and or defective software hardware Check the controllers ÎRemove the cause of the controller error 2 RS 485 converter did not operate due to incorrect connections and settings or hardware defective Check the RS 485 converter e g check for poor contact ÎChange the various RS...

Page 149: ...whatever is causing the rapid discharge of the DC link circuit After pressing the key and releasing the alarm set using a remote keypad the data of the relevant function codes such as the frequency commands timer operation time and PID process command back to the original values and then restart the operation 2 A high intensity noise affected the operation of the inverter while data was being save...

Page 150: ...ect or J01 is not set to 0 ÎSet J01 to 1 or 2 2 While timer operation is disabled C21 0 E43 item selection has been set for 10 or 12 While timer operation is enabled C21 1 it has been disabled C21 0 during setting the LED monitor to display the timer value by pressing the key Make sure that when you wish to view other monitor items E43 is not set to 13 ÎSet E43 to a value other than 13 Make sure t...

Page 151: ...eypad and check the voltage of the DC link bus which should be 200 VDC or below for three phase 230 V single phase 230 V and single phase 115 V and 400 VDC or below for three phase 460 V ÎPlug the inverter to a power supply that meets its input specifications 3 appears Problem Parentheses has appeared on the LED monitor while the keypad displaying the Drive Monitor Possible Causes What to Check an...

Page 152: ...ment should be made only by authorized persons Take off the watch rings and other metallic matter before starting work Use insulated tools Never modify the inverter Electric shock or injuries could occur 7 1 Daily Inspection Visually inspect errors in the state of operation from the outside without removing the covers while the inverter operates or while it is turned on Check if the expected perfo...

Page 153: ...ection 1 2 The display can be read and there is no fault Structure such as frame and cover 1 Abnormal noise and excessive vibration 2 Loosen bolts tightened parts 3 Deformation and breakage 4 Discoloration and deformation caused by overheat 5 Check for foulness and dust 1 Visual or hearing inspection 2 Retighten 3 4 5 Visual inspection 1 2 3 4 5 No abnormalities Common 1 Check if bolts and screws ...

Page 154: ...inspection 2 Visual inspection 1 2 No abnormalities Control circuit Printed circuit board Note 1 Check for loose screws and connectors 2 Check for odor and discoloration 3 Check for cracks breakage deformation and remarkable rust 4 Check the capacitors for electrolyte leaks and deformation 1 Retighten 2 Smelling and visual inspection 3 4 Visual inspection 1 2 3 4 No abnormalities Cooling fan Note ...

Page 155: ...ollows The capacitance is displayed in the reduction ratio of the initial value written in the inverter memory before shipment Capacitance measurement procedure 1 Remove the RS 485 communications card option from the inverter if it is mounted Disconnect the DC link bus to other inverters from terminals P and N of the main circuit if any A DC reactor option and braking resistor option may not be di...

Page 156: ... on the LED monitor Use this to determine when the capacitor should be replaced The display is in units of 1000 hours 3 Cooling fan The inverter accumulates hours for which the cooling fan has run The display is in units of 1000 hours The accumulated time should be used just a guide since the actual service life will be significantly affected by the temperature and operation environment ...

Page 157: ...hree phase input Single phase input 100 A t V Curren Voltage 3 W power Electric factor Power 100 A t V Curren Voltage W power Electric factor Power Table 7 3 Meters for Measurement of Main Circuit Item Input primary side Output secondary side DC link bus voltage P N Waveform Voltage Current Voltage Current Name of meter Ammeter AR AS AT Voltmeter VR VS VT Wattmeter WR WT Ammeter AU AV AW Voltmeter...

Page 158: ...rol wiring 3 Connect the main circuit terminals with a common cable as shown in Figure 7 2 4 The Megger test must be limited to across the common line of the main circuit and ground 5 5 M 1 M for the EMC filter built in type of inverters or a larger value displayed at the Megger indicates a correct state The value is for a discrete inverter Figure 7 2 Megger Test 2 Dielectric strength test of cont...

Page 159: ...r order When requesting an estimate and placing your orders for the products included in these materials please be aware that any items such as specifications which are not specifically mentioned in the contract catalog specifications or other materials will be as mentioned below In addition the products included in these materials are limited in the use they are put to and the place where they ca...

Page 160: ...actical application of the product at the time it was purchased or delivered j The product was not used in the manner the product was originally intended to be used k The breakdown was caused by a reason which is not this company s responsibility such as lightning or other disaster 2 Furthermore the warranty specified herein shall be limited to the purchased or delivered product alone 3 The upper ...

Page 161: ... is difficult to provide repairs or supply spare parts even within this 7 year period For details please confirm at our company s business office or our service office 4 Transfer rights In the case of standard products which do not include settings or adjustments in an application program the products shall be transported to and transferred to the customer and this company shall not be responsible...

Page 162: ...age Interphase u If this value is 2 to 3 use an AC reactor ACR 6 Tested under the standard load condition 85 load for applicable motor rating 7 Calculated under Fuji specified conditions 8 Indicates the value when using a DC reactor option 9 Average braking torque obtained with the AVR control off H Varies according to the efficiency of the motor 10 Average braking torque obtained by use of an ext...

Page 163: ...n 85 load for applicable motor rating 6 Calculated under Fuji specified conditions 7 Indicates the value when using a DC reactor option 8 Average braking torque obtained with the AVR control off H Varies according to the efficiency of the motor 9 Average braking torque obtained by use of an external braking resistor standard type available as option 10 To make FRENIC Mini compliant with category T...

Page 164: ...85 load for applicable motor rating 6 Calculated under Fuji specified conditions 7 Indicates the value when using a DC reactor option 8 Average braking torque obtained with the AVR control off H Varies according to the efficiency of the motor 9 Average braking torque obtained by use of an external braking resistor standard type available as option 10 To make FRENIC Mini compliant with category TYP...

Page 165: ...ontrol off H Varies according to the efficiency of the motor 8 Average braking torque obtained by use of an external braking resistor standard type available as option 9 To make FRENIC Mini compliant with category TYPE1 of the UL Standard or NEMA1 an optional NEMA1 kit is required Note that the TYPE1 compliant FRENIC Mini should be used in the ambient temperature range from 10 to 40qC 14 to 104 F ...

Page 166: ... EMC filter built in type Three Phase 230 and 460 V class series 1 Standard 4 pole motors Note 1 An asterisk in the above table replaces numbers which denote the following 2 three Phase 230 V 4 three Phase 460 V Other than those items in the above table are the same as those in Section 8 1 Standard Models Single phase 230 V class series 1 Standard 4 pole motors ...

Page 167: ...8 6 8 3 Common Specifications ...

Page 168: ...8 7 ...

Page 169: ...ounted independent of the MCCB or GFCI to cut off the power fed to the inverter Refer to page 9 2 for details MCs or solenoids that will be installed close to the inverter require surge absorbers to be connected in parallel to their coils Note 3 For an inverter connected to the power supply of 500 kVA or more 50 kVA or more for single phase 115 V class series be sure to connect an optional DC reac...

Page 170: ...nd 11 Note 6 For the wiring of the control circuit use shielded or twisted wires When using shielded wires connect the shields to earth To prevent malfunction due to noise keep the control circuit wiring away from the main circuit wiring as far as possible recommended 10 cm or longer and never set them in the same wire duct When crossing the control circuit wiring with the main circuit wiring set ...

Page 171: ...8 10 8 5 External Dimensions 8 5 1 Standard models ...

Page 172: ...8 11 ...

Page 173: ...8 12 8 5 2 Models available on order EMC filter built in type ...

Page 174: ...8 13 ...

Page 175: ...e phase 115 V class series 400 VDC for three phase 460 V class series However if data 4 or 5 is selected for F14 no alarm is output even if the DC link bus voltage drops NW Yes Note Input phase loss protection Detects input phase loss stopping the inverter output This function prevents the inverter from undergoing heavy stress that may be caused by input phase loss or inter phase voltage unbalance...

Page 176: ...the inverter during constant speed operation or during acceleration External alarm input Stops the inverter output with an alarm through the digital input signal THR J Yes Alarm relay output for any fault The inverter outputs a relay contact signal when the inverter issues an alarm and stops the inverter output Alarm Reset The alarm stop state is reset by pressing the key or by the digital input s...

Page 177: ...he run command in the source to be switched is active GT Yes RS 485 communication error On detecting an RS 485 communication error the inverter displays the alarm code GT Yes Data save error during undervoltage If the data could not be saved during activation of the undervoltage protection function the inverter displays the alarm code GTH Yes Overload prevention control In the event of overheating...

Page 178: ...rs caused by the inverter malfunctioning RCDs GFCIs function in the same way as MCCBs Use the MCCBs and RCDs GFCIs that satisfy the recommended rated current listed below w DC w o DC reactor reactor 1 8 FRNF12C1䂓 2U 1 4 FRNF25C1䂓 2U 1 2 FRNF50C1䂓 2U 1 FRN001C1䂓 2U 10 2 FRN002C1䂓 2U 15 3 FRN003C1䂓 2U 20 5 FRN005C1䂓 2U 20 30 1 2 FRNF50C1䂓 4U 1 FRN001C1䂓 4U 2 FRN002C1䂓 4U 10 3 FRN003C1䂓 4U 15 5 FRN00...

Page 179: ...ection purpose If you are to use the MC for this purpose only it is recommended that you use an MC capable of turning the MC on off manually Note When your system requires the motor s driven by the inverter to be started stopped with the MC the frequency of the starting stopping operation should be once or less per hour The more frequent the operation the shorter operation life of the MC and capac...

Page 180: ... includes an inverter Using a DCR increases the reactance of inverter s power source so as to decrease harmonic components on the power source lines and reform the power factor of inverter Using a DCR reforms the input power factor to approximately 90 to 95 Note At the time of shipping a jumper bar is connected across the terminals P1 and P on the terminal block Remove the jumper bar when connecti...

Page 181: ...ension cable connects the RS 485 communications card with a remote keypad or a USB RS 485 converter Three lengths are available 16ft 5m 10ft 3m and 3 3ft 1m RS 485 communications card This makes communication to a PLC or personal computer system easy Copy adapter Used to copy data into multiple inverters Connector adapter A spare connector for the copy adapter USB RS 485 converter A converter that...

Page 182: ...s of 1HP or below or 5HP The FVR E11S 2 4 2HP 3HP and FVR E11S 7 1HP 2HP series may be replaced with any of the FRENIC Mini series of inverters without the use of adapters Rail mounting bases A rail mounting base allows any of the FRENIC Mini series of inverters to be mounted on a DIN rail 1 38 in wide Other options NEMA1 kit Installing the NEMA1 kit to the inverter lets the inverter have the NEMA...

Page 183: ...s DCRs Power supply voltage Applicable motor rating HP Applicable inverter type DCR type For connection Refer to 1 8 FRNF12C1 2U 1 4 FRNF25C1 2U DCR2 0 2 1 2 FRNF50C1 2U DCR2 0 4 1 FRN001C1 2U DCR2 0 75 2 FRN002C1 2U DCR2 1 5 3 FRN003C1 2U DCR2 2 2 Three phase 230 V 5 FRN005C1 2U DCR2 3 7 1 8 FRNF12C1 7U DCR2 0 2 1 4 FRNF25C1 7U DCR2 0 4 1 2 FRNF50C1 7U DCR2 0 75 1 FRN001C1 7U DCR2 1 5 2 FRN002C1 ...

Page 184: ...n Standards The CE marking on Fuji products indicates that they comply with the essential requirements of the Electromagnetic Compatibility EMC Directive 89 336 EEC issued by the Council of the European Communities and Low Voltage Directive 73 23 EEC Only the EMC filter built in type of inverters that bear a CE marking are compliant with these EMC Directives Inverters that bear a CE marking or TÜV...

Page 185: ...er in accordance with the instructions contained in this instruction manual Installing the inverter s in a metal panel may be necessary depending upon the operating environment of the equipment that the inverter is to be used with Our EMC compliance test is performed under the following conditions Motor Sound carrier frequency F26 15 kHz Wiring length of the shielded cable between the inverter and...

Page 186: ...onnecting Shielded Cables When an RS 485 Communications Card optional is used Use a shielded cable for connection Strip the cable of the cable sheath so that the shield is exposed as shown at right Then connect the shield wire firmly to the shield grounding clamp so that it is grounded Figure 11 3 Preparing End of Extension Cable or LAN Cable for Connection Figure 11 4 Connecting Shield Wire for C...

Page 187: ...d As with the motor clamp the shield wire firmly to a grounded plate 3 If noise from the inverter exceeds the permissible level enclose the inverter and its peripherals within a metal panel as shown in Figure 11 6 Figure 11 6 Installing the Inverter with EMC compliant filter into a Metal Panel FRENIC Mini L1 R L2 S L3 T U V W G Power supply L1 L L2 N G Motor MCCB or RCD GFCI Metal Enclosure Three ...

Page 188: ... mA Input Power Inverter type Normal Worst FRNF12C1E 2U FRNF25C1E 2U FRNF50C1E 2U FRN001C1E 2U 7 5 7 5 FRN002C1E 2U FRN003C1E 2U Three phase 230V FRN005C1E 2U 13 0 20 0 FRNF50C1E 4U FRN001C1E 4U 5 4 33 0 FRN002C1E 4U FRN003C1E 4U Three phase 460V FRN005C1E 4U 3 8 25 0 FRNF12C1E 7U FRNF25C1E 7U FRNF50C1E 7U FRN001C1E 7U 8 3 8 3 FRN002C1E 7U Single phase 230V FRN003C1E 7U 4 1 8 2 ...

Page 189: ...E 2U FE5956 6 46 EFL 0 75E11 2 3 0 3 0 FRN002C1E 2U FRN003C1E 2U Three phase 230V FRN005C1E 2U FE5956 26 47 EFL 4 0E11 2 3 0 3 0 FRNF50C1E 4U FRN001C1E 4U FRN002C1E 4U FRN003C1E 4U Three phase 460V FRN005C1E 4U 15TDHE84 Delta Electronics Inc 4 0 27 0 FRNF12C1E 7U FRNF25C1E 7U FRNF50C1E 7U FRN001C1E 7U FRN002C1E 7U Single phase 230V FRN003C1E 7U 30DKCE5 Delta Electronics Inc 1 0 1 8 ...

Page 190: ...h the exception of industrial low voltage power lines Refer to Figure 11 7 below for details Figure 11 7 Power Source and Regulation Medium voltage The inverter connected here is regulated by the harmonics regulations If the harmonics flowing to the power source exceeds the regulated level permission by the local power supplier will be needed Inverter 1kW or less Transformer from medium voltage to...

Page 191: ...will need to provide the supplier with the harmonics current data of the inverter To obtain the data contact your Fuji Electric representative Note 1 A box in the above table replaces S or E depending on the enclosure 2 When supplying three phase 200 VAC power stepped down from a three phase 400 VAC power line using a transformer the level of harmonic flow from the 400 VAC line will be regulated 1...

Page 192: ...MEMO ...

Page 193: ...MEMO ...

Page 194: ...MEMO ...

Page 195: ...n in handling setting up and operating of the FRENIC Mini series of inverters Please feel free to send your comments regarding any errors or omissions you may have found or any suggestions you may have for generally improving the manual In no event will Fuji Electric FA Components Systems Co Ltd be liable for any direct or indirect damages resulting from the application of the information in this ...

Page 196: ...Fuji Electric FA Components Systems Co Ltd Fuji Electric Corp of America 2007 06 F07 F07 00CM ...

Reviews: