


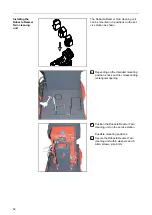


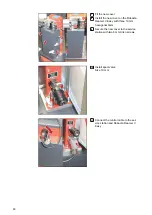

5
6
5
7
7
7
4x
5
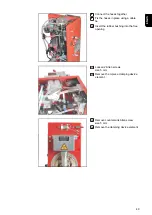
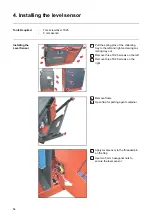
Lay the control cable and compressed
air hose of the wire cutter backwards
through the recess
IMPORTANT!
When positioning the
wire cutter, ensure that the control
cable and compressed air hose are
not pinched, kinked, cut, or otherwise
damaged.
6
Position the wire cutter according to
the diagram
7
Use four 6 mm Allen screws and four
washers to install the wire cutter on
the service station
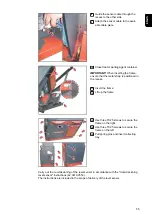
8
10
9
8
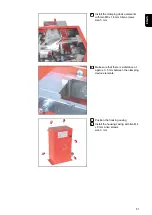
Connect the control cable
9
Connect the compressed air hose
10
Apply the cover
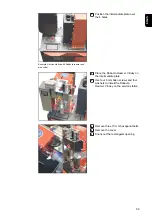
Operating
Instructions
The wire cutter can be used to cut two wire electrodes with a diameter of up to 1.6 mm
(0.063 in.).
With the 0° welding torch, the wire electrodes must be cut one after the other.
The wire cutter is grounded.
45
EN-US
Summary of Contents for Robacta TSS /i
Page 2: ......
Page 11: ...General 11 ...
Page 12: ...12 ...
Page 18: ...18 ...
Page 19: ...Operating controls connections and mechanical components 19 ...
Page 20: ...20 ...
Page 32: ...32 ...
Page 33: ...Installation and Startup 33 ...
Page 34: ...34 ...
Page 61: ...12 12 12 Connect the compressed air supply 61 EN US ...
Page 64: ...64 ...
Page 65: ...Cleaning Program Sequence 65 ...
Page 66: ...66 ...
Page 68: ...A B C D E F G 68 ...
Page 79: ...Reset external signal Internal valve brush cleaning 79 EN US ...
Page 84: ...Reset external signal Cut wire electrode End of the cleaning process Welding 84 ...
Page 85: ...Troubleshooting Maintenance and Disposal 85 ...
Page 86: ...86 ...
Page 97: ...Appendix 97 ...
Page 98: ...98 ...