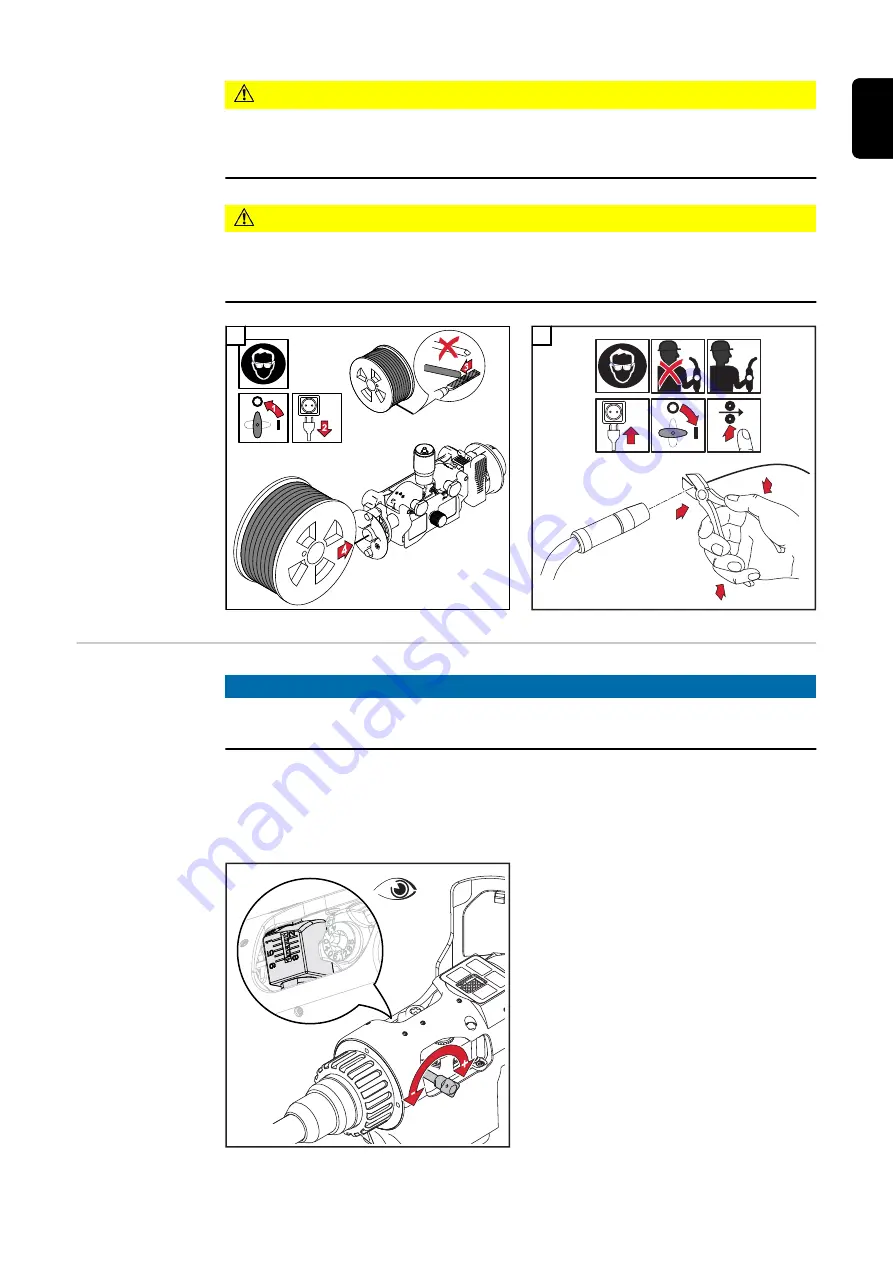
CAUTION!
Risk of injury due to springiness of spooled wire electrode.
▶
When inserting the wire electrode into the 4-roller drive, hold the end of the
wire electrode firmly to avoid injuries caused by the wire springing back.
CAUTION!
Risk of injury from moving or rotating parts in the welding system.
▶
Ensure that all covers are closed and that all parts are fitted properly and re-
main in place during operation.
1
3
2
1
4
2
Setting the con-
tact pressure for
the WF 25i
Robacta Drive
NOTE!
Set the contact pressure in such a way that the wire electrode is not deformed
but nevertheless ensures proper wirefeeding.
IMPORTANT!
In the event of a large change in contact pressure, a system calib-
ration must be carried out.
How to perform the system calibration is explained in the power source Operat-
ing Instructions.
Contact pressure standard values for
steel rollers:
Al,
AlSi
1 - 2
AlMg 2 - 4
FCW 3 - 5
CuSi 5 - 7
Steel 6 - 8
CrNi
6 - 8
153
EN
Summary of Contents for Pull
Page 2: ......
Page 21: ...System configurations 21...
Page 22: ...22...
Page 41: ...System components 41...
Page 42: ...42...
Page 56: ...OPT CAM Prepared for the camera recording option 56...
Page 67: ...Controls connections and mechan ical components 67...
Page 68: ...68...
Page 85: ...Assembling system components conventional robot 85...
Page 86: ...86...
Page 91: ...3 3 Nm 2 43 lb ft 2 6 Nm 4 43 lb ft 3 91 EN...
Page 95: ...Optimum hosep ack arrangement R R R 200 mm R 200 mm 95 EN...
Page 102: ...102...
Page 103: ...Assembling system components PAP robot 103...
Page 104: ...104...
Page 107: ...Fitting the SplitBox SB 500i R PAP Fitting the SB 500i R PAP 1 2 107 EN...
Page 110: ...4 Nm 2 95 lb ft 2 8 Nm 5 90 lb ft 3 110...
Page 112: ...11 Nm 8 11 lb ft 5 Fitting the WF Robacta Drive to the robot PAP 1 1 2 112...
Page 113: ...3 42 0411 1315 BY2 0201 4896 4 18 Nm 13 28 lb ft 5 113 EN...
Page 114: ...6 114...
Page 117: ...3 4 117 EN...
Page 118: ...118...
Page 119: ...Assembling further system com ponents 119...
Page 120: ...120...
Page 128: ...2 128...
Page 131: ...Steel inner liner 1 2 3 131 EN...
Page 134: ...Fitting the OPT i camera mount 1 2 3 4 134...
Page 137: ...5 6 Fitting the inner liner unreeling wirefeeder wire buffer 1 2 137 EN...
Page 138: ...3 4 5 Fitting the inner liner SplitBox WF 25i with in ternal inner liner 1 138...
Page 143: ...Start up 143...
Page 144: ...144...
Page 148: ...5 6 7 8 Torx 40 1 Nm 0 74 lb ft 9 10 148...
Page 150: ...5 12 mm 42 0411 0160 6 7 8 12 mm 5 Nm 3 69 lb ft 42 0411 0160 2 9 10 150...
Page 151: ...2 1 11 12 151 EN...
Page 156: ...156...
Page 157: ...Troubleshooting maintenance and disposal 157...
Page 158: ...158...
Page 168: ...3 4 Inserting the inner liner 1 2 3 4 168...
Page 173: ...Removing the CrashBox PAP from the robot 1 BY2 0201 4896 2 3 4 5 1 6 173 EN...
Page 175: ...Technical data 175...
Page 176: ...176...
Page 181: ...Triggering torques and weight distance diagram 181 EN...
Page 188: ...The product conforms to the requirements of the IEC 60974 7 standard ED Duty cycle 188...
Page 195: ...195 EN...


