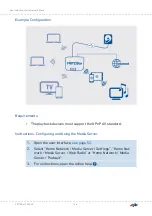
Instructions: Attaching and Configuring USB Storage
Important
Click on “Remove Safely” before removing a USB storage medium
from the FRITZ!Box. This ensures that all data transmission has been
completed.
1.
Connect the USB storage device to the USB port on the FRITZ!Box.
The USB storage medium will be re-indexed and you can access
the stored contents.
Configuring Access Rights for USB Storage Media
Under “System / FRITZ!Box Users” in the FRITZ!Box user interface you
can specify which contents on a connected USB storage media can be
accessed by each user account.
Instructions: Configuring a USB Printer as a Network Printer (Windows 8)
A USB printer connected to the FRITZ!Box can be configured as a net-
work printer in Windows 8:
1.
Press the keyboard shortcut “Windows key + X” and select
“Control Panel” from the context menu.
2.
Click on “Hardware and Sound” and select “Devices and
Printers”.
3.
In the menu bar, click on “Add a printer”.
4.
In the “Add Printer” window, select “The printer that I want isn’t
listed” and then “Next”.
5.
Enable the option “Add a printer using TCP/IP address or
hostname” and click on “Next”.
6.
in the “Hostname or IP
address” field.
If the FRITZ!Box is configured as a wireless repeater or an IP
client, enter here the IP address at which the FRITZ!Box can be
reached in the network.
7.
Click on “Next”.
8.
Click on “Next” and confirm with “Finish”.
FRITZ!Box 7530 AX
142
User Interface: Home Network Menu
• • • • • • • • • • • • • • • • • • • • • • • • • • • • • • • • • • • • • • • • • • • • • • • • • • • • • • • • • • • • • • • • • • • • • • • • • • • • • • • • • • • • • • • • • • • • • • • • • • • • • • • •
• • • • • • • • • • • • • • • • • • • • • • • • • • • • • • • • • • • • • • • • • • • • • • • • • • • • • • • • • • • • • • • • • • • • • • • • • • • • • • • • • • • • • • • • • • • • • • • • • • • • • • • •

