background image


OPERATING INSTRUCTIONS 

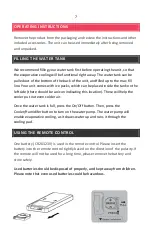
Remove the product from the packaging and review the instructions and other 
included accessories. The unit can be used immediately after being removed 
and unpacked. 

FILLING THE WATER TANK


We recommend filling your water tank first before operating the unit, so that 
the evaporative cooling will be functional right away. The water tank can be 
pulled out of the bottom of the back of the unit, and filled up to the max fill 
line. Your unit comes with ice packs, which can be placed inside the tank on the 
left side (there should be an icon indicating this location). These will help the 
cooler put out even colder air.  

Once the water tank is full, press the On/Off button. Then, press the 
Cooler/Humidifer button to turn on the water pump. The water pump will 
enable evaporative cooling, as it draws water up and runs it through the 
cooling pad. 

USING THE REMOTE CONTROL 

One battery (CR2032 3V) is used in the remote control. Please insert the 
battery into the remote control tightly based on the direction of the polarity. If 
the remote will not be used for a long time, please remove the battery and 
store safely.  

Used batteries should be disposed of properly, and kept away from children. 
Please note that even used batteries could be hazardous. 


Summary of Contents for EC200WF

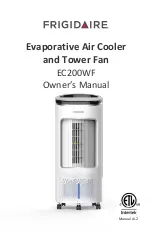
Page 1: ...Manual v1 2 Evaporative Air Cooler and Tower Fan EC200WF Owner s Manual ...

Page 2: ...ranty 12 SPECIFICATIONS MODEL NO EC200WF RATED VOLTAGE 120V RATED FREQUENCY 60 Hz RATED POWER 65W NOISE 55dB AIRFLOW 350 CFM COVERAGE 250 square feet DIMENSIONS Depth 12 7 in Width 12 8 in Height 31 4 in Frigidaire is a registered trademark of Electrolux Home Products Inc All rights reserved Manufactured under license by NewAir LLC 6600 Katella Ave Cypress CA 90630 Comments questions support newai...

Page 3: ...s Registering your product information online is safe secure and takes less than 2 minutes to complete Alternatively we recommend you attach a copy of your sales receipt below and record the following information which can be found on the manufacturer s nameplate on the back of the unit You will need this information if it becomes necessary to contact the manufacturer for service inquiries Date of...

Page 4: ... plug is intended to fit in a polarized outlet only one way If the plug does not fit fully in the outlet reverse the plug If it still does not fit contact a qualified electrician Do not attempt to override this safety feature WARNING To reduce the risk of fire or electric shock do not use this fan with any solid state speed control device WARNING Chemical Burn Hazard Keep batteries away from child...

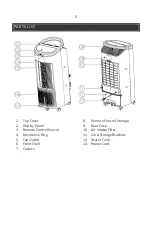
Page 5: ... Top Cover 8 Remote Control Storage 2 Display Panel 9 Rear Case 3 Remote Control Sensor 10 Air Intake Filter 4 Decorative Ring 11 Cord Storage Brackets 5 Fan Outlet 12 Water Tank 6 Front Shell 13 Power Cord 7 Casters ...

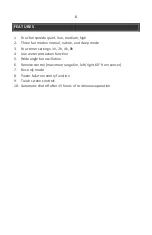
Page 6: ...p mode 3 Four timer settings 1h 2h 4h 8h 4 Low water protection function 5 Wide angle fan oscillation 6 Remote control maximum range 6m left right 60 from sensor 7 Fan only mode 8 Power failure memory function 9 Touch screen controls 10 Automatic shutoff after 15 hours of continuous operation ...

Page 7: ...left side there should be an icon indicating this location These will help the cooler put out even colder air Once the water tank is full press the On Off button Then press the Cooler Humidifer button to turn on the water pump The water pump will enable evaporative cooling as it draws water up and runs it through the cooling pad USING THE REMOTE CONTROL One battery CR2032 3V is used in the remote ...

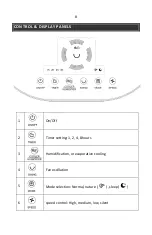
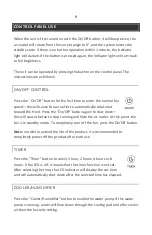
Page 8: ...8 CONTROL DISPLAY PANELS 1 On Off 2 Timer setting 1 2 4 8 hours 3 Humidification or evaporative cooling 4 Fan oscillation 5 Mode selection Normal nature sleep 6 speed control High medium low silent ...

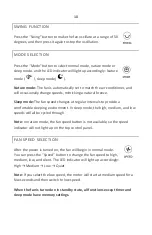
Page 9: ...ward the front Press the On Off button again to shut down this will cause the fan to stop running and hide the air outlet At this point the fan is in standby mode To completely turn off the fan press the On Off button Note In order to extend the life of the product it is recommended to completely power off the product after each use TIMER Press the Timer button to select 1 hour 2 hours 4 hours or ...

Page 10: ...ide a comfortable sleeping environment In sleep mode the high medium and low speeds will all be cycled through Note In nature mode the fan speed button is not available so the speed indicator will not light up on the top control panel FAN SPEED SELECTION After the power is turned on the fan will begin in normal mode You can press the Speed button to change the fan speed to high medium low and sile...

Page 11: ...he water tank regularly Wipe the tank clean and use your diluted vinegar solution to remove any hard water stains in the tank 9 Make sure the tank is completely dry and free of any leftover vinegar residue before using the unit again 10 Be careful handling the appliance while cleaning as working around the appliance with wet hands may cause electric shock 11 After cleaning ensure the outer dust fi...

Page 12: ...nsit or when moving the appliance Improper power supply such as low voltage defective household wiring or inadequate fuses Accident alteration misuse or abuse of the appliance such as using non approved accessories inadequate air circulation in the room or abnormal operating conditions extreme temperatures Use in commercial or industrial applications Fire water damage theft war riot hostility or a...

Reviews: