133
PB
TROUBLESHOOTING
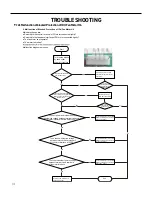
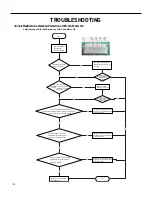
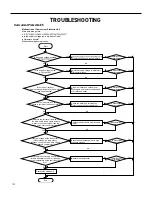
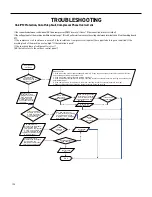
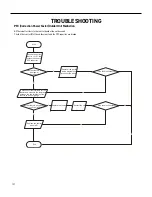
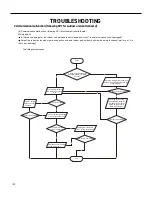
Capacity Charging malfunction - Outdoor unit
1) Capacitor charge fault (Fault with outdoor unit) (AP1 below refers to the outdoor control panel)
Main Check Points:
Use AC voltmeter to check if the voltage between terminal L and N on the wiring board is within 210VAC~240VAC.
If the reactor (L) is correctly connected? If the connection is loose or fallen? If the reactor (L) is damaged?
N
Y
N
Y
N
Y
N
Y
N
Y
Turn on the unit
and wait 1 minute
Use DC voltmeter
to measure the
voltage on the two
ends of electrolytic
capacitor
Fault with the voltage
Voltage higher than 200V?
testing circuit on
control panel AP1
Replace the control
panel AP1
Voltage within
Shut down the power
and repair the power
210VAC~250VAC?
supply to restore the
Measure the AC voltage between
terminalL andN on wiring board
XT(power supply)
range
210VAC~250VAC
power on and
restart the unit
If the fault is
eliminated?
Check the
connection of reactor
Shut down the power and wait 20 minutes;or
use DC voltmeter to measure the voltage
on the two ends of capacitor , until
the voltage is lower than 20V
(L in the Electrical
Wiring Diagram)
If the wiring of
Connect the reactor
reactor L is normal?
Laccording to Elec-
trical Wiring Diagr-
am correctly
Re-energize and
turn on the unit
If the fault is
eliminated?
End
Replace the control
panel AP1
Summary of Contents for FSHW091
Page 8: ...8 INTRODUCTION FSHSW09A1A FSHSW12A1A Figure 102 Indoor Units FSHSW18A3A FSHSW24A3A FSHSW36A3A ...
Page 47: ...47 INSTALLATION ...
Page 48: ...48 INSTALLATION Installation Tools ...
Page 72: ...72 WIRED CONTROLLER Display ...
Page 122: ...122 TROUBLESHOOTING Malfunction of IDUFanMotorU8 Service Manual No Start End ...
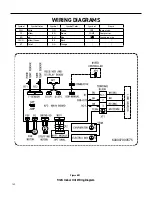
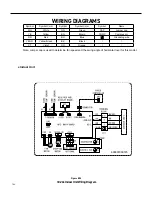
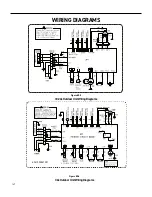
Page 146: ...146 WIRING DIAGRAMS Figure 8054 9 12KOutdoorUnitWiringDiagrams 60000706067401 3 2 N 1 C3 C4 ...
Page 158: ...158 FIgure 906 PARTS CATALOG 9KOutdoorUnit 28 27 29 31 30 32 ...
Page 160: ...160 PARTS CATALOG 12k OutdoorUnit 28 27 29 31 30 32 FIgure 907 ...

