15
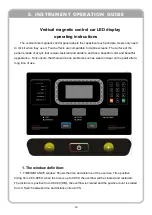
2. "CALORIES" window: shows the calorie value of the exerciser, positive count 0.0 - 999.9
(KJ
);
3. “PULSE/SPEED” window: display the heart rate and speed of the athlete, and switch the
time and distance interval 3S once;
4. "Central dot matrix display area window" This area is the WELCOME display area, program
process map and resistance level, etc. The resistance level is expressed by “L+number”, for
example, L01 is the resistance level 1. L12 is the resistance level 12;
5. “The green display tube above” is a circular runway with a circle of 400 meters;
6. "Left LED display area window" This area displays the current motion mode indicator;
2. Keyboard function:
1. “PRO” is the mode selection button: when in standby state, press this button to make a
circular selection “BIM”
,
“TIME COUNT”
,
“DISTANCE COUNT”“CALORIES COUNT”
,
“Heart
Rate”
,
“MANUAL MODE”,“ALPINE PASS”
,“5K LOOP”,“TRAINING TOOLS”,“FOReset WALK”,“TRAILBLAZER”,“10K LOOP”,“RANDOM HILL
”
。
2. “Reset”is the return button: press this button to return to the standby interface;
3. “START/STOP” is start & stop button: When user movement and the screen been light up
,
Press this button to start and suspend the work of the vertical bike.
4. “+”
、
“-”is the resistance adjustment button: the standby state is for set the resistance rate.
After start, it is used to adjust resistance, and its adjustment range is 1/time.
5. “1
,
2
,
……9
,
0
,
Delete,ok” is the keyboard shortcut for resistance level.
Machine debugging process:
1.Stepping on the vertical bike, the electronic meter shows that it is in standby state after
three seconds, pressing the“
”button, then the vertical bike will start to work, running
resistance is 1 now. at this time, please observe whether the vertical bike works properly. Press
all the buttons on the electronic watch, and observe whether each button corresponds to its
function, whether the button is valid and whether it feels good.
2.Shake the handrail of the machine by hand to confirm the stability of the machine.
Summary of Contents for FF-UB200
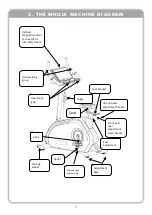
Page 1: ...FF UB200 FRENCH FITNESS UB200 COMMERCIAL UPRIGHT BIKE ASSEMBLY MANUAL...
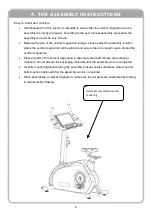
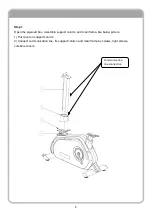
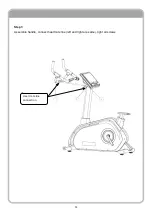
Page 10: ...10 Step 2 Assemble screen connect communication tight all screws Communication line connection...
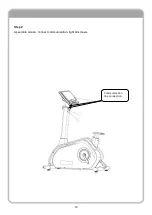
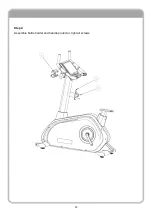
Page 12: ...12 Step 4 Assemble bottle holder and handle protector tight all screws...
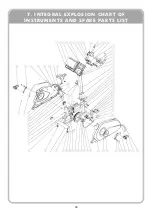
Page 18: ...18 7 INTEGRAL EXPLOSION CHART OF INSTRUMENTS AND SPARE PARTS LIST...


