63
2
Custom Job
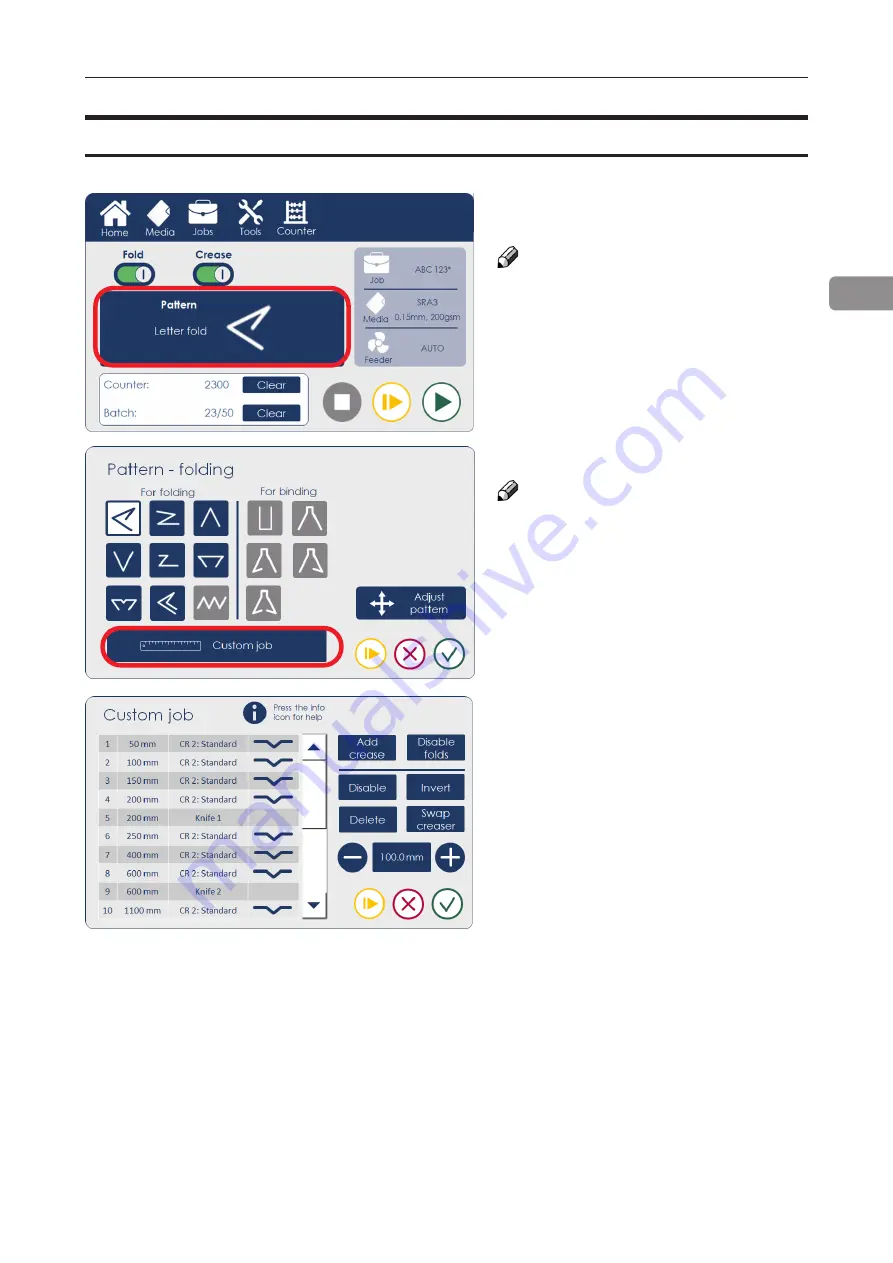
To fully customize the number and position of creases on the sheet set up a custom job:
NOTE:
Choosing a new pattern will reset
any fine adjustments that may have
been entered on other screens.
NOTE:
The custom job will be based on
the previously selected pre-set.
1. Click the Pattern button on the
Home screen
2. Select Custom job.
3. Custom job screen:
• Click Add crease to add more
creases to the list.
• Select a crease and use the + / -
buttons to adjust its position.
• Use the Delete button to remove
the selected crease from the list.
• The Swap creaser button can be
used to select whether the 1st or
the 2nd creaser will be used to
make this crease (only available if
the optional creaser unit has been
installed).
• Use the Proof button to test run a
single sheet.
•
When satisfied, click the green
check
mark.
• Use the Disable button to temporarily suspend
the selected crease without deleting it (for ex-
ample, when programming jobs in two passes)
• The Invert button disables all currently ena-
bled creases and enables all currently disabled
creases. Use this when running jobs in two
passes.
Summary of Contents for Atlas C350
Page 1: ...Atlas C350 Automatic Air Feed Programmable Folder Creaser OPERATOR MANUAL 10 2021...
Page 6: ...Page intentionally blank...
Page 16: ...16 Page intentionally blank...
Page 37: ...37 1 Page intentionally blank...
Page 46: ...46 1 Page intentionally blank...
Page 56: ...56 1 Page intentionally left blank...
Page 57: ...57 1 Page intentionally left blank...
Page 72: ...72 2 Page intentionally blank...
Page 86: ...86 3 Page intentionally blank...
Page 91: ...91 4 C D E F G H I...


