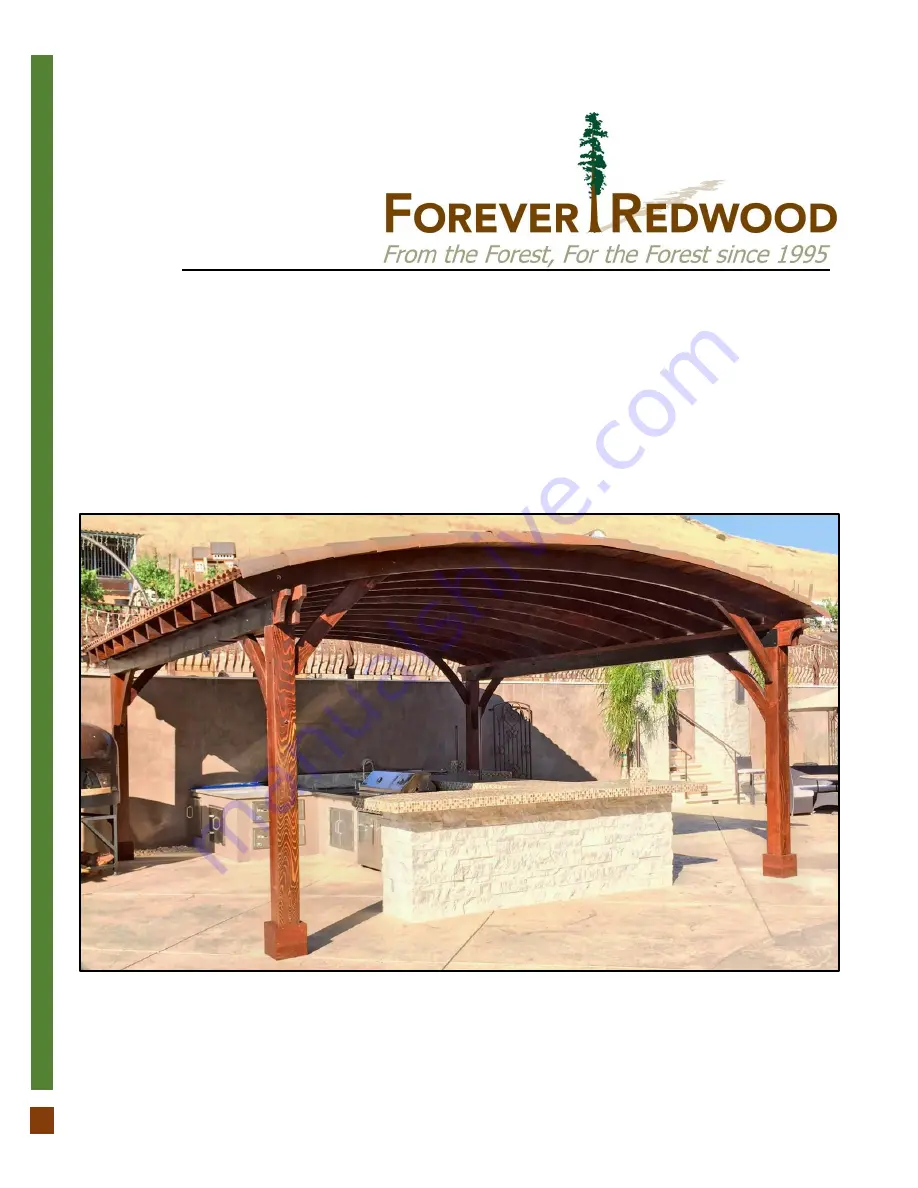
ASSEMBLY INSTRUCTIONS FOR THE
ARCHED THICK TIMBER PAVILION
866.332.2403 (TOLL FREE); 7am – 7pm Pacific Time, Monday-Saturday
Page 1: ...ASSEMBLY INSTRUCTIONS FOR THE ARCHED THICK TIMBER PAVILION 866 332 2403 TOLL FREE 7am 7pm Pacific Time Monday Saturday ...
Page 2: ...Supports Supports with In Between Blocking Arched Rafters Secondary Knee Braces Main Knee Braces Roof Boards Boots Standard Gale Wind or Hurricane Anchors Bases If ordered Qty 4 2 2 Quantity will vary 4 4 Quantity will vary 4 4 Note Part numbers in the Content of Boxes Table are for reference only These do not match to the numbers marked on the parts sent ...
Page 3: ... to the supports with in between blocking To attach the main knee braces to the supports 3 8 X 6 Bolts To attach the arched rafters to the posts 3 8 X 8 Bolts To attach the knee braces to the posts 3 8 X 5 Bolts To attach the secondary knee braces to the arched rafters 3 Deck Screws To attach the arched rafters to the supports To attach the boots to the Post 1 5 8 Deck Screws To attach the roof bo...
Page 4: ...7 8 9 DESCRIPTION Posts Single Supports Supports with In Between Blocking Arched Rafters Secondary Knee Braces Main Knee Braces Roof Boards Boots Anchor Bases Note Part numbers in the Drawing are for reference only These do not match to the numbers marked on the parts sent ...
Page 5: ...e 9 with X 4 anchor bolts A or lag bolts Please see the How to anchor your pergola document for all details Set your post 1 in the saddle of the anchor bases 9 Drill a ø hole in the post prior to anchoring to facilitate the ratcheting of the hardware After that use a 5 16 X 3 lag bolts B to attach each post to the its respective anchor base 9 Step 2 First attach the single supports 2 to the posts ...
Page 6: ...wn and attach to the posts with the single support bolts C Each part has a series of numbers that indicate where to attach the part with the corresponding number Step 4 Attach the single supports 2 to the supports with in between blocking 3 use 3 8 X 7 bolts C The quantity of bolts depends on the length of the supports 3 8 X 7 Bolts 3 3 ...
Page 7: ...rt has a series of numbers that indicate where to attach the part with the corresponding number Step 6 Attach the secondary knee braces 5 to the posts with 3 8 x 8 bolts E and to the arched rafters with 5 16 x 5 bolts F Each part has a series of numbers that indicate where to attach the part with the corresponding number 3 8 X 6 Bolt 8 X 3 Deck Screws 4 4 3 8 X 8 Bolts 5 16 x 5 Bolts 5 5 5 5 ...
Page 8: ...x 7 bolts C Each part has a series of numbers that indicate where to attach the part with the corresponding number Step 8 Use 8 x 3 deck screws G to attach the other arched rafters 4 to the supports Each part has a series of numbers that indicate where to attach the part with the corresponding number 3 8 X 8 Bolts 3 8 X 7 Bolts 5 3 Deck Screws 4 4 4 4 4 4 ...
Page 9: ...ews H to attach the roof boards 7 to the arched rafters Each part has a series of numbers that indicate where to attach the part with the corresponding number Step 10 Finally attach the boots 8 to the posts with 8 x 3 deck screws G 7 7 Put the central boards first 8 X 3 Deck Screws ...
Page 10: ...AVILION www ForeverRedwood com This completes the Pavilion assembly Hope you enjoy your set for many decades If you ever have a problem or a question don t hesitate to call us 866 332 2403 or email us We are here to support you ...
Page 11: ...w ForeverRedwood com HOW TO REMOVE THE ELECTRICAL WIRING TRIM FROM THE POST Step 1 First remove the deck screws to remove the boots of the post Step 2 Loosen the nut on the bolt support Don t add the lag bolt over the trim piece initially ...
Page 12: ...PAVILION www ForeverRedwood com Step 3 The bolt of the post and the brace must be flush with the post Step 4 Swing the brace aside After that remove the trim Note The dimensions of the trim are standard adjust if necessary Bolt ...