63
8-4. KEY Transitions
Key images are displayed on the M/E (background) output screen. This chapter explains how to
perform key transitions using KEY1 as an example.
1. Perform key setup for KEY1.
See section 9. "KEY/DSK."
2. Perform a desired transition referring to the below procedures.
CUT Transition
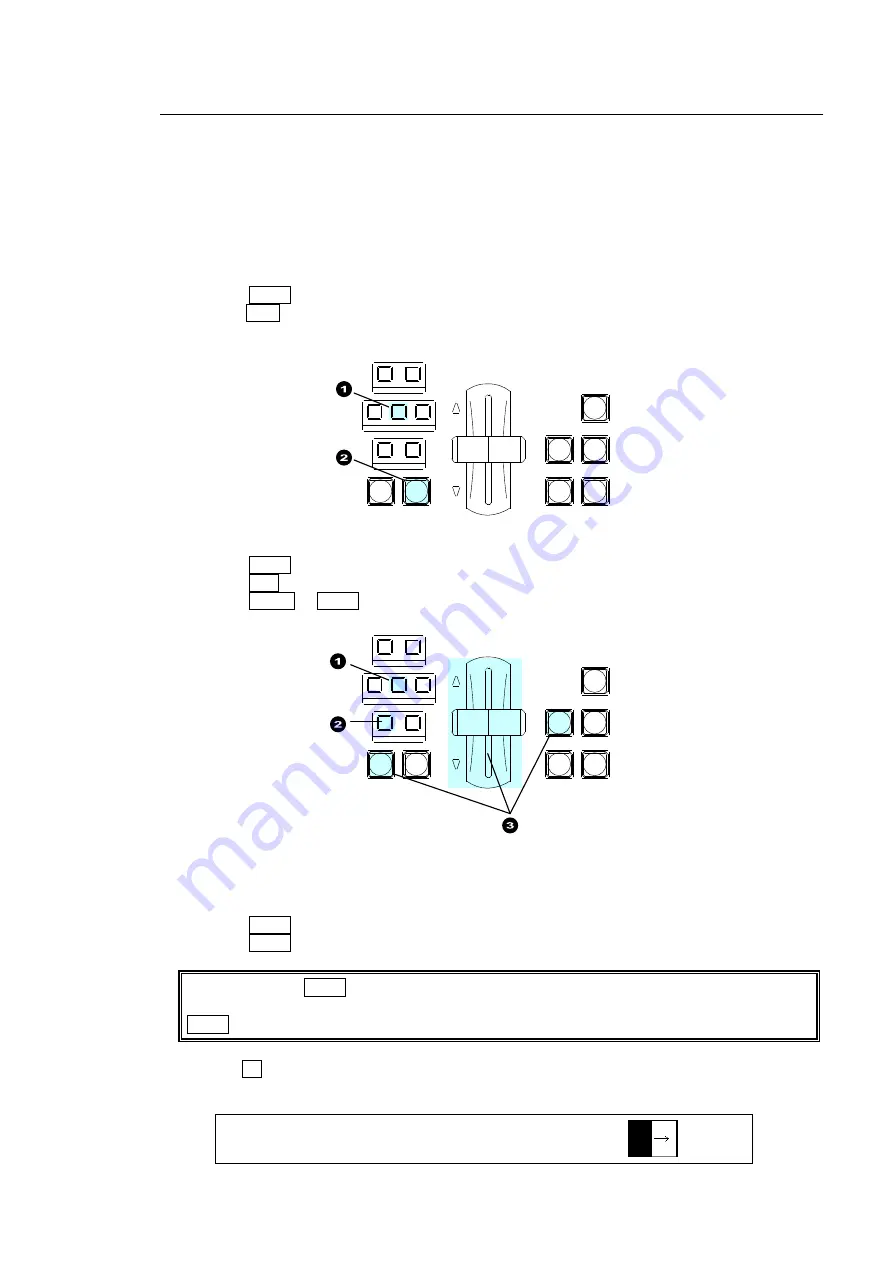
(1) Press KEY1 in the NEXT TRANSITION block.
(2)Press CUT to perform a key CUT transition. KEY1 will be inserted onto the program video.
Press the button again to remove KEY1 from the screen.
MIX Transition
(1) Press KEY1 in the NEXT TRANSITION block.
(2) Press MIX in the TRANSITION TYPE block.
(3) Press AUTO or KEY1 or move the fader lever to perform the KEY1 MIX transition.
Pattern transition
(1) Press KEY1 in the NEXT TRANSITION block.
(2) Press WIPE in the TRANSITION TYPE block. The [TRANS](1/6) menu is displayed.
If the light of the WIPE button does not turn on, a WIPE channel is already being used for
BKGD or KEY2. In such case, change the BKGD or KEY2 type to MIX, then press the
WIPE button again for KEY1.
(3) Turn F4 to select a desired pattern. (Note that only one pattern can be set at the same
time.)
TRANS : RATE :TRANS LIMIT :PAT NO : 1/6
BKGD : =30 :=100.0 =OFF : =0 :
REV
NOR/REV
DIRECTION
BLACK
TRANS
BKGD
KEY1
KEY2
NEXT TRANSITION
MIX
WIPE
KEY1
KEY2
TRANSITION TYPE
AUTO
CUT
DSK1
DSK2
REV
NOR/REV
DIRECTION
BLACK
TRANS
BKGD
KEY1
KEY2
NEXT TRANSITION
MIX
WIPE
KEY1
KEY2
TRANSITION TYPE
AUTO
CUT
DSK1
DSK2


