


14
4-3. Changing HVS-GPIO128 IP Address
Connect to the switcher and open the Setup menu. The followings are factory default menu settings.
1. Setup Unit IP Address
[ 192.168.0.40 ]
2. Setup Subnet Mask
[ 255.255.255.0 ]
3. Setup Gateway Address
[ 192.168.0.1 ]
4. Setup Target IP Address
[ 192.168.0.80 ]
5
. Setup Target TCP Port (1…65535)
[ 52001 ]
6. Save and Reboot
7. Exit without Save
No.
Item
Default
Description
1
Unit IP Address
192.168.0.40
Sets IP address of HVS-GPIO128.
2
Subnet Mask
255.255.255.0
Sets Netmask of HVS-GPIO128.
3
Gateway Address
192.168.0.1
Sets Default gateway of HVS-GPIO128.
4
Target IP Address 192.168.0.80
Specifies IP address of the target HVS
switcher.
5
Target TCP Port
52001
Se
ts the Send (HVS switcher’s ) TCP port
address.
◆
Changing Network Settings
(1)
Enter “
#
“ in the terminal.
(2)
Then, enter “
setup
” (case ignored) and press
Enter
.
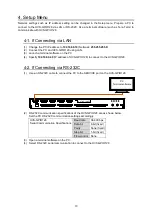
(3) The Setup menu content appears as shown below.
(4)
At first, to change the GPI Unit’s IP address, type “
1
” in the terminal, then press
Enter
.
>1
(5) Type
a new IP address
, then press
Enter
.
IP : 192.168.0.30
(6) The screen returns to the Setup menu top.
Verify that the new IP address is set.
1. Setup Unit IP Address
[ 192.168.0.30 ]
2. Setup Subnet Mask
[ 255.255.255.0 ]
3. Setup Gateway Address
[ 192.168.0.1 ]
4. Setup Target IP Address
[ 192.168.0.80 ]
5
. Setup Target TCP Port (1…65535)
[ 52001 ]
6. Save and Reboot
7. Exit without Save
(7) Change other settings, as needed, in the same manner.
(8) After all settings are complete, type “
6
”, then press
Enter
.
HVS-GPIO128 will automatically restart and changes are applied.
*
To close the Setup menu without changing settings, type “
7
”, then press
Enter
.