background image


Thermal Imaging Scanner 

 Unpacking 

the 

Imager 

 3 

Unpacking the Imager 

Carefully unpack the following items: 


TiS Thermal Imaging Scanner 


AC Power Adapter/Charger 


Rugged Carrying Case 


SD Memory Card 


SD Card Reader 


Soft Transport Bag 


SmartView

®

 Software 


Warranty Registration Card 

Note 

Fluke recommends the use of the supplied SD memory card with the 
Imager. Fluke does not warrant the use or reliability of aftermarket 
SD memory cards of different brands or capacities. 

Charging the Battery 

Before using the Imager for the first time, charge the battery for at least two 
hours. The Imager’s battery condition is displayed in the upper-left corner of 
the display. When the last segment of the battery icon extinguishes, the Imager 
will shut down and will require recharging before operating again. To charge 
the Imager’s battery: 

W


Caution 

To avoid damage to the Imager, remove it from the dc car 
charger before starting or jump starting the vehicle. 

Note 

Ensure the Imager is near room temperature before connecting it to 
the charger. See the charging temperature specification. Do not 
charge the Imager in hot or cold places. Charging in extreme 
temperatures reduces the battery pack’s ability to hold a charge. 

1.


Plug the ac input of the battery charger into an ac wall outlet. 

2.


Plug the battery charger’s dc output into the Imagers ac adapter socket. 

The optional Car Charger can also be used to recharge the Imager’s battery. 

Summary of Contents for TiS

Page 1: ...2010 2010 Fluke Corporation All rights reserved Specifications are subject to change without notice All product names are trademarks of their respective companies TiS Thermal Imaging Scanner Users Ma...

Page 2: ...ce center to obtain return authorization information then send the product to that service center with a description of the difficulty postage and insurance prepaid FOB Destination Fluke assumes no ri...

Page 3: ...Setting the Time 7 Focusing and Capturing an Image 8 Saving Imager Data 8 Adjusting the Thermal Image 9 Selecting a Palette 9 Auto or Lock Range 9 Reviewing and Deleting Stored Images 10 Changing the...

Page 4: ...TiS Users Manual ii...

Page 5: ...iii List of Tables Table Title Page 1 Symbols 2 2 Features and Controls 5 List of Figures Figure Title Page 1 Range and Span Settings 10...

Page 6: ...TiS Users Manual iv...

Page 7: ...0 C The thermal image can be displayed using any one of a number of color palettes Imager power is supplied by a rechargeable Nickel Metal Hydride battery A full visual image 640 X 480 can be displaye...

Page 8: ...in this manual for more information Do not use in a manner not specified in this manual or the protection provided by the equipment may be impaired To avoid injury from explosion chemical burns or fi...

Page 9: ...splayed in the upper left corner of the display When the last segment of the battery icon extinguishes the Imager will shut down and will require recharging before operating again To charge the Imager...

Page 10: ...ith the Imager on turn the Imager off to view the battery condition icon Removing the Imager from the charger before a full charge is indicated will deprive the battery of a full charge and thus short...

Page 11: ...and Controls 5 Table 2 Features and Controls 7 1 4 5 8 2 6 3 9 10 12 11 gja01 eps Item Description LCD Display Function Softkeys F1 F2 and F3 Battery Cover Speaker Auto backlight sensor Hand strap AC...

Page 12: ...images To bring up the menu press The text above each function softkey and corresponds to that softkey throughout all menu screens Press to open and cycle through the menus The menu will disappear sev...

Page 13: ...st the selected date element 5 Press the softkey labeled Next to move to the next date element 6 Press the softkey labeled Done when finished Setting the Time To set the time 1 Press until Time appear...

Page 14: ...e the saved image format see the Setting File Format section later in this manual Pressing the softkey labeled Settings allows modification of image characteristics such as palette picture in picture...

Page 15: ...he softkey labeled Palette to display the available palette options 3 Press the softkey labeled Up or Down to move between the palette options 4 Press the softkey labeled Back Done to set the Imager t...

Page 16: ...menu 3 Press the softkey labeled Review 4 Press the softkey labeled Up to display the previous image or Down to display the next stored image To delete a single Image from the SD card 1 Perform the s...

Page 17: ...ng energy high emissivity the emissivity factor is estimated to be 95 or 0 95 This estimate works for most purposes This simplification does not work however on shiny surfaces or unpainted metals Thes...

Page 18: ...nd voice recording to annotate the stored image Bitmap bmp images can be transferred to a PC and used immediately in non proprietary software and electronic documents Images in is2 format can be trans...

Page 19: ...ger is in operation To insert an SD card into the Imager carefully slip the card into the slot with the card s label facing toward the LCD display Push the card in until it catches Setting the Backlig...

Page 20: ...leave the camera exposed to a heat source or high temperature environments such as an unattended vehicle in the sun Do not store the Imager on the charger for more than 24 hours as reduced battery lif...

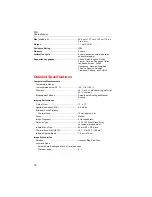
Page 21: ...cluded Power Battery Internal rechargeable battery pack included Battery Life 3 to 4 hours continuous use assumes 50 brightness of LCD Battery Charge Time 2 hours full charge with ac adapter or dc car...

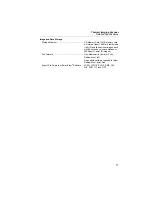
Page 22: ...ture Range not calibrated below 10 C 20 C to 100 C Accuracy 5 C or 5 whichever is greater at 25 C nominal Measurement Modes Smooth Auto Scaling and Manual Scaling Imaging Performance Field of View 17...

Page 23: ...least 1200 fully radiometric is2 IR and linked visual images each with 60 seconds voice annotations or 3000 basic bmp IR images File Formats Non Radiometric bmp or Fully Radiometric is2 No analysis s...

Page 24: ...TiS Users Manual 18...

Reviews: