RUSKA 7252
Users Manual
6-4
Preparation
1.
Verify that the Calibrator’s Reference Port is open to atmosphere for gauge
calibrations and that the calibration standard is connected to the Test Port.
2.
For Calibrator’s with pressure ranges greater than 100 psi (690 kPa) verify that the
supply pressure port is plugged, or a supply pressure is connected to the supply port
and adjusted to 110% of the full scale of the Calibrator.
3.
Verify that the Calibrator has been at stable environmental temperature and that the
oven temperature
MENU | MENU | DISPLAY | TEMP
has been stable for at least
three hours.
4.
Verify that the Calibrator is in Measure mode (see Chapter 4).
5.
If desired, change the Calibrator’s units of measure (see Chapter 4) to match those of
the calibration standard.
6.
Set the gas head to 0. Select
MENU | MENU | SETUP | USER
.
7.
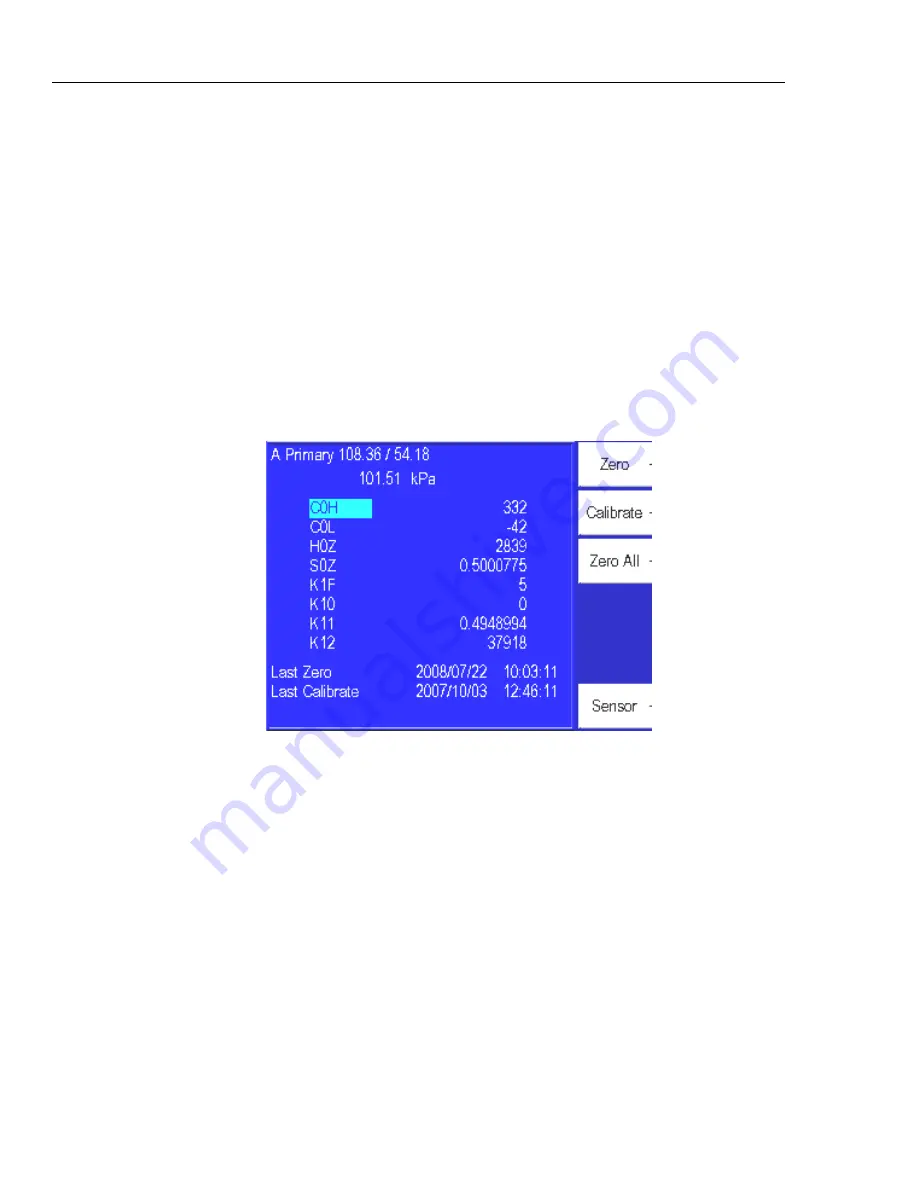
To access the Calibration screen, select
MENU | MENU | CALIBRATION
.
glb44.bmp
Figure 6-2. Calibration Screen
8.
When you first enter the Calibration menu, the top left hand side of the display will
indicate which sensor is being the viewed. The sensors coefficients are then shown
below the sensor label. On the RUSKA 7252, there are two primary sensors. The first
sensor that is shown is the primary measuring sensor A. This is indicated by the word
A Primary displayed in the top of the display. To cycle through the various sensors
that exist in the system, you would press the Sensor [F6] function key. Assure that
you are in the screen that is labeled A Primary (or B Primary) depending on which
channel is being calibrated.
9.
To begin the calibration process, press the Calibrate [F2] button. If the calibration
access code is enabled, enter it at the prompt. The first calibration screen will appear.
Note
To exit the calibration procedure before the calibration coefficients have
been changed, press CANCEL any time during the procedure. Canceling
restores all previous calibration values.
Summary of Contents for RUSKA 7252
Page 3: ...7252 Change Language Hold key for 5 seconds enter mode ...
Page 4: ......
Page 10: ...RUSKA 7252 Users Manual vi ...
Page 12: ...RUSKA 7252 Users Manual viii ...
Page 20: ...RUSKA 7252 Users Manual 1 6 ...
Page 40: ...RUSKA 7252 Users Manual 3 6 ...
Page 72: ...RUSKA 7252 Users Manual 4 32 ...
Page 114: ...RUSKA 7252 Users Manual 6 22 ...
Page 118: ...RUSKA 7252 Users Manual 7 4 ...


