background image

F

F

I

I

T

T

N

N

O

O

R

R

D

D


C

C

Y

Y

C

C

L

L

O

O


2

2

0

0

0

0

R

R


R

R

E

E

C

C

U

U

M

M

B

B

E

E

N

N

T

T


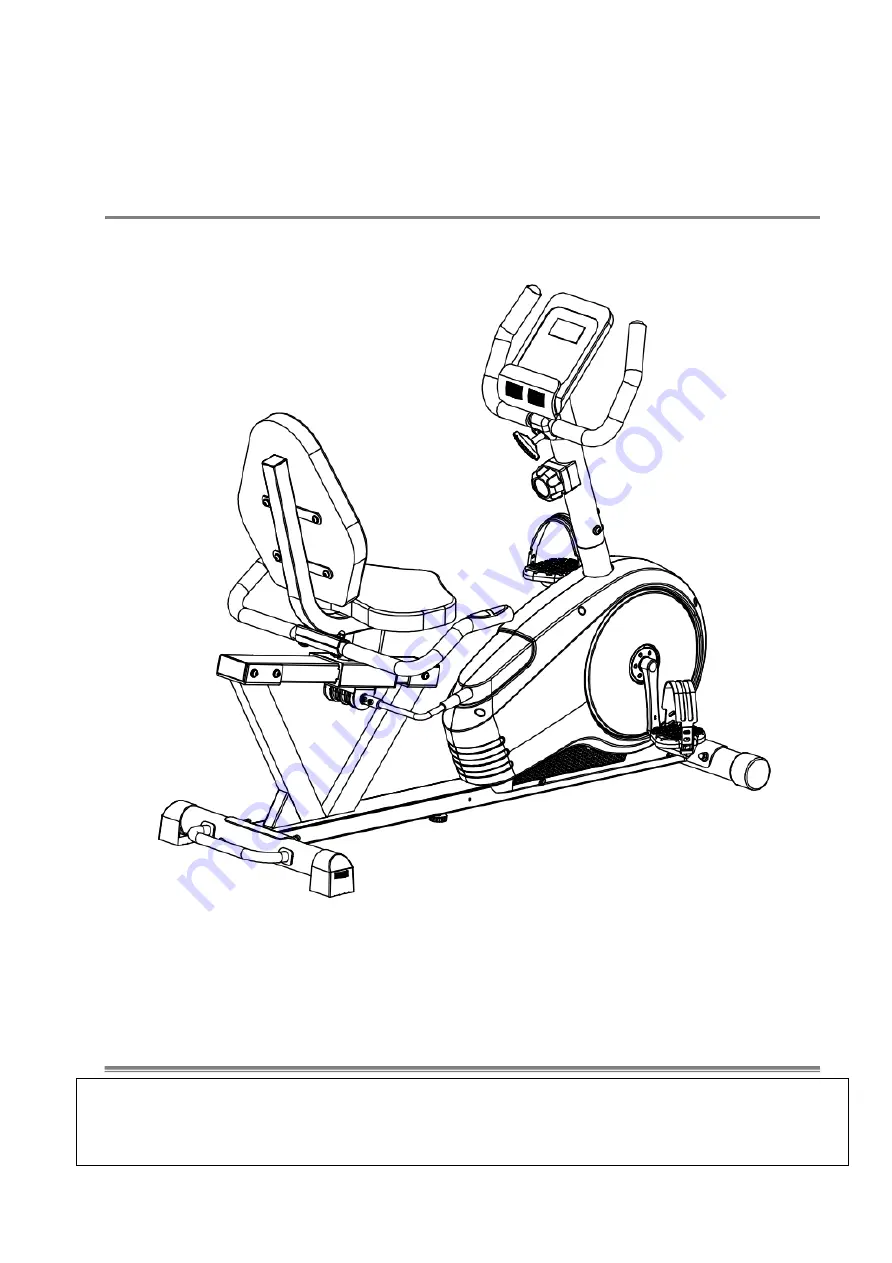
OWNER’S MANUAL


IMPORTANT! 

Please read all instructions carefully before using this product. 
Retain this manual for future reference. 
The  specifications  of  this  product  may  vary  slightly  from  the  illustrations  and  are  subject  to 
change without notice. 

Summary of Contents for CYCLO 200R

Page 1: ...UM MB BE EN NT T OWNER S MANUAL IMPORTANT Please read all instructions carefully before using this product Retain this manual for future reference The specifications of this product may vary slightly from the illustrations and are subject to change without notice ...

Page 2: ... finishing training 6 Your health can be affected by incorrect or excessive training Consult a doctor before beginning a training program He can define the maximum settings Pulse Watts Duration of training etc to which you may train yourself and can get precise information during training This machine is not suitable for therapeutic purposes 7 Only train on the machine when it is working correctly...

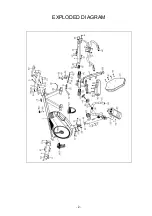
Page 3: ... 2 EXPLODED DIAGRAM ...
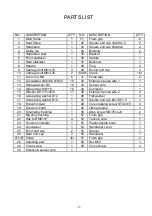
Page 4: ...r D8 16 43 Sensor wire 1 14 Allen screw M8 16 18 44 Computer 1 15 Washer D8 1 5 Φ16 17 45 Extension pulse wire 2 2 16 Axle spring washer D12 1 46 Flat washer 4 17 Axle spring washer D10 1 47 Square end cap 60 30 1 5 1 18 Eccentric gear 1 48 Cross tapping screw ST4 2x18 4 19 Eccentric shaft 1 49 Lifting handle 1 20 Small alloy bushing 1 50 Allen screw M8 75 L20 2 21 Big alloy bushing 1 51 Foam grip...

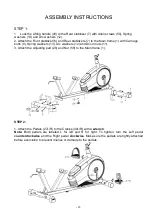
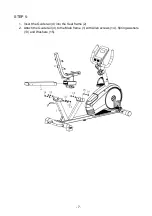
Page 5: ...iage bolts 9 Spring washers 13 Arc washers 12 and Acorn nuts 11 3 Attach the Adjusting pad 28 and Nut 58 to the Main frame 1 STEP 2 1 Attach the Pedals 27L R to the Cranks 40L R with a wrench Note Both pedals are labeled L for left and R for right To tighten turn the Left pedal counterclockwise and the Right pedal clockwise Make sure the pedals are tightly attached before exercising to prevent inj...

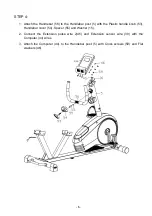
Page 6: ... hole in the Handlebar post 5 3 Connect the Tension wire 52 with the Tension controller 23 as shown in picture A 4 Attach the Tension controller 23 to the Handlebar post 5 with Cross screws 29 and Arc washers 24 5 Lock the Handlebar post 5 to the Main frame 1 with Allen screws 14 Spring washers 13 and Arc washers 12 ...

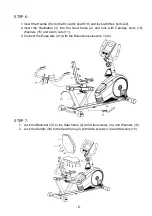
Page 7: ... with the Plastic handle knob 53 Handlebar cover 54 Spacer 55 and Washer 15 2 Connect the Extension pulse wire 2 45 and Extension sensor wire 30 with the Computer 44 wires 3 Attach the Computer 44 to the Handlebar post 5 with Cross screws 59 and Flat washers 46 ...

Page 8: ... 7 STEP 5 1 Insert the Guide rail 4 into the Seat frame 2 2 Attach the Guide rail 4 to the Main frame 1 with Allen screws 14 Spring washers 13 and Washers 15 ...

Page 9: ... 3 into the Seat frame 2 and lock with Carriage bolts 10 Washers 15 and Acorn nuts 11 3 Connect the Pulse wire 41 with the Extension pulse wire 1 42 STEP 7 1 Lock the Backrest 37 to the Seat frame 2 with Allen screws 14 and Washers 15 2 Lock the Saddle 36 to the Seat frame 2 with Allen screws 14 and Washers 15 ...

Reviews: