Please read this manual and save it
Please read this manual and save it
with your original sales receipt.
with your original sales receipt.
Tools needed for assembly: Phillips acrewdriver
Tools needed for assembly: Phillips acrewdriver
and hammer (both not included);
and hammer (both not included);
Assembly Tool (included).
Assembly Tool (included).
Use only with a Power Wheels
Use only with a Power Wheels
®
6 Volt
6 Volt
Rechargeable Battery with A-Style Connector
Rechargeable Battery with A-Style Connector
and Built-In Thermal Fuse and Power Wheels
and Built-In Thermal Fuse and Power Wheels
®
Super 6 Volt Charger (both included).
Super 6 Volt Charger (both included).
Owner's Manual
Owner's Manual
with Assembly Instructions
with Assembly Instructions
For Model K3033
For Model K3033
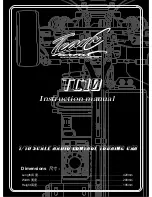
Owner's Manual
with Assembly Instructions
For Model K3033
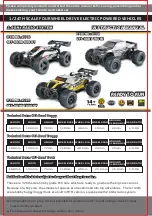
Product features may vary
Product features may vary
from the picture above.
from the picture above.
Product features may vary
from the picture above.
Please read this manual and save it
with your original sales receipt.
Tools needed for assembly: Phillips screwdriver
and hammer (both not included);
Assembly Tool (included).
Use only with a Power Wheels
®
6 Volt
Rechargeable Battery with A-Style Connector
and Built-In Thermal Fuse and Power Wheels
®
Super 6 Volt Charger (both included).