background image

Maintenance Instructions

Seite/Page 124   -   Kaptitel/Chapter 9: Maintenance Instructions

9.12.14

3. Now tighten the screw again and fasten it with 20 Nm.

9.11.3  Refiller-Set

An appropriate refiller set can be purchased at Fischer Panda.

The refiller set contains:

Oil: Omala S4 GX 220.

Syringe plus hose

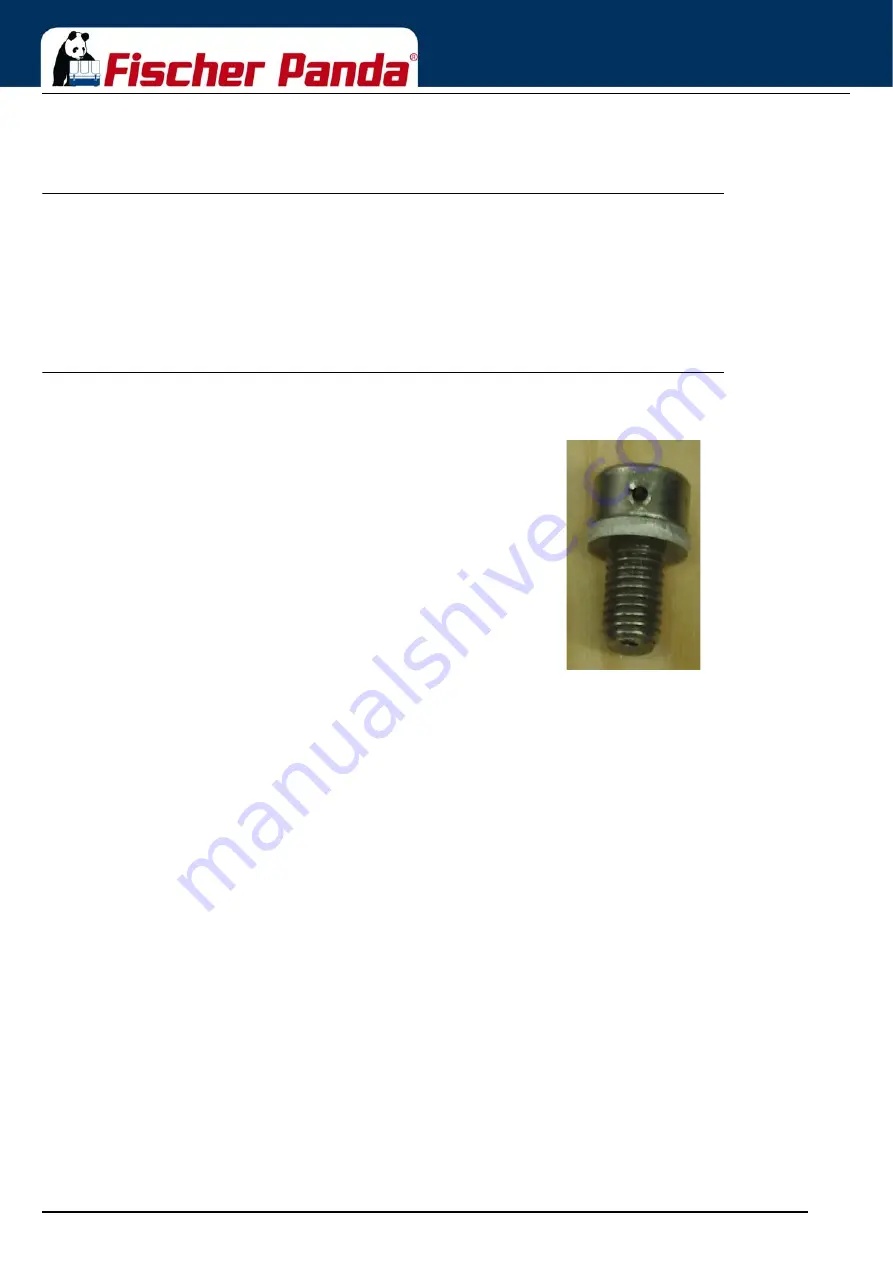
9.11.4  Screw plug

Fig. 9.11.4-1: Screw plug

ATTENTION: 

The screw plug has a ventilation hole!

Do NOT replace it by a normal screw - this will cause oil 
loss!

Summary of Contents for 10000/9

Page 1: ...marine generator Panda 6500 7 mini PMS 230 400 V 50 Hz 6 kVA 120 240 V 60 Hz 6 kVA Panda 8000 8 mini PMS 230 400 V 50 Hz 8 kVA 120 240 V 60 Hz 8 kVA Panda 10000 9mini PMS 230 400 V 50 Hz 10 5 kVA 120...

Page 2: ...l is permitted only in consultation with the manufacturer Fischer Panda GmbH 33104 Paderborn reserves all rights regarding text and graphics Details are given to the best of our knowledge No liability...

Page 3: ...ctive conductor and potential equalisation 23 3 6 1 2 Protective conductor for Panda AC generators 23 3 6 1 3 Switch off all loads while working on the generator 23 3 6 1 4 Potential equalisation for...

Page 4: ...50 6 3 4 Components of Combustion Air 52 6 3 5 Components of the Electrical System 54 6 3 6 The Operation Surveillance System 58 6 3 7 Components of the Oil Circuit 60 6 4 Remote Control Panel see se...

Page 5: ...anel see separate control panel manual 94 7 11 Generator AC System Installation 95 7 11 1 Installation with looped in AC Control box 95 7 11 2 Installation AC Box distribution panel separate connected...

Page 6: ...ring 117 9 10 1 1 Demounting the cooling disc if existent 118 9 10 1 2 Demounting the backend bearing 118 9 10 1 3 Installing the new backend bearing 119 9 11 Checking the oil level of the generator e...

Page 7: ...ltage fluctuates 184 10 4 4 Generator not able to start electric motor 184 10 4 5 Diesel motor fails to start 184 10 4 6 Starter is turning motor but fails to start 184 10 4 7 Motor does not achieve e...

Page 8: ...ecifications 214 11 6 1 Coolant mixture ratio 214 11 7 Types of coil 215 11 7 1 HP1 230V 50 Hz 215 11 7 2 HP2 120V 60 Hz 215 11 7 3 HP2 120V 60 Hz Duo 216 11 7 4 HP3 400V 50 Hz 216 11 7 5 HP2 120V 60...

Page 9: ...5 2 Stopping the generator 236 13 6 Automatic adapter optional 237 13 6 1 Function 237 13 6 2 The Automatic input 238 13 6 3 Terminal connections 239 13 7 Master Slave adapter optional 239 13 7 1 Fisc...

Page 10: ...Seite Page 10 Kapitel Chapter 2 9 12 14 Leere Seite Intentionally blank...

Page 11: ...rried out Fischer Panda can supply Service Kits which are ideal for regular servicing tasks We only supply the highest quality components which are guaranteed to be the RIGHT parts for your generator...

Page 12: ...ll quantities if inhaled swallowed or absorbed through the skin WARNING Important information This warning symbol draws attention to special warnings instructions or procedures which if not strictly o...

Page 13: ...to the danger of electric shock and draws attention to special warnings instructions or procedures which if not strictly observed may result in severe personal injury or loss of life due to electric s...

Page 14: ...er due to corrosive substances potential contamination of person Warning of substances that cause chemical burns upon contact These substances can act as contaminants if introduced into the body WARNI...

Page 15: ...les PPE Wearing safety goggles protects the eyes from damage Optical spectacles are not a replacement for the corresponding safety goggles MANDATORY INSTRUCTION Wear protective gloves PPE Wearing prot...

Page 16: ...bols are used throughout this manual to show which tool must be used for maintenance or installation Spanners W A F X width across flats of X mm Hook wrench for oil filter Screw driver for slotted hea...

Page 17: ...eral Instructions and Regulations 9 12 14 Kapitel Chapter 3 General Instructions and Regulations Seite Page 17 Clamp on ammeter DC for synchronous generators AC for asynchronous generators Torque wren...

Page 18: ...g these measures lies with those who undertake the installation of the generator in the final system 3 4 Customer registration and guarantee Use the advantages of registering your product you will rec...

Page 19: ...ces and ensure work safety Familiarise yourself with the equipment and its limits Keep the generator in good condition 3 5 3 Personal protective clothing PPE For maintenance and repair work on the equ...

Page 20: ...st fumes are vented appropriately leak proof system and that an adequate fresh air supply is available for the generator and the operator forced ventilation Check the system regularly for leakage and...

Page 21: ...from the batteries Ensure that the battery terminals are tightly connected and not corroded to avoid sparking Use an appropriate terminal grease Check the charge level with an adequate voltmeter or a...

Page 22: ...h water and soap and dry them with a soft cloth Immediately replace damaged or missing warning and instruction signs This also applies to the installation of spare parts 3 6 1 Special instructions and...

Page 23: ...The battery must always be disconnected if work on the generator or electrical system is to be carried out so that the generator cannot be started up unintentionally 3 6 1 3 Switch off all loads whil...

Page 24: ...is installed free from any influence due to friction and crushing 3 6 2 Recommended starter battery sizes Use only batteries approved by the manufacturer as starter batteries Use the battery capacity...

Page 25: ...da generator capsule the positive battery cable must be routed so that it is protected from heat and vibrations by means of an adequate conduit protective sleeve It must be installed so that it does n...

Page 26: ...risk of skin burns Protect all battery contacts against accidental contact For battery banks Use only deep cycle batteries Starter batteries are not suitable Lead acid gel batteries are recommended T...

Page 27: ...by electrical shocks 5 Safety steps to follow if someone is the victim of electrical shock Do not touch the injured person while the generator is running Switch off the generator immediately If you ca...

Page 28: ...ds you by pulling slowly 4 Open Airway Tilt head back and lift chin Shout Are you OK 5 Check for Breathing Look listen and feel for breathing for 3 to 5 seconds 6 Give 2 Full Breaths Keep head tilted...

Page 29: ...of Fischer Panda generators The manual is the base and the guideline for the correct installation and maintenance of Fischer Panda Generators The manual does not substitute the technical evaluation a...

Page 30: ...ansport and Loading Unloading 5 3 1 Transporting the generator The generator must always be upright for transport For transport the Fischer Panda Transport Box shall be used for the generator The gene...

Page 31: ...used for transport loading 5 4 Scope of delivery The Fischer Panda PMS generator system contains following components 5 4 1 Asynchronous Generator Fig 5 4 1 Fischer Panda Generator Fischer Panda Gene...

Page 32: ...ol Box is not required for this generators representative picture Fig 5 4 1 4 Fischer Panda Manual Fischer Panda Manual The Fischer Panda Manual contains following components Clear foil bag with gener...

Page 33: ...4 1 Sound insulation capsule side part To open the sound insulation capsule the closures must be rotated roughly 180 counter clockwise Use a flat head screwdriver Pull the sidewalls out by gripping i...

Page 34: ...s at long periods of stand still time or shutdown Stand still is divided into the following groups Short term standstill 1 to 3 months Medium term standstill winter storage 3 to 6 months Long term sta...

Page 35: ...for corrosion on a regular basis 5 5 2 Arrangements at a short term standstill Short term standstill 1 to 3 months Measure the charge of battery via the open circuit voltage At stand still 7 days dis...

Page 36: ...and oil according to specification Remove preservation agent of the engine with petroleum Degrease the v belt pulleys and install v belt correctly Check v belt tension Disconnect turbocharger oil pres...

Page 37: ...exhaust and close lines again Sprinkle preserving agent to the intake and exhaust lines than attach again Remove valve cover and sprinkle the inside of the cover shafts springs rocker lever etc with p...

Page 38: ...water filter Keep shut off lever at generator in 0 position and activate starter for approx 10 sec Make a break for 10 sec and repeat procedure twice Visual inspection of the generator according to in...

Page 39: ...e Panda Generator 9 12 14 Kapitel Chapter 6 The Panda Generator Seite Page 39 6 The Panda Generator 6 1 Type plate at the Generator Fig 6 1 1 Type plate at the generator Fig 6 1 2 Description type pla...

Page 40: ...02 DC alternator 03 V belt for DC alternator and cooling water pump 04 Oil pressure switch 05 Magnetic switch for starter motor 06 Starter Motor 07 Engine oil filter 08 Generator power terminal box 09...

Page 41: ...ing with air filter 03 Actuator for speed control 04 Generator housing with winding 05 Cooling water connection block 06 Failure bypass switch 07 Flat fuse 08 Starter Relay Ks 09 Pre Glow Relay Glow P...

Page 42: ...ater pump 04 Alternator 12 V 05 V belt for DC alternator and internal cooling water pump 06 Engine oil filter 07 Seawater pump 08 Fuel fine filter 09 Seawater inlet 10 Fuel intake connection 11 Fuel b...

Page 43: ...01 04 02 03 06 05 07 08 01 Capacitor boost at generators with boost option only 02 Air suction housing with air filter 03 Capacitor excitation 04 Generator front plate 05 Cooling plate 06 Cooling wate...

Page 44: ...ilation screw fuel 02 Ventilation screw internal cooling water pump 03 Ventilation screw thermostat housing 04 Thermostat housing with thermostat set 05 12 V DC alternator 06 Oil filler neck 07 Water...

Page 45: ...1 2 Raw water impeller pump Raw water impeller pump The raw water pump is fitted with a rubber impeller This pump is self inductive If for example you forget to open the sea valve then you must expect...

Page 46: ...6 3 1 5 Raw Water Injection Raw Water Injection The injection point for the marine generator water cooled exhaust system is situated at the exhaust connection pieces The exhaust connections must be re...

Page 47: ...by two hose connections The connecting pieces showed here serves as constant ventilation for the water cooling system In case the external expansion tank is connected with two hoses the system will ve...

Page 48: ...generator casing from corrosion and electrolyse the terminal block assumes the function of a sacrificial anode Fig 6 3 2 6 Internal Cooling Water Pump Internal Cooling Water Pump The fresh water pump...

Page 49: ...hermostat Housing Ventilation screw thermostat housing The ventilation screw on the thermostat housing should occasionally be opened for control purposes Standing machinery should principally carry ou...

Page 50: ...reinforcement a second pump must be installed Fig 6 3 3 2 Connection Pieces for the Fuel Pipe Connecting Pieces for the Fuel Pipe 1 Fuel intake 2 Fuel backflow Fig 6 3 3 3 Fuel Filter Fuel Filter A co...

Page 51: ...he fuel injection lines must be ventilated individually Fig 6 3 3 6 Glow Plugs Glow plugs The glow plugs serve the pre chamber for the heating with cold start The glow device must be operated if the t...

Page 52: ...or combustion air at the sound insulated capsule Drilling at the lower surface of the sound cover serve the admission of fresh air for the entrance It must be safe that no raw water or other water can...

Page 53: ...Elbow Combustion chamber intake elbow The figure shows the induction elbow at the combustion engine At the front of this induction elbow you can see the hose connection between air suction housings a...

Page 54: ...ng circle is fed here Fig 6 3 4 8 Exhaust Outlet Exhaust outlet Connect the exhaust pipe with the water lock 6 3 5 Components of the Electrical System Fig 6 3 5 1 Cable for Starter Battery Connection...

Page 55: ...trol box Fig 6 3 5 3 Electrical Connections Electrical connections for control All remaining cables are located at the front end of the generator for electrical connections depending upon type The con...

Page 56: ...an external automatic starter A separate speed sensor is necessary for this automatic starting system The speed sensor is fitted as series in the case of some models In the case of other models the o...

Page 57: ...pter A2 In these terminal box there are the electrical connection points for the AC generator Here is also the bridge for the protective grounding of the generator The cover may only be removed if it...

Page 58: ...Fig 6 3 6 1 Thermo switch at Cylinder Head Thermo switch at cylinder head The thermo switch at the cylinder head serves to monitor the generator temperature All thermo switches for the generators fro...

Page 59: ...asons are installed independently in parallel Fig 6 3 6 4 Oil Pressure Switch Oil pressure switch In order to be able to monitor the lubricating oil system an oil pressure switch is built into the sys...

Page 60: ...y attached at the operating side for numerous generator types Please ensure the filler necks are always well secured after filling with engine oil Consider also the references to the engine oil specif...

Page 61: ...hose The generator should be installed in such a way that a collecting basin can be placed deeply enough If this is not possible an electrical oil drain pump must be installed Note Lubricating oil sh...

Page 62: ...The Panda Generator Seite Page 62 Kaptitel Chapter 6 The Panda Generator 9 12 14...

Page 63: ...otes for the installation Notice see Safety first on Page 12 Follow the general safety instruction at the front of this manual Warning Risk of injury Working at a running generator can result in sever...

Page 64: ...t is required to minimize the health hazards Protective clothing safety boots protective gloves Ear defender safety glasses Attention disconnect all load Disconnect all load during the work at the gen...

Page 65: ...he vibrations which would arise with a closed soil 7 3 Generator Connections Connect all electrical wires within the capsule tightly to the motor and the generator This is also the case for fuel lines...

Page 66: ...he suction resistance in the line at a minimum the raw water intake system i e sea cock through hull fitting inlet filter etc must have an inner diameter of at least 1 25 mm This applies also to insta...

Page 67: ...cks in air for a short time The impeller pump will be lubricated by raw water and the impeller life span will be increased By the installation of a check valve in the raw water inlet line which is und...

Page 68: ...middle and extended respectively at each end by an additional hose and a connecting nipple Both hose ends must be led outside of the sound cover to one point if possible 600 mm over the waterline in...

Page 69: ...e of the sound cover to one point if possible 600 mm over the waterline at the mid ships line The valve is connected at the highest place with the two hose ends 7 4 6 Generator Housing cooled by Raw W...

Page 70: ...oling water expansion tank The Panda generator is normally supplied with an additional external cooling water expansion tank This tank must be installed in such a way that its lower edge is at least 5...

Page 71: ...ng screw on the pipe socket of the internal cooling water pump Close the vent screw when air free water comes out Check the water level in the expansion tank during the venting Fill up if necessary Ne...

Page 72: ...be that the cooling water is not circulating The generator will heat up very quickly and switch off because of overheating Anti freeze In the interest of safety the freezing point of the closed circu...

Page 73: ...Seite Page 73 7 5 4 Scheme for Freshwater Circuit at Two Circuit Cooling System Fig 7 5 4 1 Scheme for Freshwater Circuit at Two Circuit Cooling System 1 Expansion Tank 2 Exhaust Manifold 3 Thermosta...

Page 74: ...an also be installed The exhaust hose descends from the capsule to the water lock Then the hose rises via the goose neck to the silencer see drawing The goose neck must be vertical and sit preferably...

Page 75: ...This is a certain sign for cooling water that got into the oil pan If the engine is started under these conditions the water and the oil are mixed into an emulsion The oil will quickly become so visc...

Page 76: ...he exhaust hose can get into the exhaust elbow area at the engine If this happens the cooling water can get into the combustion chamber via an open discharge valve This would lead to irreparable damag...

Page 77: ...out All cooling water remaining in the hose at that point flows back into the waterlock At the same time the diesel engine itself continues to cart cooling water through the cooling water pump as long...

Page 78: ...ally in tilted position by the waterlock moving out of the center line See the following pictures Fig 7 7 3 1 1 Ideal position of the waterlock In Fig 7 7 3 1 1 the waterlock is mounted in center unde...

Page 79: ...degrees Tilted position 45 degrees Fig 7 7 3 1 4 In this case the water level rise so high that the distance constitutes only 325 mm Even when the water lock is mounted in the ideal spot at an extrem...

Page 80: ...12 14 Summary The preset minimum height of 600 mm must be regarded unconditionally and is only valid if the waterlock is mounted in its ideal position in center underneath the generator A higher posit...

Page 81: ...ave to be reckoned concerning motor yachts Here it is only necessary to regard that the volume of the waterlock is measured so large that it can take the entire amount of water flowing back and at the...

Page 82: ...hat in a tilted position of 30 degrees you already face the highest risk of sea water sloshing into the combustion chamber Fig 7 7 3 2 4 Tilted position 45 degrees Tilted position 45 degrees Fig 7 7 3...

Page 83: ...istance between waterlock and the generator s center line 1000 mm Fig 7 7 3 2 5 waterlock 1000 mm next to center line Fig 7 7 3 2 6 Tilted position 15 degrees Tilted position 15 degrees Fig 7 7 3 2 6...

Page 84: ...ath the generator at least in reference to the ships center line Thus the waterlock is prevented from leaking very strongly when the ship is tilted The leaking of the waterlock leads to a rise of the...

Page 85: ...e Page 85 Fig 7 8 0 1 Water Flow Exhaust Water Separator Water flow exhaust water Separator Fig 7 8 0 2 Exhaust Water Separator Water flow exhaust water Separator 1 Raw water outlet 2 Hose connector 3...

Page 86: ...waterline If the through hull exhaust outlet has to be mounted far from the generator an exhaust water separator must definitely be installed The raw water from the separator must then run along the...

Page 87: ...stallation Instructions Seite Page 87 Fig 7 8 1 2 Example for an unfavourable Installation Example of an unfavourable installation Water lock not far enough below the lowest level of the generator Dis...

Page 88: ...must be mounted to the diesel tanks Do not connect the generator fuel supply lines with any other fuel lines of other diesel systems The following items need to be installed Fuel supply pump DC Pre fi...

Page 89: ...or is mounted higher than the tank in order to prevent fuel running back into the tank after the motor has been switched off which can lead to enormous problems if the generator is switched off for a...

Page 90: ...l pump has to be run audibly By moving the failure bypass switch you can hear the solenoid valve of the generator starting and stopping when the sound insulation cover is taken off 3 After the fuel pu...

Page 91: ...nerator is then Earth Ground free 7 10 1 Connection of the starter battery block IAn own separate starter battery must be installed for the generator The positive cable of the battery is attached dire...

Page 92: ...s up to 90 C 195 F The batteries must be installed in such a way that they do not chafe through or other mechanical load can be stripped The battery poles must be secured against unintentional short c...

Page 93: ...e 120 V installation Fig 7 10 1 3 DC Relay DC Relay The Panda generators 8000 to 30 are equipped with various DC relays which can be found under the terminal strip The various relays have the followin...

Page 94: ...Kaptitel Chapter 7 Installation Instructions 9 12 14 Fig 7 10 1 5 Battery installation Scheme 7 10 2 Connection of the remote control panel see separate control panel manual 1 2 4 3 1 Generator 2 Bat...

Page 95: ...RST Be sure that all electrical installations including all safety systems comply with all required regulations of the regional authorities This includes lightening conductor personal protection switc...

Page 96: ...power connection III Inverter The cam type switch must have 2 poles so that MP and phase can be switched off If a 3 phase current system is also installed with the option of supplying from either the...

Page 97: ...not required Electrical fuses It is absolutely essential that the electrical system installation is inspected by a qualified electrical technician The generator should have its own AC input electrical...

Page 98: ...electrical wires high voltage and low voltage to the generator The front panel must always be closed since the AC Control box produces 400 V during operation The AC Control box must be electrically c...

Page 99: ...ached The speed gauge is governed by an adjusting screw above and below Adjustment of this screw may not occur without the expressive approval of the manufacturer All signals pass through the circuit...

Page 100: ...ative for generators without AC control box the Mini VCS The Mini VCS and the capacitors are is mounted at the generator Fig 7 11 4 1 1 Mini VCS at the Panda 6000 ND PMS Mini VCS at the Panda 6500 NE...

Page 101: ...ave to be made on board 7 11 6 Jump start at high starting current Booster Additionally the automatic start booster is located on the circuit control board The starting current is increased by connect...

Page 102: ...lso comply with the hook up requirements of the shore current grid Generally a leakage current relay is sufficient for safe electrical operation however this must be confirmed by the electrical safety...

Page 103: ...id an unexpected starting of the generator the starter battery must be disconnected before start working at the generator Attention Danger to life Rotating parts inside of the generator Do not run the...

Page 104: ...ons 8 3 2 1 The soot of the generator is due to the fact that The cylinder temperatures are too low to ensure complete burning of all the fuel delivered A further result is that of abnormal carbon bui...

Page 105: ...ped with various sensors temperatures switches The combustion engine is further equipped with a oil pressure control switch which switches the motor off if the oil pressure sinks to a particu lar leve...

Page 106: ...et Note The instructions and regulations of the remote control panel data sheet must be respected Respect the safety instruction in front of this manual 8 7 Stopping the generator see remote control p...

Page 107: ...refore before starting work at the generator Make sure that the generator is stopped and the starter battery is disconnected to guarantee that the generator cannot be inadvertently started Do not run...

Page 108: ...ctions for safety reasons Warning Hot surface material Generator oil and antifreeze can be hot during after operation Risk of severe burns Instruction Personal protective equipment necessary During In...

Page 109: ...can be raised up to 30 200 h max Make sure that the dynamic operation hours are not reset accidently between the service interval 9 5 General maintenance instructions 9 5 1 Checks before each start O...

Page 110: ...urface with marine generators Measure the oil level when the ship is not lop sided Run the generator for about 10 minutes to ensure that the engine is warm Wait for 3 minutes so the oil can flow back...

Page 111: ...ark by less than 50h there might be a technical problem In that case we recommend going to a shop or a Fischer Panda service point if the oil is cloudy or even creamy coolant might have mixed with the...

Page 112: ...erator on a levelled surface with marine generators Change the oil when the ship is not lop sided Run the generator for about 10 minutes to ensure that the engine is warm Wait for 3 minutes so the oil...

Page 113: ...e oil drain screw by means of the open ended wrench from the oil drain hose rotating direction left Use a second open ended wrench to lock Make sure to do this over the container Use spanner size 17 m...

Page 114: ...heck oil level after every 2 litres with the oil dipstick 9 Check proper filling level See section 9 7 Checking oil level on page 110 When the proper filling level is reached screw in the oil cap agai...

Page 115: ...s Fig 9 9 1 1 1 Battery Keep battery clean and dry Remove dirty clamps Clean terminal posts and and clamps of the battery and grease with acid free and acid resistant grease When reassembling ensure t...

Page 116: ...Keep sparks and naked flames away from the battery Do not allow battery acid to come into contact with skin or clothing Wear protective goggles Do not rest tools on the battery 9 10 Grease lubricated...

Page 117: ...ckend bearing with cooling disc Sample Picture 9 10 1 Exchange of grease lubricated bearing STOP Only special trained persons are allowed to do this maintenance Warning Automatic start DANGER FOR LIFE...

Page 118: ...existent Fig 9 10 1 1 1 Demounting the cooling disc To demount the cooling disc detach the cooling discs holding nut and take off the disc Sample Picture 9 10 1 2 Demounting the backend bearing Fig 9...

Page 119: ...the shaft 01 Bearing cover 02 Fixing screw 03 Holes for disengaging Sample picture Note If there is no suitable extractor available a suitable extractor can be purchased from Fischer Panda Check the...

Page 120: ...slightly canted because of the material which is brought up by the ejector screws A canted bearing case causes a canted ball bearing which will wear out quite fast Sample Picture Fig 9 10 1 3 4 Attach...

Page 121: ...grommet up to the shaft screw on long hexagon nut Grease Oil thread rod Guide ball bearing with one hand to avoid canting on the shaft Sample Picture Fig 9 10 1 3 7 Press in ball bearing With the oth...

Page 122: ...unt cooling disc if existent Mount presilencer and circuit points Refill cooling water and vent cooling water circuit see generator manual Remove starting lock Reconnect starter battery Run generator...

Page 123: ...Fig 9 11 1 Oil level check 9 11 2 Refilling oil 1 Remove the Allen screw M8 at the right side of the sensor cable 2 Refill some oil by means of a small hopper or a syringe 01 02 03 Older version Newer...

Page 124: ...and fasten it with 20 Nm 9 11 3 Refiller Set An appropriate refiller set can be purchased at Fischer Panda The refiller set contains Oil Omala S4 GX 220 Syringe plus hose 9 11 4 Screw plug Fig 9 11 4...

Page 125: ...plus pole to ensure that the generator can not be started by accident when operations at the generator itself or its electrical system shall be executed 9 12 2 Demounting the bearing Fig 9 12 2 1 3 Oi...

Page 126: ...intenance Instructions 9 12 14 Fig 9 12 2 3 Demounting the oil cap Demount the oil cap by loosening the nuts M6 Tool Socket wrench SW10 Fig 9 12 2 4 Marking the bearing position As shown degrease the...

Page 127: ...l Allen wrench SW6 Fig 9 12 2 6 Insert lifting screws As shown screw in 3 lifting screws M8x50 as far as possible by hand Fig 9 12 2 7 Pull off the bearing seat Then screw in those 3 screws with a scr...

Page 128: ...ng screws Place an appropriate bolt e g extension of a ratch on the inner bearing ring Knock the bearing out of the seat with several careful hammer scales Thereby move the bolt after each scale to ke...

Page 129: ...itel Chapter 9 Maintenance Instructions Seite Page 129 Fig 9 12 2 11 Dismounted shaft sealing ring Dismounted shaft sealing ring Fig 9 12 2 12 Remove o rings Remove O rings from the bearing seat Take...

Page 130: ...m the oil cap Clean the bearing seat and the oil cap Slightly lubricate the new O rings and mount them Fig 9 12 2 14 Mounting the shaft sealing ring Mounting the NEW shaft sealing ring Lubricate greas...

Page 131: ...ge 131 Fig 9 12 2 16 Push the sealing ring on the mandrel the open side should point towards the handle The side marked with X is to be used Fig 9 12 2 17 Fitting the shaft sealing ring Mounting of th...

Page 132: ...to be clean free of partial damages drafts indentations notches scratches Fig 9 12 2 21 Mounting the bearing housing Mounting the bearing housing inside the generator cap Put the bearing housing loose...

Page 133: ...using in its seat with a soft headed hammer or hammer plus mandrel By doing that shift the mandrel after each scale in a circle to avoid canting Otherwise you might risk that the housing is a little b...

Page 134: ...shafts tap hole as far as possible Fig 9 12 2 26 Mount the ball bearing Push the ball bearing the pressure ladle and the washer up against the shaft then screw on the hex nuts Grease lubricate the thr...

Page 135: ...ing By doing that the ball bearing is pressed onto the shaft If necessary hold the crank shaft with an appropriate wrench to keep the diesel engine from rotating concurrently Press the ball bearing on...

Page 136: ...with a bit of grease Tool Allen wrench SW6 Nut torque M6 10 Nm Fig 9 12 2 33 Fill up the oil Filling up the oil Up to the middle of the inspection glass hose Oil type Shell Omala S4 GX 220 Shell Omala...

Page 137: ...rts working and the fuel system will be de aerated after some time automatically It is nevertheless essential to ventilate the system as follows prior to the first operation as all hoses are empty Att...

Page 138: ...a single ventilation screw is installed Fig 9 13 3 Injection nozzles 4 Pressing the starter button can now start the machine The machine should start after a short period 5 If this does not occur then...

Page 139: ...The filter change depends on the fuels degree of pollution but should be executed every 300 operating hours at the latest 01 Fuel filter housing 02 Fuel filter element 03 Sight glass Fig 9 13 1 1 2 Fu...

Page 140: ...hand rotation 9 14 Checking the water separator in the fuel supply Fig 9 14 1 Pre filter with water separator The pre filter with water separator has a cock underneath by which means the water can be...

Page 141: ...housing 2 Change the air filter mat 3 Close the suction air housing 9 14 2 Alternative replacement of the air filter mat with pull out holder Fig 9 14 2 1 Air suction housing with pull out holder 1 A...

Page 142: ...l Chapter 9 Maintenance Instructions 9 12 14 Fig 9 14 2 3 Air suction housing with pull out holder 3 Pull the filter mat holder out Fig 9 14 2 4 Air suction housing with pull out holder 4 Replace the...

Page 143: ...sing by loosening the closure on the right side of the housing 01 Closure Fig 9 14 3 2 Air suction housing 2 Open the combustion air housing by loosening the closure on the left side of the housing 01...

Page 144: ...repeated several times The generator must be switched off before opening the ventilating points Pay attention that the external coolant expansion tank is connected with the generator by the intended c...

Page 145: ...x 60 Seconds then switch off 6 Refill cooling water via the compensation tank 7 The compensation tank is connected to the generator by two hoses The external compensation tank should be filled to a ma...

Page 146: ...after a very short time of operation Therefore the V belt must be checked in short time distances It may be possible that the V belt must be changed after a few weeks Therefore the V belt must be chec...

Page 147: ...tion of the thermostat housing 4 Exchange the V belt Sample Picture Fig 9 14 5 4 V belt 5 Afterwards the V belt must be tightened again 6 The V belt must be tightened in such a way that it is possible...

Page 148: ...e impeller if the cooling water sucking in way is relatively long or the supply is handicapped so that the cooling water sucking in range develops a negative pressure This can reduce first of all the...

Page 149: ...peller Fig 9 16 1 1 Raw water cock Close the raw water stop cock Representative picture Fig 9 16 1 2 Raw water pump Raw water pump on the front side of the genset Representative picture Fig 9 16 1 3 C...

Page 150: ...entative picture Fig 9 16 1 5 Impeller Check to the impeller for damage and replace it if necessary Before the reinsertion into the housing the impeller should have been lubricated with glycerin or wi...

Page 151: ...t be taken from the generator description of this manual All replacements and repairs should be done by a trained person ATTENTION Ensure that the generator cannot be started up accidentally Remove ba...

Page 152: ...ctions 9 12 14 Fig 9 17 3 Actuator 3 Unscrew the grub screw using a size 2 mm socket wrench Representative picture Fig 9 17 4 Actuator 4 Slide spindle to the right Representative picture Fig 9 17 5 Ac...

Page 153: ...lectric starter 11 To reinstall reverse the order of steps Representative picture 9 17 1Check and discharge the capacitors Attention NEVER check the capacitors whilst the generator motor is running Ch...

Page 154: ...tor Fig 9 17 1 2 Discharge capacitor three phase Discharge the capacitor three phase 01 Discharge reactor 5 10kOhm 02 Multimeter 03 Capacitor At three phase capacitors the discharge must be made betwe...

Page 155: ...e electrical connections to the Capacitor It must be ensured that the electrical connections to the capacitor are always tight fitting Loose connections with transitional resistance can mean that the...

Page 156: ...s The original location of the item must be taken from the generator description of this manual All replacements and repairs should be done by a trained person ATTENTION Ensure that the generator cann...

Page 157: ...c starter 3 Pull off rubber cap 4 Loosen hex nut with wrench with W A F 13 mm and remove the electric connections Fig 9 18 4 Electric starter 5 Loosen the lower attachment screw with a hex socket wren...

Page 158: ...r attachment screw is visible from up top view between engine and exhaust manifold 6 Slide the socket wrench fitted with both extensions under the exhaust manifold and insert in the hex socket screw L...

Page 159: ...the item must be taken from the generator description of this manual All replacements and repairs should be done by a trained person 9 Disconnect the starter battery first GND then 10 Disconnect the t...

Page 160: ...original location of the item must be taken from the generator description of this manual All replacements and repairs should be done by a trained person ATTENTION Ensure that the generator cannot be...

Page 161: ...DP terminal red cable using a wrench with W A F 10 mm Fig 9 20 4 DC alternator 5 Remove nut and washer of the exciter terminal grey cable with a wrench with W A F 8 mm 6 Remove nut and washer of the c...

Page 162: ...oosen bottom fixing screw of the DC alternator with a wrench with W A F 12 mm 01 9 Use a wrench with W A F 12 mm 02 for the counter nut Fig 9 20 7 DC alternator 10 Push the DC alternator toward the th...

Page 163: ...14 Kapitel Chapter 9 Maintenance Instructions Seite Page 163 Fig 9 20 9 DC alternator 14 Loosen and remove the earthing strip with a size 5 mm socket wrench 15 Replace the DC alternator 16 To reinstal...

Page 164: ...that the generator cannot be started up accidentally Remove battery main switch For part numbers refer to the spare parts catalogue Fig 9 21 1 Oil pressure sensor 1 Open both connectors 01 on the oil...

Page 165: ...nnectors 01 on the oil pressure sensor Fig 9 21 2 Oil pressure sensor 2 Loosen and remove oil pressure sensor 6R3 using a wrench with W A F of 17 mm A large piece of cloth or absorbent tissue must be...

Page 166: ...generators The original location of the item must be taken from the generator description of this manual All replacements and repairs can be done by the user Fig 9 22 1 Relay 1 Remove the two fixing s...

Page 167: ...tion of this manual This replacement can be done by the user The fuses should be replaced every 2000 operating hours Fig 9 23 1 Fuse Figures similar 1 Remove the two fixing screws of the plastic cover...

Page 168: ...tors The original location of the item must be taken from the generator description of this manual All replacements and repairs should be done by a trained person ATTENTION Ensure that the generator c...

Page 169: ...9 24 3 Thermoswitch 3 Disconnect electric supply line of the thermoswitch Fig 9 24 4 Thermoswitch 4 Loosen thermoswitch with a wrench with W A F 22 mm Fig 9 24 5 Thermoswitch 5 Before installing the...

Page 170: ...l location of the item must be taken from the generator description of this manual All replacements and repairs should be done by a trained person ATTENTION Ensure that the generator cannot be started...

Page 171: ...e nozzle holder assembly 4 Wrench with W A F of 21 mm 3 Remove the copper seal 5 and the heat shield 6 4 Dismount the connector 2 from the glow plugs 3 5 Remove the glow plugs 3 For assembly Replace t...

Page 172: ...the screwdriver 1 into the hole in the heat ring seal 2 Rotate the screwdriver three to four times in each direction 3 When rotating the screwdriver slowly extract the heat ring seal 4 together with...

Page 173: ...he generator description of this manual All replacements and repairs should be done by a trained person Fig 9 26 1 Flame glow plug 01 Flame glow plug Symptoms indicating a faulty start up aid Hesitant...

Page 174: ...Pull connector off the flame glow plug Fig 9 26 1 2 Flame glow plug 2 A large piece of cloth or absorbent tissue must be placed under the connection to prevent escaping fuel from running into the caps...

Page 175: ...a generators The original location of the item must be taken from the generator description of this manual All replacements and repairs should be done by a trained person ATTENTION Ensure that the gen...

Page 176: ...9 Maintenance Instructions 9 12 14 Fig 9 27 3 Stop solenoid 3 Disconnect electric supply line 3X4 from the stop solenoid Fig 9 27 4 Stop solenoid 4 Remove cable ties Fig 9 27 5 Stop solenoid 5 Remove...

Page 177: ...ons Seite Page 177 Fig 9 27 6 Stop solenoid 6 Replace the stop solenoid 7 To reinstall reverse the order of steps Fig 9 27 7 Stop solenoid Please note for reinstallation 8 Slide the pin into the throt...

Page 178: ...Maintenance Instructions Seite Page 178 Kaptitel Chapter 9 Maintenance Instructions 9 12 14 Fig 9 27 9 Stop solenoid 10 Ensure that the throttle jumps back to its starting position without friction...

Page 179: ...The original location of the item must be taken from the generator description of this manual All replacements and repairs should be done by a trained person ATTENTION Ensure that the generator canno...

Page 180: ...tentionally blank Maintenance Instructions Fig 9 28 3 Glow plugs 3 Remove the glow plug connector Fig 9 28 4 Glow plugs 4 Loosen the glow plug using a socket wrench with a long size 10 mm socket Fig 9...

Page 181: ...g at a running generator can result in severe personal injury Therefore before starting work at the generator Make sure that the generator is stopped and the starter battery is disconnected to guarant...

Page 182: ...ctrical voltages above 48 volts battery chargers greater than 36 volts are always dangerous to life The rules of the respective regional authority must be adhered to Only an electrician may carry out...

Page 183: ...urbances while driving the following tools and measuring instruments should belong to the equipment kept on board Multimeter for voltage AC frequency and resistance Measuring instrument for inductance...

Page 184: ...ion If the generator is unable to supply enough power to start an electric motor 1 phase it is usually because the motor draws too much current during starting process Check the motor s current draw r...

Page 185: ...k of fuel Check fuel supply Glow plugs not working correctly Check glow plugs and heating time Too much air in fuel lines Test fuel system for leakage Bleed air from fuel system refer to section Bleed...

Page 186: ...r service Air in the fuel system Ventilate the fuel system Cause Solution Lack of fuel Check fuel supply system fuel filter renew if necessary check fuel pump check fuel lines bleed if necessary Lack...

Page 187: ...ing adjustment Have motor serviced by Kubota Cause Solution motor rpm suddenly rises or drops unusual noise comes from genset exhaust colour suddenly becomes dark leakage in the cooling water system R...

Page 188: ...l system 5 3 No Deaerate fuel system No Yes Empty tank 5 4 Refuel Fuel pump installed connected correctly 4 2 Install connect fuel pump correctly Defective fuel pump 4 3 Exchange fuel pump Yes Yes No...

Page 189: ...2 Fuse at VCS ok 11 3 Exchange fuse Interrupted measurement voltage to VCS 11 4 Exchange connect measurement voltage line 1 Yes Yes No Frequency too high low Yes Reduce load Genrator overloaded 11 5...

Page 190: ...g plug of the anti repeat starter device Loosen the holding screws of the anti repeat starter device Mount the new anti repeat starter device in reversed order 3 1 Charge exchange starter battery Proc...

Page 191: ...Fischer Panda Service point Service Centre Attention Voltage up to 400V Danger to life The operations are to be executed by a trained professional only 9 2 Defective cable AC out Get the cable AC out...

Page 192: ...e up to 400V Danger to life The operations are to be executed by a trained professional only 11 4 Disrupted measuring voltage to VCS Get the measuring voltage cable connected exchanged by a Fischer Pa...

Page 193: ...temperature switch possibly loose contact cable break Get the temperature switch checked and repaired by a Fischer Panda Service point Service Centre 13 6 Leaky ventilation screw Renew the ventilatio...

Page 194: ...he generator The cover may only be removed if it is guaranteed that the generator cannot be inadvertently started Sample picture Fig 10 5 0 2 Wiring diagram HP1 230 V 50 Hz Fig 10 5 0 3 Generator Powe...

Page 195: ...minal box 120 60 Hz Generator Power Terminal Box 120 V 60 Hz In these terminal box there are the electrical connection points for the AC generator Here is also the bridge for the protective grounding...

Page 196: ...al box 240 V 60 Hz Generator Power Terminal Box 240 60 Hz 208 V 60 Hz In these terminal box there are the electrical connection points for the AC generator Here is also the bridge for the protective g...

Page 197: ...er Terminal Box DVS 120 V 240 V 60 Hz In these terminal box there are the electrical connection points for the AC generator Here is also the bridge for the protective grounding of the generator The co...

Page 198: ...occur if run for long periods at full load Effects of Short Circulating and Overloading on the Generator The generator cannot be damaged by short circuit or overloading Short circuit and overloading s...

Page 199: ...switched on the voltage must be controlled in each case at the voltmeter Sensitive devices must be switched off so long until the voltage exceed the critical parameter Under certain circumstances the...

Page 200: ...en disconnected Should this be above the prescribed generator idling speed it can be assumed that one or several condensers are defective 10 7 1 Discharging the Capacitors ATTENTION Never work on the...

Page 201: ...pacity value at this measurement should be exchanged as fast as possible If all capacitors prove to be still functional then a check must be made as to whether the connections to the strip are correct...

Page 202: ...be the same if possible Deviations from each other show there is windings short circuit In this case the generator windings must be renewed by an electrician 10 7 5 Check the Windings for Short circu...

Page 203: ...f ohmmeter 10 8 Generator provides no voltage 10 8 1 Rotor Magnetism Loss and Re magnetising ATTENTION See Safety Instructions Safety First on Page 19 In the case of asynchronous generators the genera...

Page 204: ...rt period whilst in operation first remove the small retention screw and replace it immediately The motor should react immediately by revving high If the motor does not react sharply to the re connect...

Page 205: ...ff caused by heat accumulation after the generator has been switched off then this can also be bypassed using the switch 10 9 3 Lifting solenoid for motor stop optional There are two different version...

Page 206: ...10 Generator Faults 9 12 14 the only handling error that can be made on board that can lead to fatal consequences for both generator and operator 10 9 4 Troubleshooting Table For Troubleshooting see...

Page 207: ...x 0 42 1 12 l approx 0 42 1 12 l approx 0 42 1 12 l approx 0 5 1 4l Oil consumption max 1 of fuel consumption max 1 of fuel consumption Oil specification API CF API CF API CF API CF Cooling water requ...

Page 208: ...nda 6500 Panda 7 mini Panda 8000 NE Panda 8 mini Panda 9000 ND Panda 10000 NE Panda 9 mini Panda 12000 NE Panda 14000 NE Panda 15000 NE 15 mini digital Panda 18 NE Panda 24 NE Panda 30 NE Type D782 D9...

Page 209: ...00 rpm Valve clearance engine cold 0 2 mm Hydro Hydro 0 2 mm Cylinder head nut torque 63 7 68 6 Nm 68 Nm 68 Nm 25 Nm Compression ratio 22 5 1 22 16 22 16 22 1 Lubrication oil capacity 5 0 l 6 4 l 6 4...

Page 210: ...meter max 25mm 25mm 25mm 70mm 70mm Max exhaust back pressure 10 7 kPa 107 Millibar 10 7 kPa 107 Millibar 10 7 kPa 107 Millibar 10 7 kPa 107 Millibar 10 7 kPa 107 Millibar Panda 7 5 4 Panda 9 4 Panda 1...

Page 211: ...pm 3000UpM 1500 rpm Idle running speed 2900rpm 2900rpm 3100rpm 2900UpM 1800 rpm Valve clearance engine cold 0 16 0 20mm 0 2mm 0 2mm 0 2mm 0 2mm Cylinder head nut torque 58 8 63 7Nm 42Nm 42Nm 42mm 68Nm...

Page 212: ...ze 12V 136Ah equivalent Recommend cable cross size starter battery cable Length 4 meter max 70mm Max exhaust back pressure 10 7 kPa 107 Millibar Panda 45i Panda 8000 230 V 50 Hz Panda 8000 400 V 50 Hz...

Page 213: ...t Complete yearly oils have usually SAE classes of SAE 10W 40 SAE 15W 40 etc 11 5 1 2 Quality of oil The quality of an engine oil is specified by the API standard American Petroleum Institutes The API...

Page 214: ...e product GLYSANTIN PROTECT PLUS G 48 11 6 1 Coolant mixture ratio Engine coolant automotive industry Product description Product name GLYSANTIN PROTECT PLUS G48 Chemical nature Monoethylenglycol with...

Page 215: ...Tables 9 12 14 Kapitel Chapter 11 Tables Seite Page 215 11 7 Types of coil 11 7 1 HP1 230V 50 Hz Fig 11 7 1 1 HP1 230V 50 Hz 11 7 2 HP2 120V 60 Hz Fig 11 7 2 1 HP2 120V 60 Hz...

Page 216: ...Seite Page 216 Kaptitel Chapter 11 Tables 9 12 14 11 7 3 HP2 120V 60 Hz Duo Fig 11 7 3 1 HP2 120V 60 Hz Duo 11 7 4 HP3 400V 50 Hz Fig 11 7 4 1 HP3 400V 50 Hz 11 7 5 HP2 120V 60 Hz Fig 11 7 5 1 HP3 120...

Page 217: ...tor coil Fig 11 8 1 Resistor inductance generator coil HP1 L N Ohm L Z Ohm L N Ohm L Z Ohm Mains 120V 60Hz Mains 120V 60Hz Panda 8000 Panda 9000 Panda 12000 Panda 18 Panda 24 ca 0 7 ca 0 65 ca 0 45 ca...

Page 218: ...ca 0 17 ca 0 1 ca 0 12 ca 0 1 ca 0 1 ca 0 08 ca 0 9 ca 0 8 ca 0 3 ca 0 4 ca 0 4 ca 0 2 L1 N mH L2 N mH L3 N mH L1 N mH 1 2 mH 3 4 mH Mains 120V 60Hz Panda 8000 Panda 9000 Panda 12000 Panda 18 Panda 2...

Page 219: ...Panda PMS 9000 ND 20 20 40 8 8 Panda PMS 12000 NE 12 mini Digital 20 20 40 8 8 Panda PMS 14000 NE 20 20 40 8 8 Panda PMS 18 NE 16 Digital 25 20 50 8 8 Panda PMS 24 NE 22 25 Digital 25 20 50 8 8 Panda...

Page 220: ...Tables Seite Page 220 Kaptitel Chapter 11 Tables 9 12 14...

Page 221: ...Control P6 RE0703_Kunde_eng R08 9 12 14 Generator Control Panel P6 Manual 12V version 21 02 02 046P 24V special version 21 02 02 047P Option automatic adapter 21 02 02 016P Option master slave adapte...

Page 222: ...mbH 33104 Paderborn reserves all rights regarding text and graphics in this document Details are given to the best of our knowledge No liability is accepted for correctness Please note technical modif...

Page 223: ...st not be put into operation with cover removed If the generator is mounted without sound cover the rotating parts pulley belt etc must be covered and protected so that an injury is excluded All servi...

Page 224: ...Safety Instructions Generator Control P6 Seite Page 224 Kaptitel Chapter 12 Safety Instructions Generator Control P6 9 12 14 Note Note also the safety of the other components of your system...

Page 225: ...ED for coolant temperature red1 02 LED for water leak red yellow1 sensor optional 03 LED for AC voltage fault red yellow1 04 LED for AC voltage ok green1 05 LED for winding temperature red1 06 LED for...

Page 226: ...ew 12 V version Fischer Panda Art No 21 02 02 009P Fig 13 1 1 Panel rear view 12 V version 02 01 03 04 01 Control board 02 Terminal block master slave adapter left row automatic adapter right row 03 T...

Page 227: ...Art No 21 02 02 012P Fig 13 2 1 Panel rear view 24 V version 02 01 04 05 06 03 01 Control board 02 Terminal block master slave adapter left row automatic adapter right row 03 Fuse 630 mA slow blow 04...

Page 228: ...or 12 V 24 V OK must be adjusted by solder Jumper The input loads the signal with 5 mA at 12 V and 10 mA at 24 V The input status is indicated with red and green LED The connection can supply an ener...

Page 229: ...rated open Function deactivated J3 1 2 Dynamo excitation resistor 68R is switched on with Fuel Pump 1 2 3 Dynamo excitation resistor 68R is switched on with Panel ON 1 open Dynamo excitation resistor...

Page 230: ...X 12 V operation open 24 V operation not possible J201 1 2 X T Engine input for contact which opens in case of error 2 2 3 T Engine input for contact which closes in case of error 2 J202 1 2 Water lea...

Page 231: ...J101 closed 12 V operation open X 24 V operation J201 1 2 X T Engine input for contact which opens in case of error 2 2 3 T Engine input for contact which closes in case of error 2 J202 1 2 Water lea...

Page 232: ...n not possible J201 1 2 X T Engine input for contact which opens in case of error 2 2 3 T Engine input for contact which closes in case of error 2 J202 1 2 Water leak input Replace air filter for cont...

Page 233: ...closed 12 V operation closed X 24 V operation J201 1 2 X T Engine input for contact which opens in case of error 2 2 3 T Engine input for contact which closes in case of error 2 J202 1 2 Water leak i...

Page 234: ...checked and cleaned The impeller fatigue increases if residual affects the raw water intake 5 Visual inspection Control fixing bolts check hose connectors for leakages control electrical connections...

Page 235: ...upon engine type and execution pre heating can be necessary Pre heat is necessary at an operating temperature 20 C Fig 13 5 1 3 Start 3 Press button start start engine LED for start green The electric...

Page 236: ...ich has been brought to the exhaust outlet To avoid filling the exhaust outlet with water and causing further problems close the inlet sea water valve Once the engine is running be sure to open the in...

Page 237: ...tic stop procedure can be terminated only by switching off generator control panel prematurely The times for heat start and stop are separately adjustable see below The additional automatic adapter sw...

Page 238: ...Fig 13 6 2 2 Settings Attention The automatic adapter must only be used together with an additional device The starter should only be switched on when the generator stationary shut down Data Paramete...

Page 239: ...connected with VBFS at optional 24 V operation VBFS over internal voltage regulator at 12 9 V regulated 9 GND O power supply ground 11 GND O power supply ground 13 Heat signal I Heat is active if the...

Page 240: ...n the Slave Panel are coded as for slave operation please see the appropriate adjustment pages for the Generator Control Panel P6 RE0703 The Master Panel and Slave Panel are identical and only differs...

Page 241: ...ched using a push button on master or slave to VBF 24 OFF Signal I O Panels are switched off if the connection is switched using a push button on master or slave to VBF 25 Heat Signal I O Heat is acti...

Page 242: ...r 68R is switched on with Panel ON 1 open XM Dynamo excitation resistor is deactivated J101 closed M 12 V operation open M 24 V operation not possible J201 1 2 T Engine input for contact which opens i...

Page 243: ...Dynamo excitation resistor 68R is switched on with Panel ON 1 open XM Dynamo excitation resistor is deactivated J101 closed M 12 V operation open M 24 V operation J201 1 2 T Engine input for contact w...

Page 244: ...Seite Page 244 Kapitel Chapter 13 General operation 9 12 14 Leere Seite Intentionally blank General operation...

Page 245: ...r Ersetzt durch Blatt Panel Generator Control 06 03 2007 jschaefers 1 A3 Otto Hahn Str 32 34 D 33104 Paderborn Tel 05254 9202 0 Fax 05254 85724 info fischerpanda de www fischerpanda de Allgemeintoler...

Page 246: ...Seite Page 246 Kapitel Chapter 14 Measurements 9 12 14 Leere Seite Intentionally blank Measurements...

Reviews: