


EN
56
7.2.3 Commissioning Wizard
The commissioning wizard procedure is the same whether you use
the “Installer for solar inverters” mobile app or the Web UI.
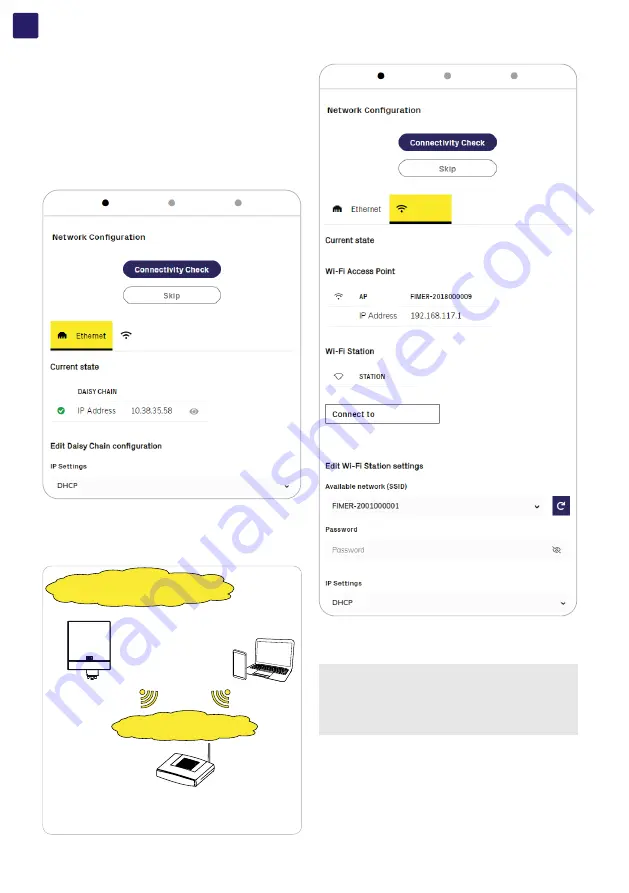
7.2.3.1 STEP 1 (Optional) - Network connection.
• Choose the connection type (Ethernet or Wi-Fi) and set the
related parameters.
Ethernet connection:
If the Ethernet cable is connected will be showed the related IP
Address and settings:
Wi-Fi
Wi-Fi connection:
Two Wi-Fi radio channels are enabled by the inverter and could be
used simultaneously:
1. Wi-Fi Access Point. Connection between inverter and a mobile
device (like Smartphone, Tablet, Notebook).
2. Wi-Fi Station. Connection between inverter and switch/router.
- The AP is still available and the user can connect to the inverter.
- In this scenario the Router gives IPs according to its own rules.
- Inverter is reachable by IP.
- Domain name can be used only if the Router permits multicast
Direct Access
SSID: FIMER-WWYYSSSSSS
(WWYYSSSSSS= Inverter SN)
IP given by inverter
DHCP server
IP given by inverter
DHCP server
Customer SSID
Aurora Vision®
Wi-Fi
FIMER-2001000001
• Fill the field SSID, Password and IP Settings and click on
“connect to (SSID)” on the Wi-Fi Station section to connect the
inverter to the switch/router
NOTE –
D
This step can be skipped and performed later (via
Web UI).
NOTE –
D
By selecting “Skip this step” button the second
radio channel will be kept off and you will need to use a
wired Ethernet daisy chain bus to allow the inverters to
communicate with Aurora Vision.
• Click on “Next” button to continue the configuration wizard.


