7'' 4K HDMI On-Camera Monitor
User Manual
Page 1: ...7 4K HDMI On Camera Monitor User Manual...
Page 2: ...use the external battery for power supply To insure best use of the unit please read the user s manual carefully CAUTION 1 Do not use any damaged or leaking battery and please replace the battery imme...
Page 3: ...ious batteries for outdoor usage 4 F Buttons can be self defined for different function Support a variety of different types of battery brands F970 LP E6 D28S U60 Picture Zoom can be operated Zoom All...
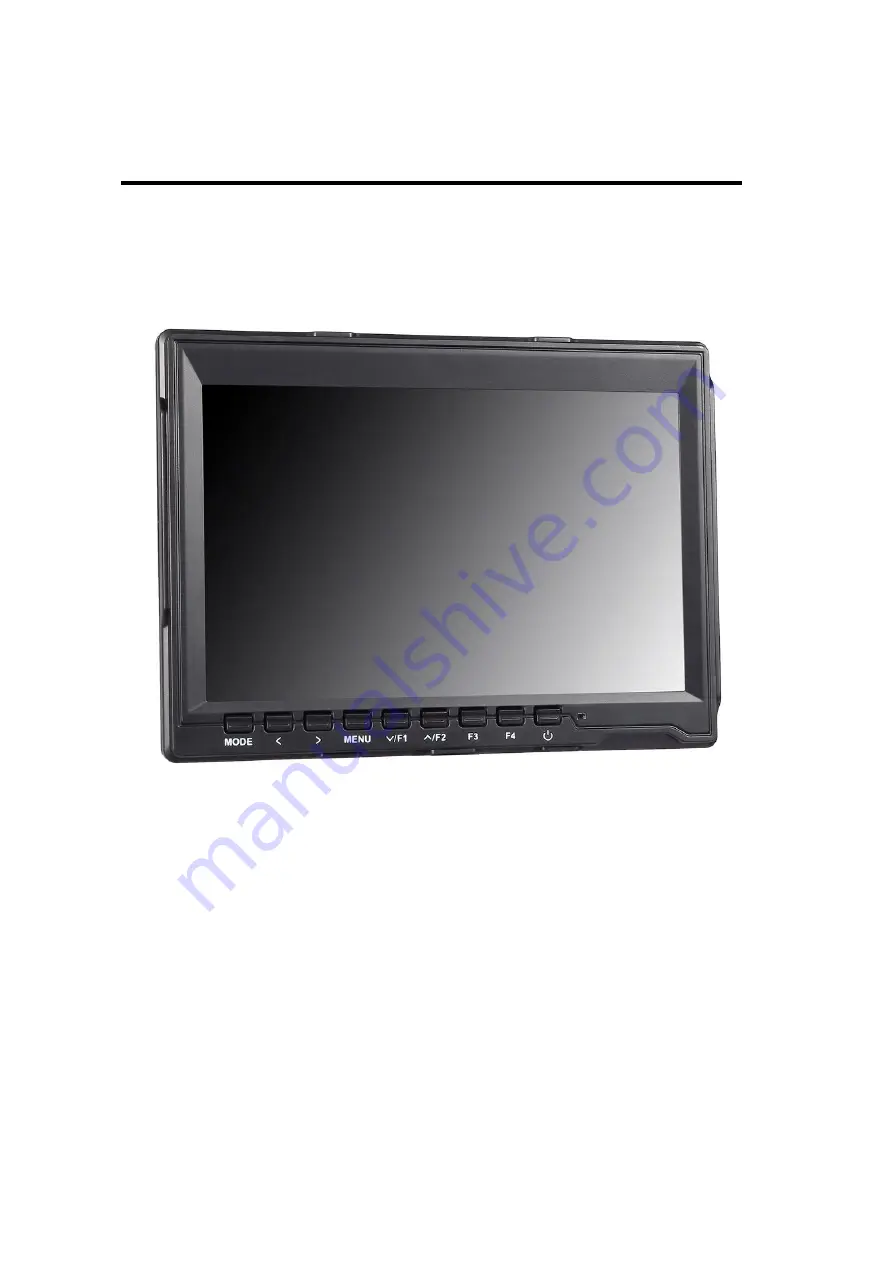
Page 4: ...off 3 F4 Custom button enter secondary menu item F self defined button then self define the function that user need 4 F3 Custom button same as F4 operation 5 Multi button In OSD Menu is for up adjust...
Page 5: ...enu 9 Volume down in OSD menu to decrease the value of analog on the menu 10 MODE Signal Switch Button 11 LCD Display 1 2 Rear Panel Features 1 USB Upgrade Port 2 OSD Controller input Can insert OSD C...
Page 6: ...wer input interface pole of the power should match the image 7 Battery Plate 8 Built in Speaker 1 3 VIDEO Matched Cable option The input of the VIDEO signal is 3 5mm four section plug as the picture a...
Page 7: ...late 2 Locking Screw To use HDMI locking plate to lock the plug of HDMI cable then put the locking plate close to the monitor and finally bolt the locking screw to lock the plate with the monitor As t...
Page 8: ...frame press the side of the sunshade frame smooth and press 3 sides on the sunshade to lock the sunshade with the monitor tight 1 6 Battery Plate There is a battery plate installed on the back of the...
Page 9: ...1D QM71 QM70D QM70 QM51D QM51 FM71 FM70 series LP E6 battery plate for battery of Canon DV Canon LP E6 D28S battery plate for battery of Panasonic DV Panasonic D55 554S D54SE D40 D35 D33 D32 D28 D25 D...
Page 10: ...he indicator will turn Red press to turn on monitor power the indicator will be Yellow and then input AV or HDMI signals the indicator will turn Green from Yellow 2 1 Press MENU button in the front of...
Page 11: ...menu 3 Menu Function Instruction Image Including 2 pages Pic Mode Standard Mild User Dynamic Select user to adjust Brightness Contrast Saturation Sharpness Brightness 0 100 To adjust image s brightnes...
Page 12: ...00 User Select image white color temperature of the monitor When select user adjust the Red Green Blue to meet the different user s requirement for the different Color Temp Tint 0 100 To adjust the im...
Page 13: ...unction is to adjust the menu time Backlight 0 100 To adjust the brightness of screen backlight Power On Auto Manual When select the Auto the monitor will turn on when input power But if select the ma...
Page 14: ...eve this function you need to first open the Nine Grid function Zoom Off 4X 9X 16X Image Zoom function to help the photographer observe more careful image by changing it Zoom Mode Off Mode1 Mode2 Zoom...
Page 15: ...scan mode can be selected Function Including 3 pages Center Marker Off On To set center mark cross mark display Safe Frames Off 80 85 90 96 93 2 35 1 To select the screen marker Nine Grid Off On To ma...
Page 16: ...2 00X Customizable anamorphic adjustment is available Check Field Off Mono Red Green Blue To switch among Color Mono Red Green Blue Histogram Off On It stands for the image pixels numbers in each lev...
Page 17: ...ons so as to suggest the photographer adjust the aperture to obtain proper exposure Embedded Audio Off On The Audio Level Meters provide numerical indicators and headroom levels The audio meter is gre...
Page 18: ...hic To set the 4 shortcut custom button F1 F2 F3 F4 on the panel For example When in OSD menu press F1 button to select F1 press or button to pop up function items and press F1 or F2 button to select...
Page 19: ...Support Format 480i 480p 576i 576p 720p 60 59 94 50 30 29 25 24 23 98 1080i 60 59 94 50 1080p 60 59 94 50 30 29 97 25 24 24sF 23 98 23 98sF 4K UHD 3840 2160p 30 29 97 25 24 23 98 4096 2160p 24Hz Headp...
Page 20: ...monitor is synchronized with the input signal and can press the MODE give it a try Check signal cable connecting and make sure use the standard adapter connect the monitor If power supply by battery...