Eden
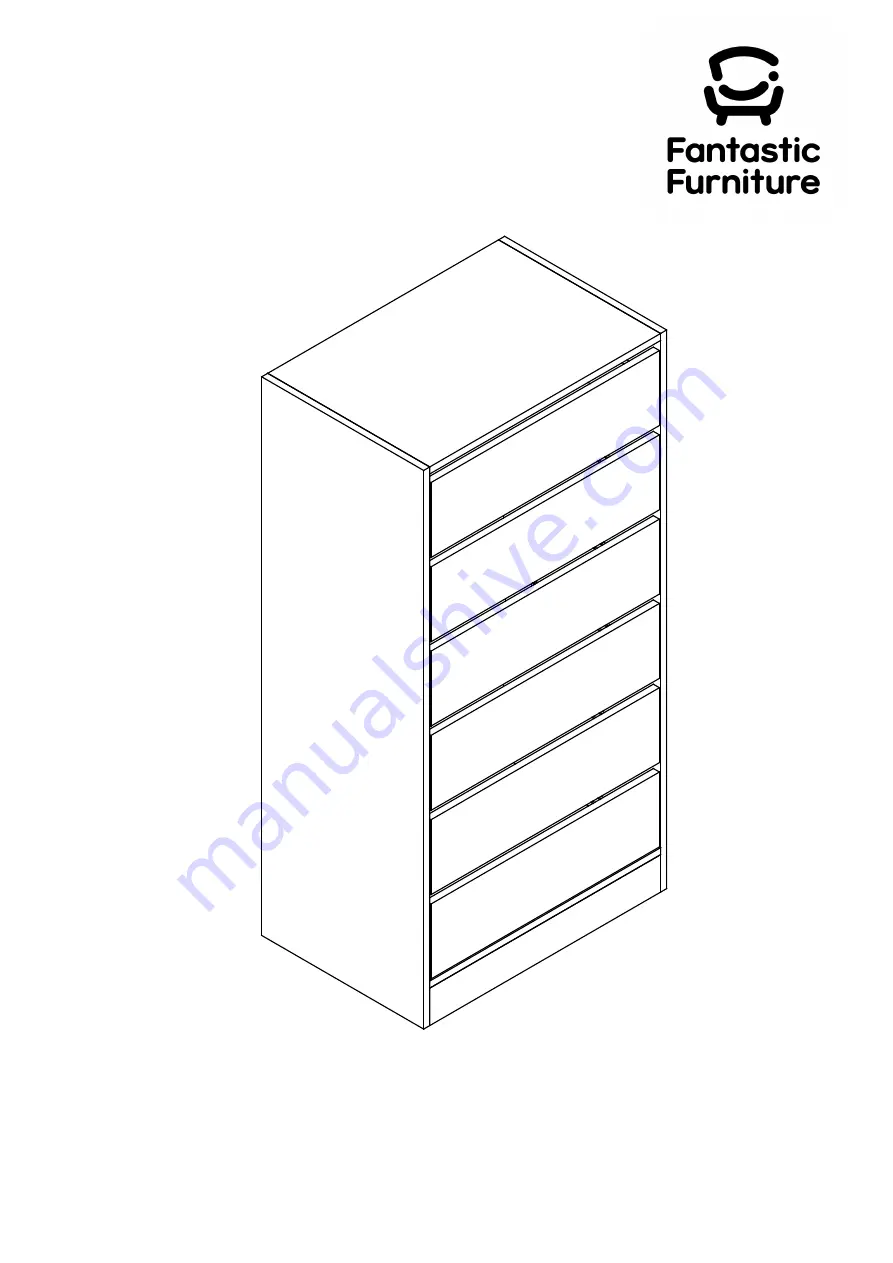
Utility 6 Drawer MK2
fantasticfurniture.com.au
Version 1.0
Page 1: ...Eden Utility 6 Drawer MK2 fantasticfurniture com au Version 1 0...
Page 2: ...into stud Please seek professional advice if you are in doubt of what xing device to use Do not Reduce the risk of furniture tip over accidents with available wood stud S S crew fantasticfurniture co...
Page 3: ...ound your Fantastic We re thrilled you ve chosen Fantastic Furniture to help create a home you ll love Love it Share it Fantastic buy Share how it looks at home on Instagram for your chance to win a 2...
Page 4: ...o avoid scratching or damaging the surface of the product Bulky items such as wardrobes and bunk beds should be assembled in the room they will be used in as they may not t through a door once assembl...
Page 5: ...nel P5 Back Panel P5 Back Panel P5 Left Drawer Side P10 Drawer Front P9 Right Drawer Side P11 Drawer Back P13 Drawer Base P12 Base Panel P2 What you need to assemble the product Other tools you need P...
Page 6: ...ightening with the Phillips Head Screwdriver fantasticfurniture com au Page 6 Phillips Head Screwdriver Phillips Head Screwdriver Attach 10 x Cam Bolts H3 to Left Side Panel P3 as shown by tightening...
Page 7: ...ntasticfurniture com au Page 7 Step 4 You will need Phillips Head Screwdriver Step 3 You will need Phillips Head Screwdriver Attach 6 x CR Runner Tracks H7 to Right Side Panel P4 with 18 x Small Screw...
Page 8: ...to Left Side Panel P3 by tightening all nuts with the Phillips Head Screwdriver fantasticfurniture com au Page 8 10 x Dowels H1 Insert 10 x Dowels H1 into Left Side Panel P3 as shown Phillips Head Scr...
Page 9: ...Top Panel P1 Base Panel P2 Rails P6 x 2 and Left Side Panel P3 You will need Step 8 P6 P6 P5 P5 P6 P3 P6 P2 P1 P5 fantasticfurniture com au Page 9 P1 P2 P7 P7 P8 P8 Insert 10 x Dowels H1 into Top Pane...
Page 10: ...r Hammer 4 x Plastic Glides H10 Insert 10 x Cam Nuts H4 into Top Panel P1 Base Panel P2 and Rails P6 x 2 P7 x 2 P8 x 2 Rotate the nuts so the arrows point towards the incoming bolts Attach Right Side...
Page 11: ...h Drawer Back P13 to Left Right Drawer Sides P10 P11 and Rail P14 with 6 x Long Screws H2 by tightening with the Phillips Head Screwdriver Repeat this step for the remaining Drawer Backs P13 x 5 Drawe...
Page 12: ...P10 P13 P11 P11 P12 30 x Cam Nuts H4 fantasticfurniture com au Page 12 H4 H4 H1 H4 H4 H4 Insert 1 x Dowel H1 into Rail P14 Insert 5 x Cam Nuts H4 into Left Right Drawer Sides P10 P11 and Rail P14 Rot...
Page 13: ...with the Phillips Head Screwdriver Repeat this step for the remaining ve Drawers You will need Step 15 Phillips Head Screwdriver Gently insert the assembled drawers into the unit by carefully lining...
Page 14: ...the nal position and attach the safety strap to the wall securely Make sure it is rmly attached and snug t Seek advice from a quali ed trades person on how to attach this safety strap to your speci c...