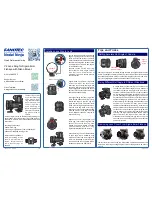


V2 Lens Ring for Sigma 8mm
Fisheye with Nikon Mount
© 2014 FANOTEC
Video Tutorials:
www.youtube.com/nodalninja
Quick Reference Guide
Support Forum:
www.nodalninja.com/forum
Installing Lens Ring to Lens
Loosen the knob on outer ring until the
edge of opening is flush with lens ring
plate. Don’t loosen further. It will only
make installation more difficult and can
potentially damage the thread if knob
is completely unscrewed. See Page 2
for trouble shooting.
Squeeze to take out the inner ring.
Check label on inner ring to confirm
with lens in use and direction of
mounting. The arrow should point to
the front of lens.
Align window on the inner ring to the
reference mark of the focus scale.
Insert the lens. Stretch the ring when
necessary. Move it to a position where
it fits snugly. Push it against the anchor
point on lens to ensure exact mounting
and consistent NPP setting.
Align base of outer ring to opening of
inner ring. Insert outer ring from the
back of lens. Loosen lens ring knob
slightly if necessary. Rotate and slide
until positioned onto inner ring.
Tighten fully. Mount lens to camera.
We suggest fixing the inner ring with a
piece of tape about 40mm (1.5”) long.
Stretch the tape so that the ring will
grasp the lens firmly. This eases instal-
lation of outer ring and prevents move-
ment of inner ring when outer ring is
rotated. Cut any tape that goes beyond
trimmed area of inner ring. This step
can be skipped if users do not plan to
rotate outer ring.
Mount lens ring to quick release clamp
of pano head in use. Rotate to align
windows of outer and inner rings with
camera in landscape or portrait orien-
tation. Slide the lens ring plate to NPP
setting and tighten the clamp fully.
Squeeze
Flush
The lens cover consists of a cap and a lens hood. The cap and hood must be
removed in order to get enough angle of view for taking panos with 4 shots
around.
Removing Lens Cover From Sigma 8mm Fisheye
This lens ring consists
of a metal outer ring
and a plastic inner
ring that fits the lens
barrel precisely. The
i n n e r r i n g a l l o w s
exact mounting of
lens, which protects it
from stress by provid-
ing greater area of
contact.
V2 lens ring improves its functionality by adding cut
out windows to outer and inner rings, allowing focus
distance to be read in both landscape and portrait
orientations.
Lens Ring Components:
r
LR2W outer ring
r
Inner ring of Sigma 8mm / 15mm for Nikon V2
r
LRP45X or LRP45X2 lens ring plate
Note that when LRP45X2 is
used, 4 mounting screws
should be installed as
shown. This will ensure
s a m e N P P s e t t i n g s a s
LRP45X.
Anchor Point
Push
Setting Accurate Roll Angle of Camera
Extended
Reference Mark
Align to
Set Roll
Angle
There is no feature on lens to aid setting accurate roll angle of camera apart
from 0° (landscape) and 90° (portrait). A piece of tape or label can be added
to extend the reference mark on the lens. Roll angle can then be read in 30°
intervals by aligning this mark to notches at the back of outer ring.
Tips and Tricks
A unique feature of the lens ring is its ability to roll
the camera into different angles quickly. Experts in
the field use different roll angles with crop sensor
cameras in different situations. A roll angle of about
60° (sensor diagonal aligned vertically) can be used
to take advantage of diagonal angle of view over
horizontal and vertical to increase overlap or reduce
number of images to be taken. This is important in
multi-camera rig for capturing instantaneous action
panoramas or panoramic videos, where fewer
cameras equal substantial cost saving. A camera can
also be rotated to landscape orientation temporarily
to take extra shots to capture large moving objects
such as waves, trains, busy traffic and various kinds
of racing. The larger horizontal angle of view help to
freeze the scene and reduce stitch issue due to
movement across multiple image shots. The area
near nadir and zenith usually contains static objects
and is easy to stitch.
Using Different Roll Angle in Different Situations
QRG13001.1 - 18/10/14
Page 1 of 2