background image

8.


Getting started 

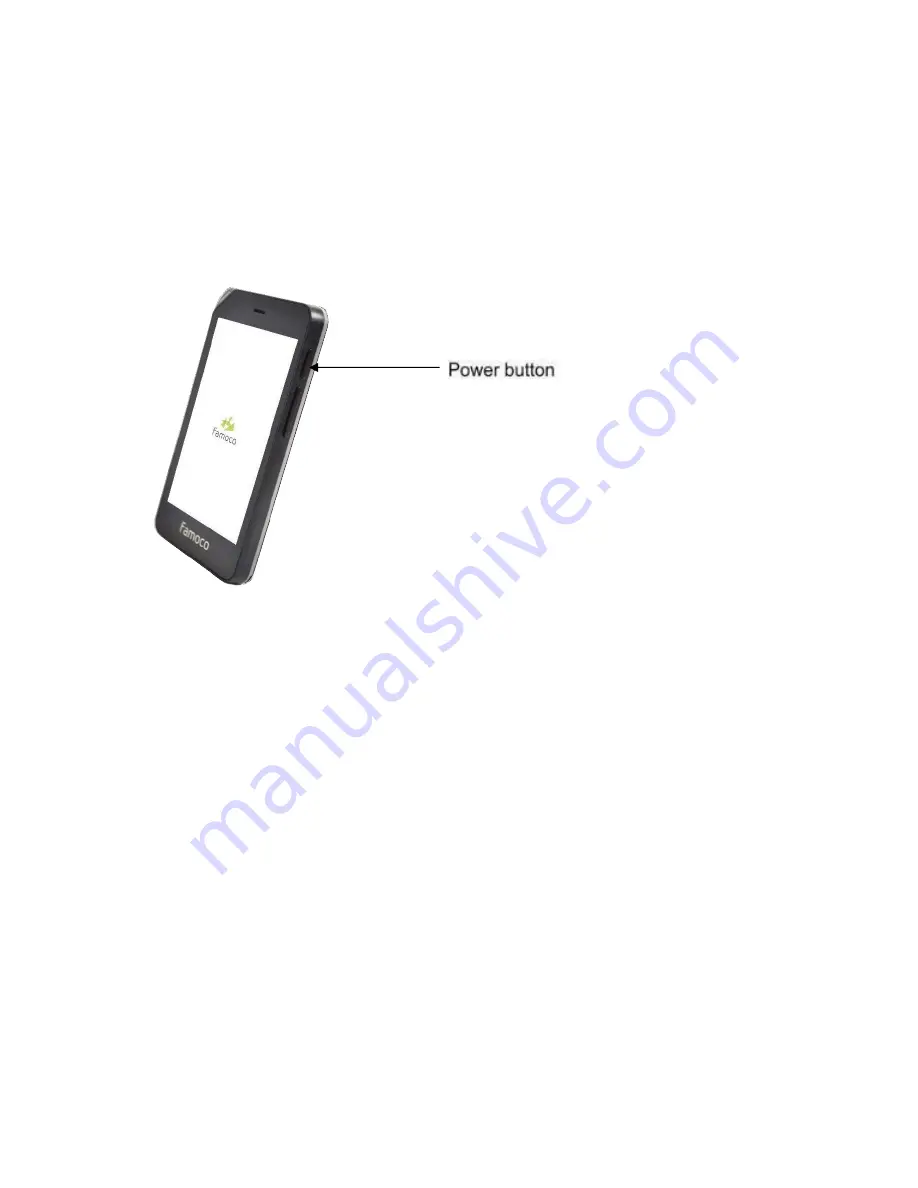
 How to switch the device ON or OFF 

To power ON: 


Press and hold the power button for three seconds then release. The 
home screen will be displayed after a few moments. 

To power OFF: 

Press and hold the power button for two seconds, then select shut 
down option on the screen. 

Standby mode: 

The device enters the standby mode after 30 seconds by default if left 
alone. 


 Home screen and synchronization 

Once your device is switched on it will start synchronizing. 
If there are no applications installed on it yet, the device will be locked 
on  a screen that shows the following indication to configure the  
internet 

connection: 

Summary of Contents for FX105F

Page 1: ...User Manual FX105F Professional Android Device ...

Page 2: ...synchronization 8 LED colors 10 How to access the dashboard 10 How to find your specific Famoco ID 11 How to charge the device 11 How to change the battery 12 How to use the battery 13 How to read an NFC card 13 About the SIM slots 14 9 Technical specifications 14 10 Warranty information 15 11 Safety and general information 16 Electromagnetic waves safety information SAR 18 12 DOC 20 13 support ba...

Page 3: ...ritten permission of Famoco We reserve the right to make modifications on print errors or update specifications without prior notice 2 Trademarks Famoco and the Famoco logo are registered trademarks of Famoco The Android logo is a trademark of Google Inc Bluetooth is a registered trademark of Bluetooth SIG Inc worldwide Wi Fi and the Wi Fi logo are registered trademarks of theWi Fi Alliance All ot...

Page 4: ...advised knew or should have known the possibility of such damages The user should refer to the enclosed warranty card for full warranty and service information 5 About this manual Congratulations on becoming the owner of a Famoco FX105 device This user manual is specially designed to detail the device s functions and features Please read this manual before using the device to ensure safe and corre...

Page 5: ...co is not liable for performance issues or incompatibilities caused by edited registry settings or modified operating system software Attempting to customize the operating system may cause the device or applications to work improperly 6 Device layout Overview Back view 1 Indicator light 2 Power button 3 Volume down 4 Type USB C port 1 Rear Camera 2 Flash 3 NFC antenna 4 Speaker 1 2 3 4 1 2 3 4 ...

Page 6: ...FF standby mode Customizable button Action can be defined by the customer Volume up down Press to turn the volume up or down USB Type C port Connect the device to a USB type C power source or computer Indicator light Turn red to indicate when the device is charging and green when full charge level is reached ...

Page 7: ...supplied with the device and any availableaccessories may vary depending on the region or serviceprovider The supplied items are designed only for this device and may not be compatible with other devices Appearances and specifications are subject to change without prior notice Third party accessories may not be compatible with yourdevice ...

Page 8: ... power button for two seconds then select shut down option on the screen Standby mode The device enters the standby mode after 30 seconds by default if left alone Home screen and synchronization Once your device is switched on it will start synchronizing If there are no applications installed on it yet the device will be locked on a screen that shows the following indication to configure the inter...

Page 9: ...support If there is a connection one of the following screens will appear depending on the synchronization status If the synchronization is in progress please wait until it is complete If the synchronization is complete but no applications have been installed or if the synchronization has been aborted please contact your customer support ...

Page 10: ...Green Low battery Battery charging Battery charged How to access the dashboard When your device is switched on you can access the dashboard by pressing the volume up button for three seconds and then release it In the dashboard you will find Famoco serial number Connectivity Time Battery level Brightness that you can modify Volume that you can modify ...

Page 11: ...ry see 8 6 for more information The serial number is written on the device which is below the battery How to charge the device To charge the device only use Type C port 1 cable supplied 1 Insert the charger cable carefully Check that the plug and socket are aligned 2 The indicator light will turn red to indicate that the device is charging and will turn green when the full charge level isreached 3...

Page 12: ...serious damage to the device Any damage caused by misuse is not covered by the warranty Note The device will power off automatically when the battery reaches 2 How to change the battery 1 Unclip the back left corner where the little nook is and from this angle remove the back cover 2 Use the small nook on the bottom to remove the battery ...

Page 13: ...leave the battery in a discharged state Keep your device and battery cool High temperatures degrade the battery more quickly The battery will not charge when over 45 C Do not leave on charge for more than 10 hours When not using the device for long periods charge to approximately 40 and remove the battery How to read an NFC card To read an NFC card flip the device over and bring the card near the ...

Page 14: ...ot 3 SD card slot MicroSD card Do not attempt to remove any of the installed cards In case of any operational problem contact your administrator 9 Technical specifications Processor Type MTK6739WW Quad core Cortex A53 Speed 1 5GHz OS Famoco OS based on Android 8 1 Memory RAM 2GB Mass Storage 16GB ext Micro SD Display Characteristics 4 960x490 px Touch Panel 3 Points Gesture 1 2 3 ...

Page 15: ...th auto focus flash Speaker Microphone Accelerometer Yes Size L x W x H 110 63 5 13 95mm Weight 150g Battery 2000mAh Power supply USB Type C 10 Warranty information The warranty does not apply to defects or errors in the product caused by 1 Normal wear and tear misuse mishandling and physicaldamage 2 Exposure to water or any other liquids or solvents 3 Any unauthorized disassembly repair or modifi...

Page 16: ... magnetic media The information contained on disks or cards may be erased or damaged Do not leave the device or battery in direct sunlight or near other heat sources where temperatures could exceed 45 C Keep the device and all accessories away fromchildren In the unlikely event of battery leakage avoid contact with eyes or skin In the event of contact rinse with water and consult a doctor Observe ...

Page 17: ...batteries Do not connect the device to non genuine or 3rd partychargers Do not attempt to dismantle the device or any of itsaccessories Do not put the device into a microwave oven dryer or high pressure container Don t use the device immediately after a sudden temperature change e g from an air conditioned environment to high temperature and humidity outside In such cases there could be condensing...

Page 18: ...tery is being charged The information images in this guide are valid at the time of publication of the guide Changes to this information images can be made without prior notice 12 Electromagnetic waves safety information SAR The highest reported SAR level for the head is 0 456 W kg for the Hotspot Body is 1 020W kg and for the Body Worn is 0 540W kg This device was tested for typical body worn ope...

Page 19: ...our device in certain locations such as aircraft hospitals service stations and professional garages or while driving a vehicle The electromagnetic waves from the device can disrupt the performance of electronic devices used in these locations i We recommend that you switch off your device or switch it to flight mode in these locations to avoid interference ...

Page 20: ...where reception is good to reduce the quantity of radiation received avoid using in an underground car park or when travelling train or car o A reception icon indicates the quality of reception on your device A 4 full bar display means that reception is good 13 DOC smplified EU declaration of conformity The simplified EU declaration of conformity referredto in Article 10 9 shall be provided as fol...

Page 21: ...1 BLE 7 1 15 Restrictions in the 5 GHz band According to Article 10 10 of Directive 2014 53 EU the packaging shows that this radio equipment will be subject to some restrictions when placed on the market in Belgium BE Bulgaria BG the Czech Republic CZ Denmark DK Germany DE Estonia EE Ireland IE Greece EL Spain ES France FR Croatia HR Italy IT Cyprus CY Latvia LV Lithuania LT Luxembourg LU Hungary ...

Page 22: ... and if not installed and used in the following may cause harmful interference to radio communications However there is no guarantee that interference will not occur in a particular installation To radio or television reception which can be determined by turning the equipment off and on the user is encouraged to try to correct the interference by one or more of the following measures Reorient or r...

Page 23: ...pareils radio exempts de licence L exploitation est autorisée aux deux conditions suivantes 1 l appareil ne doit pas produire de brouillage et 2 l utilisateur de L appareil doit accepter tout brouillage radioélectrique subi même si le brouillage est susceptible d en compromettre le fonctionnement This equipment complies with Industry Canada radiation exposure limits set forth for an uncontrolled e...

Reviews: