


English
19
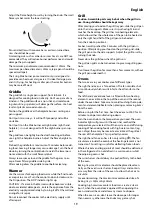
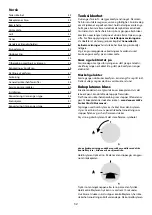
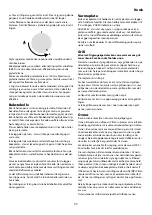
Adjust the flame height to suit by turning the knob. The small
flame symbol marks the lowest setting.
Pans and kettles with concave bases or down turned base
rims should not be used.
Simmering aids, such as asbestos or mesh mats, are NOT rec-
ommended. They will reduce burner performance and could
damage the pan supports.
The minimum pan diameter recommended is 120mm. The
maximum pan base diameter is 250mm, large pans should be
spaced well apart.
The 3 ring Wok burner (some models only) is designed to
provide even heat over a large area. It is ideal for large pans
and stir-frying. For heating smaller pans the smaller burners
may be more efficient.
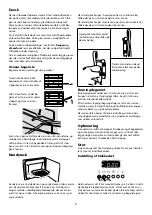
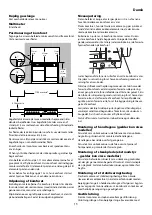
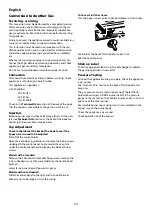
Griddle
The griddle fits a single pan support, front to back. It is
designed for cooking food on directly. Don’t use pans of any
kind on it. The griddle surface is non-stick and metal cook-
ing utensils (e.g. spatulas) will damage the surface. Use heat
resistant plastic or wooden utensils.
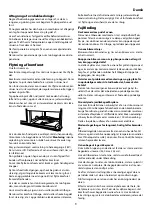
Position the griddle over the hotplate burners resting on a
pan support.
Don’t put it crossways - it will not fit properly and will be
unstable.
Don’t put it on the Wok burner or High burner (right hand
hotplate) - it is not designed to fit the High burner pan sup-
port.
The griddle can be lightly brushed with cooking oil before
use. Light the hotplate burners. Adjust the flame heights to
suit.
Preheat the griddle for a maximum of 5 minutes before add-
ing food. Leaving it longer may cause damage. Turn the heat
down by turning the control knobs towards the lower posi-
tion marked with the small flame symbol.
Always leave space around the griddle for the gases to es-
cape. Never fit two griddles side by side.
After cooking allow the griddle to cool before cleaning.
Warmer
Use the warmer for keeping food warm while the final touch-
es are put to a meal. Turn the control knob anti-clockwise to
the ‘On’ position. The ‘HOT’ indicator lights up.
CAUTION: - If a crack in the Warmer surface becomes visible,
due to accidental damage etc., isolate the appliance from the
electricity supply immediately by turning it off at the wall and
arrange for its repair.
Do not reconnect the cooker to the electricity supply until
after repair!
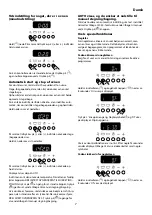
Grill
Caution: Accessible parts may be hot when the grill is in
use. Young children should be kept away.
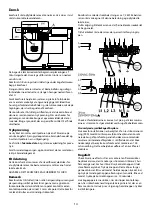
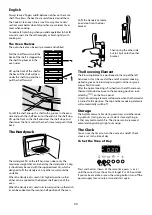
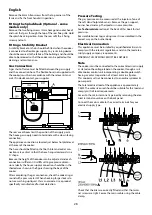
After placing your food on the grill tray pan, slide the grill pan
onto the side supports. Make sure it is pushed right in and
touches the backstop. The grill has two heating elements,
which allow either the whole area of the pan to be heated or
only the right hand half of the grill pan to be heated.
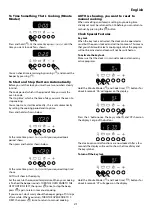
Turn the knob to position 3.
For best results preheat for 2 minutes with the grill pan in
position. After placing your food on the grill pan grid, slide
the grill pan onto the side supports. Adjust the grill to suit by
turning the knob.
Never close the grill door when the grill is on.
The grill pan grid can be turned over to give two grilling posi-
tions.
Don’t leave the grill on for more than a few moments, without
the grill pan underneath it.
Ovens
The two ovens in your cooker are of different types.
The right hand oven is a fanned oven. The fan circulates hot
air continuously which results in faster heat transfer to the
food.
The left hand conventional oven is fitted with two heating
elements, one visible in the top of the oven and the second
under the oven base. Take care to avoid touching the top ele-
ment and element deflector when placing or removing items
from the oven.
Before using for the first time, heat the ovens to 200 C for 30
minutes to dispel manufacturing odours.
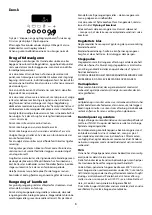
Turn the oven knob to the temperature you need. The oven
indicator light will glow until the oven has reached the
temperature you selected. It will then cycle on and off during
cooking. When cooking foods with high water content (e.g.
oven chips) there may be some steam visible at the grille at
the rear of the hotplate. This is perfectly normal.
The right hand fan oven has a fan only setting ( ). The fan
circulates air inside the oven but the heating element is not
turned on. This setting is useful for defrosting frozen foods.
Whole chickens and large joints of meat should be defrosted
in the refrigerator. Do not defrost in a warm oven or whilst
the adjoining oven is hot.
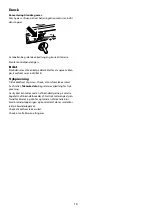
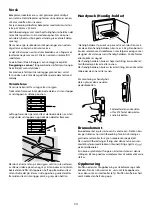
The wire shelves should always be pushed firmly to the back
of the oven.
Baking trays meat tins etcetera should be placed level cen-
trally on the oven’s wire shelves. Keep all trays and contain-
ers away from the sides of the oven, to allow the hot air to
circulate.
For even browning, the maximum recommended size of a
baking tray is 325mm by 305mm.
Cooking high moisture content foods can create a ‘steam
burst’, when the oven door is opened. When opening the
oven stand well back and allow any steam to disperse.
When the oven is on, don’t leave the door open for longer
than necessary, otherwise the knobs may get very hot.
Summary of Contents for Classic 110 Dual Fuel
Page 2: ...2 ...
Page 3: ...3 Dansk English Norsk Tekniske Data Technical Data Tekniske Data DK GB NO IE ...
Page 17: ...Dansk 17 ...
Page 31: ...English 31 ...
Page 50: ...50 ...
Page 51: ...51 ...