background image

2

Side by side

Frigoríficos

Escriba el modelo y los números de serie aquí:

Número de modelo

Número de serie

Estos números se encuentran dentro del compartimento
del frigorífico en la parte superior derecha.

Manual de uso e instalación

For the English version go to page 25

Instrucciones de seguridad ............................................. 3

Cómo conectar la electricidad ......................................... 4

Los controles de temperatura ......................................... 5

El filtro de agua ................................................................ 6

Puertas del frigorífico ...................................................... 6

Estantes y recipientes ..................................................... 7

El compartimiento del congelador ................................... 9

Cajones y recipientes .................................................... 10

Cómo retirar los cajones ............................................... 10

Dispositivo automático para hacer hielo ........................ 11

Dispensador de agua y hielos ...................................... 12

Cuidado y limpieza ........................................................ 12

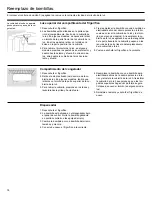
Reemplazo de bombillas .............................................. 14

Instrucciones de instalación .......................................... 15

Conexión a la toma de agua ......................................... 18

Sonidos normales de operación .................................... 20

Antes de solicitar servicio .............................................. 21

Summary of Contents for FQ8925X

Page 1: ...1 225D3076P002 rev 3...

Page 2: ...e seguridad 3 C mo conectar la electricidad 4 Los controles de temperatura 5 El filtro de agua 6 Puertas del frigor fico 6 Estantes y recipientes 7 El compartimiento del congelador 9 Cajones y recipie...

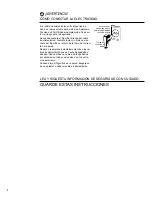
Page 3: ...arla Antes de reemplazar una bombilla de luz quema da el frigor fico debe desenchufarse a fin de evi tar el contacto con un filamento con corriente el ctrica Una bombilla de luz quemada puede romperse...

Page 4: ...de la pared Repare o reemplace inmediatamente todos los ca bles de alimentaci n que se hayan desgastado o da ado Nunca utilice un cable que tenga da os por abrasi n en toda su extensi n o en los extre...

Page 5: ...figuraciones de los controles pueden variar dependiendo de las preferencias personales uso y condiciones de funcionamiento y pueden requerir m s de un ajuste NOTA El frigor fico se env a con una pel c...

Page 6: ...em puje el cartucho hacia arriba a dentro del sopor te 4 Gire el cartucho lentamente hacia la derecha hasta que el cartucho se pare NO APRETAR MUY FUERTE Mientras est gir ndolo ste se alzar por s mism...

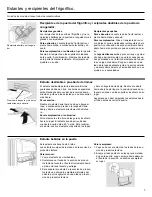
Page 7: ...stantes cuelgan de los lados de la secci n de productos l cteos Para remover 1 Vac e el estante de vino bebidas 2 Sosteniendo el fondo de la secci n de produc tos l cteos levante el frente directament...

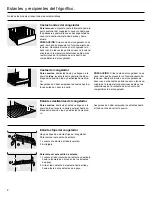
Page 8: ...n tope levante la parte posterior hasta so brepasar la posici n tope y desl celas hacia afue ra Aseg rese de haber empujado las cestas hasta el fondo antes de cerrar la puerta PRECAUCI N Si las cesta...

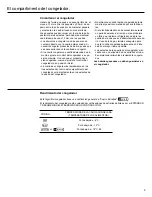
Page 9: ...de ali mentos ajuste el control del congelador a su po sici n m xima Una vez que el producto haya sido congelado vuelva a ajustar el control del congelador a su posici n inicial La comida se congela...

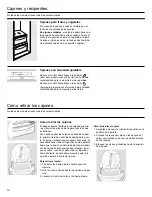
Page 10: ...atro cierres hasta la posici n de aper tura 3 Levante el frente del caj n y tire hacia afuera Para reinstalar el caj n 1 Aseg rese de que los cuatro cierres est n en la posici n de apertura 2 Coloque...

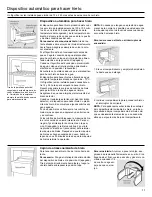
Page 11: ...viejos se opacan adquieren un sabor rancio y se contraen Si los cubitos de hielo bloquean la m quina de hie los la luz verde se volver intermitente Para co rregirlo fije el interruptor de corriente e...

Page 12: ...ente La alarma puede silenciarse tocando la pantalla LCD Cuidado y limpieza del frigor fico rea de goteo del dispensador Limpiar el exterior El rea de goteo del dispensador por debajo de la parrilla s...

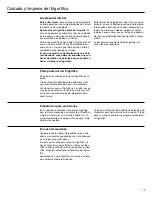
Page 13: ...dispositivo para hacer hielos Limpieza del interior Para evitar olores deje un envase de bicarbonato de sodio abierto en los compartimientos de alimen tos frescos y del congelador Desconecte el frigor...

Page 14: ...segura Coloque de nuevo el tornillo en algunos mode los 5 Reinstale el estante y enchufe el frigor fico de nuevo Luz superior del compartimento del frigor fico 1 Desenchufe el frigor fico 2 Las bombil...

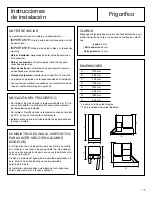
Page 15: ...conexiones de fontaner a y el ctri cas 4 mm 25 mm 13 mm ANTES DE INICIAR Lea estas instrucciones completa y cuidadosamente IMPORTANTE Guarde estas instrucciones para uso del inspector local IMPORTANTE...

Page 16: ...con sus muebles de co cina Use una llave de tubo de 5 16 de mango largo para girar los tornillos de los rodillos traseros en sentido de las agujas del reloj para elevar el frigor fico y en el sentido...

Page 17: ...17 Instrucciones de instalaci n DIMENSIONES Y ESPECIFICACIONES...

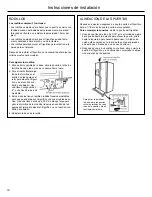
Page 18: ...unto de congelaci n Cuando utilice un aparato el ctrico un taladro por ejemplo durante la instalaci n aseg rese de que dicho aparato est e l ctricamente aislado o conectado de tal manera que no exista...

Page 19: ...erruptor de corriente del dispositivo para hacer hielo en la posici n l El dispositivo para hacer hielo no en trar en funcionamiento hasta que haya alcanzado su tem peratura de funcionamiento de 9 C o...

Page 20: ...asta la temperatura correcta Los reguladores electr nicos se abren y se cierran para ofrecer un enfriamiento ptimo y ahorrar energ a El compresor puede causar un chasquido o un gorjeo cuando in tenta...

Page 21: ...fr e com pletamente Es normal cuando el frigor fico se aca ba de instalar en su casa Compartimento del frigor fico o del congelador demasiado c lido Revise si hay un paquete que mantiene la puerta abi...

Page 22: ...namiento Remueva los cubos de hielo Los cubos de hielo se congelaron sobre el brazo sensor Encienda el dispositivo de hielo o abra el suministro agua Dispositivo de hielo apagado o suminis tro de agua...

Page 23: ...o sensibles y se decoloran a estas temperaturas que son normales y seguras La puerta no cierra apropiada mente Mueva el anaquel de la puerta a una posici n superior Un anaquel de la puerta est chocand...

Page 24: ...je que transcurran 24 horas para que el sistema se estabilice Se introdujo comida tibia al frigor fico Deje que transcurran 24 horas para que el sistema se estabilice Se dej abierta una puerta durante...

Page 25: ...ctions Important Safety Information 26 How to connect electricity 27 About the temperature controls 28 Water filter 29 Refrigerator doors 29 Shelves and bins 30 Freezer compartment 32 Crispers and pan...

Page 26: ...ator is plugged in Installation of the icemaker must be done by a qualified service technician Keep fingers out of the pinch point areas clear ances between the doors and between the doors and cabinet...

Page 27: ...e by a person responsible for their safety Chil dren should be supervised to ensure that they do not play with the appliance IMPORTANT The refitting of electric plugs and cables should be done by a qu...

Page 28: ...r Control settings will vary based on personal preferences usage and operating conditions and may require more than one adjustment NOTE The refrigerator is shipped with protective film covering the te...

Page 29: ...penser This light will turn orange to tell you that you need to replace the filter soon The filter cartridge should be replaced when the re placement indicator light turns red or if the flow of water...

Page 30: ...n To remove 1 Empty the wine beverage rack 2 Holding the bottom of the dairy bin lift the front straight up then lift up and out 3 To detach the rack from the dairy bin pull the rack s side wires out...

Page 31: ...To remove slide out to the stop position lift the front past the stop position and slide out Make sure you push the baskets all the way back in before you close the door Freezer Baskets WARNING Poor p...

Page 32: ...ozen set the freezer control to its coldest setting After the food is frozen reset the freezer control to its initial po sition Food is most quickly frozen on the middle three shelves of the freezer c...

Page 33: ...four swing locks to the unlock position 3 Lift the front of the drawer up and out To replace the bottom crisper 1 Make sure all four swing locks are in the unlock position 2 Place the sides of the dra...

Page 34: ...ce is not used frequently old ice cubes will become cloudy taste stale and shrink If ice cubes get stuck in the icemaker the green power light will blink To correct this set the power switch to O and...

Page 35: ...LCD models a popup screen will appear The alarm can be si lenced by touching the LCD screen Care and cleaning of the refrigerator Dispenser drip area Cleaning the Outside The dispenser drip area bene...

Page 36: ...eful when moving the refrigerator away from the wall Pull the refrigerator straight out and return it to po sition by pushing it straight in When pushing the refrigerator back make sure you don t roll...

Page 37: ...make sure the top tabs snap securely into place Re place the screw on some models 5 Reinstall the shelf and plug the refrigerator back in Refrigerator Compartment Upper Light 1 Unplug the refrigerato...

Page 38: ...ty REFRIGERATOR LOCATION Do not install the refrigerator where the temperature will go below 16 C because it will not run often enough to maintain proper temperatures Do not install the refrigerator w...

Page 39: ...kwise to lower it Use a 3 8 hex socket or wrench or an adjustable wrench 3 These models also have rear adjustable rollers so you can align the refrigera tor with your kitchen cabinets Use a long handl...

Page 40: ...40 Installation Instructions DIMENSIONS AND SPECIFICATIONS...

Page 41: ...NG TO THE REFRIGERATOR NOTES Before making the connection to the refrigerator be sure the refrigerator power cord is not plugged into the wall outlet We recommend installing a water filter if your wat...

Page 42: ...rator back to the wall 3 START THE ICEMAKER Set the icemaker power switch to the l position The ice maker will not begin to operate until it reaches its operating temperature of 9 C or below It will t...

Page 43: ...gged in This happens as the refrigerator cools to the cor rect temperature Electronic dampers click open and closed to provide optimal cool ing and energy savings The compressor may cause a clicking o...

Page 44: ...rmal Door left open Check to see if package is holding door open Hot weather or frequent door openings This is normal Temperature controls set at the coldest setting Check to see if package is holding...

Page 45: ...ress and hold the LOCK CONTROL pad for 3 sec onds Water has poor taste odor Press the dispenser arm for at least two minutes Air may be trapped in the water system Replace filter cartridge or remove f...

Page 46: ...off after the door remains closed for 2 hours Adaptive defrost keeps compressor run ning during door openings Refrigerator never shuts off but the temperatures are OK Normal air flow cooling motor In...

Page 47: ...47...

Page 48: ...48...

Reviews: