


Creating accounts and users
Overview
To configure your ezeio
™
, you need to create an account on the server and
associate the ezeio
™
with that account.
This is important to understand to effectively manage your systems:
(!!)
Each ezeio
™
is associated with a single account.
(!!)
Each user is associated with a single account.
(!!)
An account may have any number of ezeio
™
units and any number of
users associated with it.
Note that you can register several ezeio
™
units under the same account. This
allows you to access all of them from a single login. See Add an ezeio to an
existing account
page 10.
All users on the same account will have access to all the ezeio units on that
account. If you prefer to separate user access, simply create unique accounts
for each ezeio. There is no per-account cost, but having a lot of accounts
may become difficult to manage.
Creating a new account
Click
Create a new account
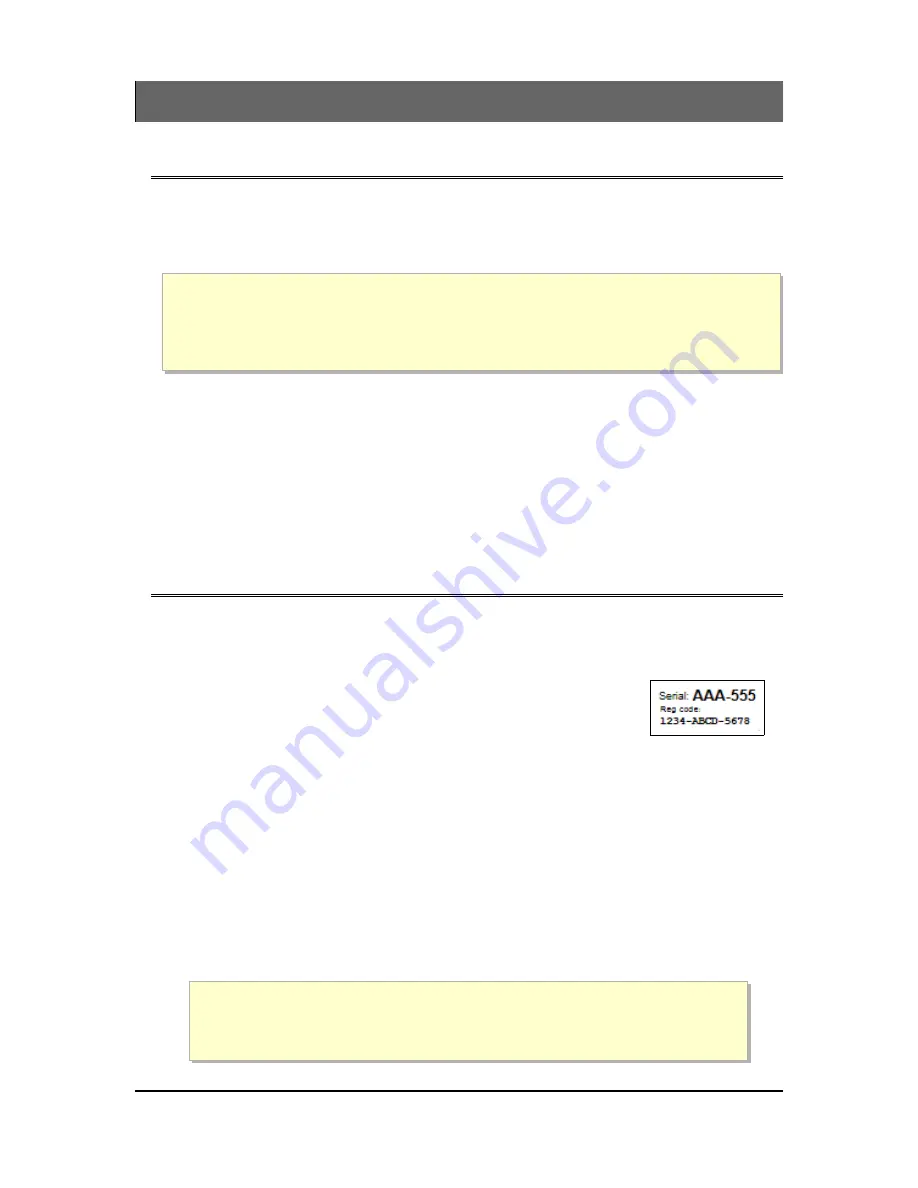
Step 1:
The system will ask you for the ezeio serial number, and the
registration code. These are printed on a sticker located on the
front of your ezeio.
Enter them exactly as they show on the sticker.
Step 2:
Enter your user info:
Name, Email, Phone & Company or Account Name
Step 3:
Enter a User Name & Password.
Click to send the verification email.
Step 4:
Open the email, click the link, and enter your password. You're done!
In addition to your login name and password, the system assigns you an
account ID. You will need the account ID every time you log in. Make
sure to take a note of it. It is also included in the confirmation email.
Page 9 of 121


