Room Scheduling System • Google Setup
57
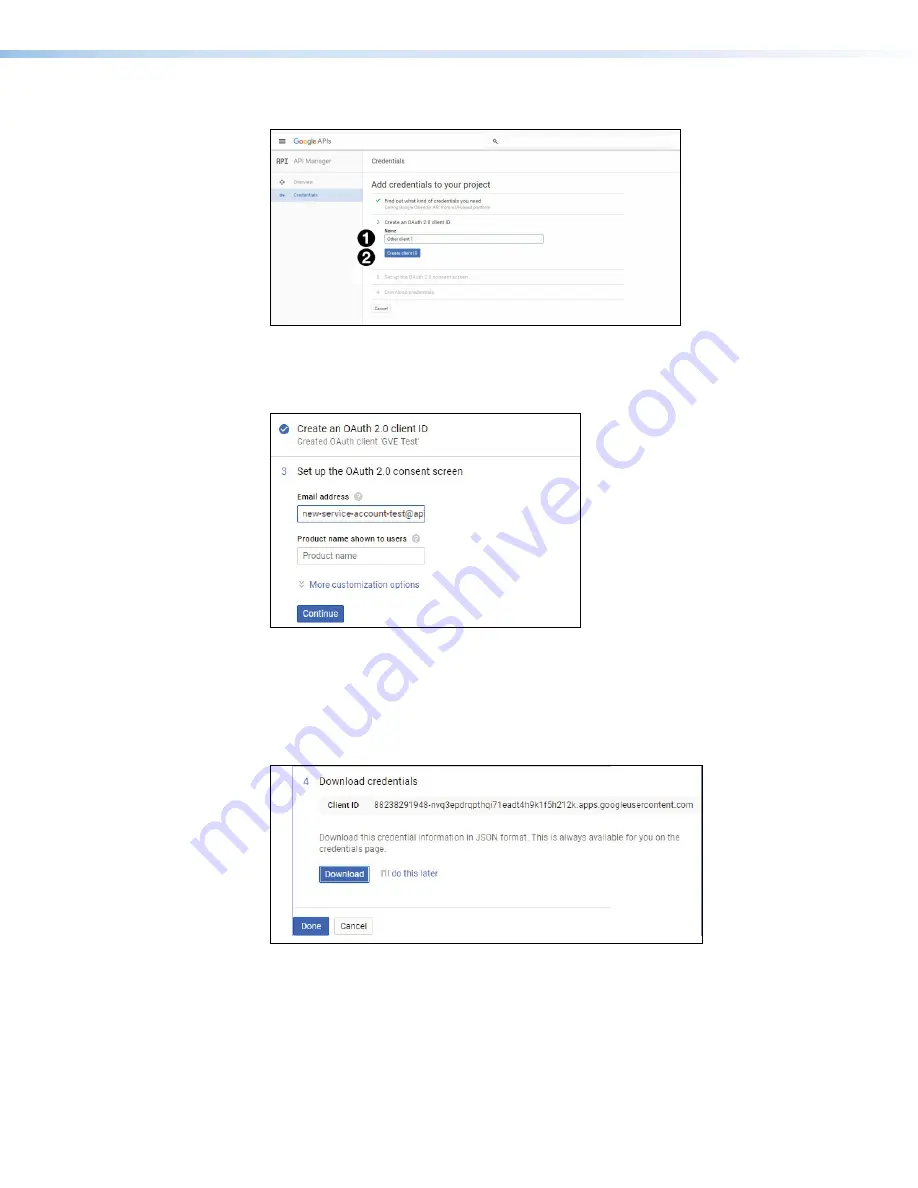
The
Create
an
OAuth
2.0
client
ID
screen opens.
Figure 61.
Create an OAuth 2.0 client ID
9.
Enter a name (see figue 61,
1
) and click
Create
client
ID
(
2
).
The
Set
up
the
OAuth
2.0
consent
screen
opens.
1
1
1
1
1
1
1
1
1
1
1
1
1
1
1
1
1
1
2
2
2
2
2
2
2
2
2
2
2
2
2
2
2
2
2
2
3
3
3
3
3
3
3
3
3
3
3
3
3
3
3
3
3
3
Figure 62.
Set up the OAuth 2.0 consent screen
10.
Enter the
address
used to access Google Calendar (see figure 62,
1
).
11.
Enter a
Product
name
shown
to
users
(
2
).
12.
Click
Continue
(
3
).
The
Download
credentials
screen opens;
1
1
1
1
1
1
1
1
1
1
1
1
1
1
1
1
1
1
2
2
2
2
2
2
2
2
2
2
2
2
2
2
2
2
2
2
3
3
3
3
3
3
3
3
3
3
3
3
3
3
3
3
3
3
Figure 63.
Download Credentials Screen
Your
Client
ID
is shown (see figure 63,
1
).
13.
Click
Download
(
2
) to save the JSON file. Make a note of where it is saved as it is
required to authenticate the touchpanel.
14.
Click
Done
(3).
step 13


