ShareLink 200 N • Operation Using a Computer
14
Using the ShareLink Software
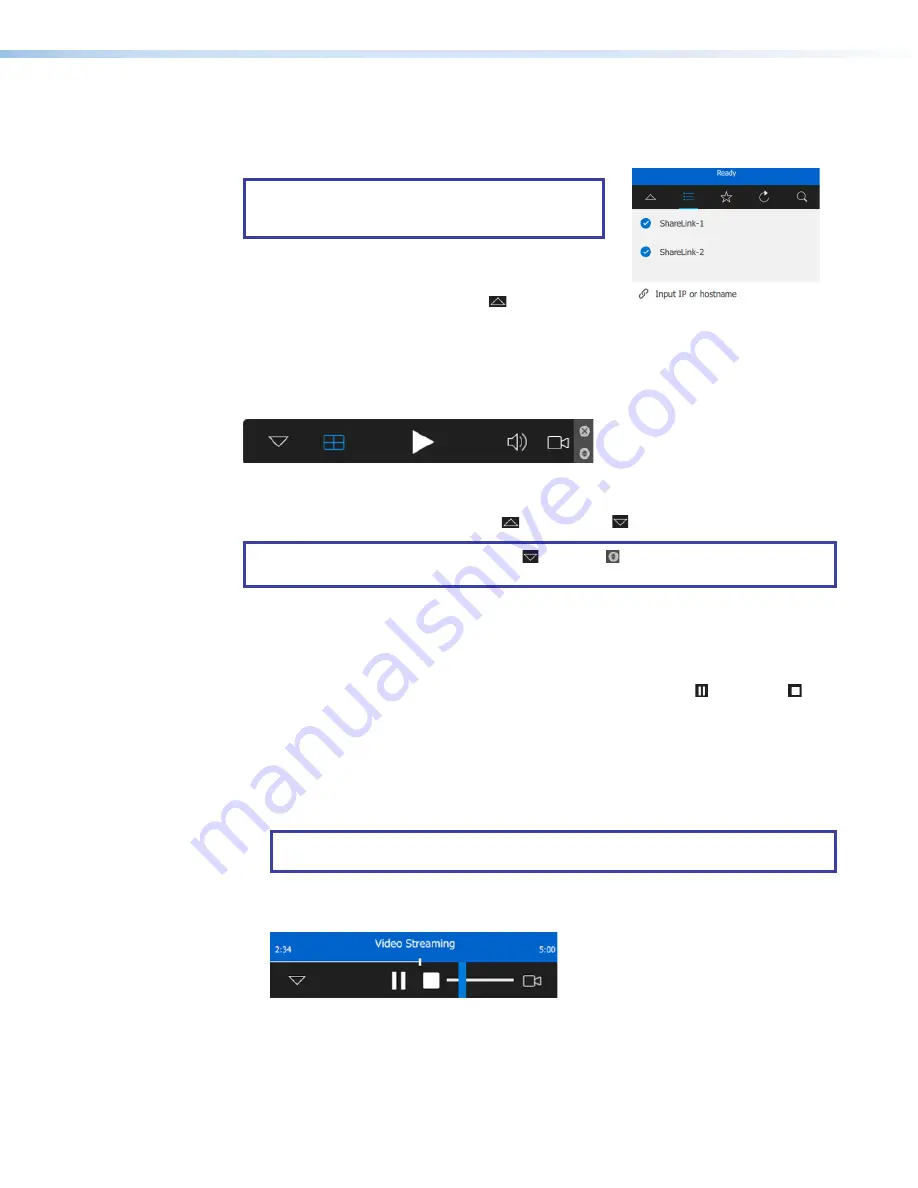
After successful connection to the ShareLink, the device name is shown on the software
window with a blue checkmark as shown at right.
NOTE:
The computer can be connected to multiple
ShareLink devices. The presentation is broadcast
to all connected units simultaneously.
After a few seconds, the software window is minimized,
and the presentation controls are revealed as shown
below. Alternatively, you may click the arrow (
1
) to
reveal the presentation controls.
Presenting the Computer Screen
Use the following software options to present content:
1
1
2
2
3
3
4
4
5
5
6
6
Î
Î
Figure 12.
ShareLink Software Controls
1
Minimize/maximize
— Minimize ( ) or maximize ( ) the current software window.
NOTE:
After clicking the maximize button ( ), click
Î
Î
( ) to show the info panel, which
lists the connected receivers.
2
Grid view
— Click this button (for presentations that feature multiple content sources)
to change how the computer screen is presented on the display: top left, top right,
bottom left, bottom right, or full screen.
3
Play
— Click to start presenting your computer screen. A
Pause
( ) and
Stop
( )
button become available to pause the presentation on the current screen or to stop the
presentation.
4
Volume
— Click this button to mute or unmute audio when presenting.
5
Stream Video
(Windows only) — Click this button to upload and present an MP4 video
file. Browse to the desired video file and double-click it to upload it to the software.
NOTE:
The stream video feature is only supported on devices that are on the same
subnet.
Use the video streaming panel (shown below) to stop or pause the presentation, control
the volume, and skip to a specific time:
Figure 13.
Video Streaming
6
Close
— Click to close the software.
1
1
PRELIMINARY
Summary of Contents for ShareLink 200 N
Page 6: ...PRELIMINARY ...


