IPI 100 Series, IPI 200 Series • Configuration and Control
4-17
3
.
Add intercoms to the intercom list and click
Update
Intercom List
.
4
.
Configure each intercom and click
Apply
. See the
“Configuration” section in this chapter for details.
5
.
Exit the configuration utility. The main screen is now
accessible.
6
.
Click on the
Tools
drop-down menu and select
Preferences
.
7
.
Select the desired settings for the system, then click
OK
to accept the settings and return to the main screen. See
“Setting preferences” on page 4-13.
8
.
Click on the
File
menu and select
Save Project
or
Save
Project As
, then create a filename for and save the system
settings.
9
.
Manage the intercom system using the main/management
screen. See “Parts of the Main Screen” on page 4-5.
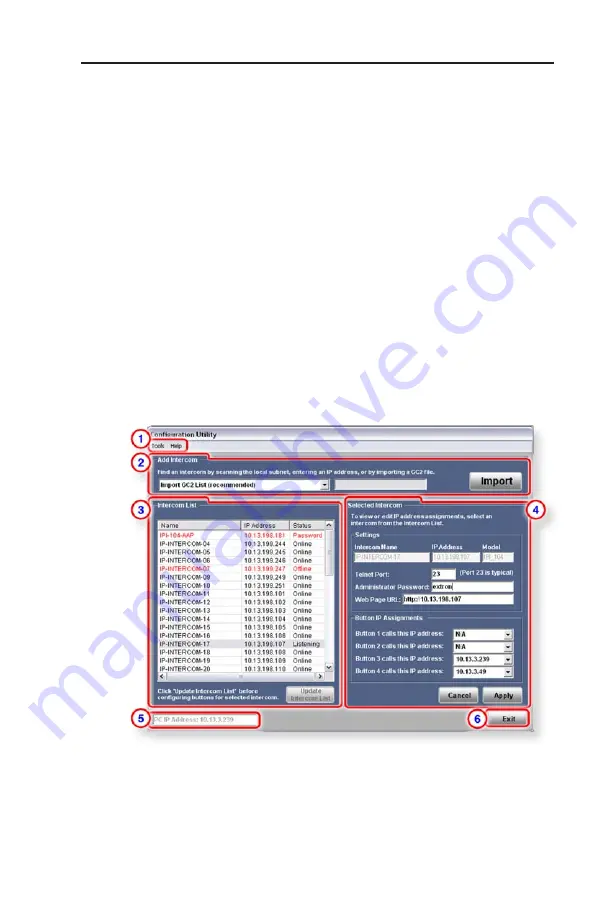
Parts of the Configuration Utility screen
a
Configuration Utility menu bar
— See “Configuration Utility
menus” on page 4-8 for details on the drop-down menus
available here.
Summary of Contents for IPI 101
Page 4: ...This page has been intentionally left blank...
Page 8: ...This page has been intentionally left blank...
Page 28: ...IPI 100 AAP IPI 200 AAP Series Installation Installation cont d 2 14...
Page 58: ...IPI 100 Series IPI 200 Series Configuration and Control Configuration and Control cont d 4 26...


