


4
68-3274-50 Rev. B
10 19
MENU and ENTER buttons
— Press these buttons to access and navigate the on-screen display menu system.
Navigation buttons
— Press these arrow buttons to navigate through the on-screen menu system or change settings.
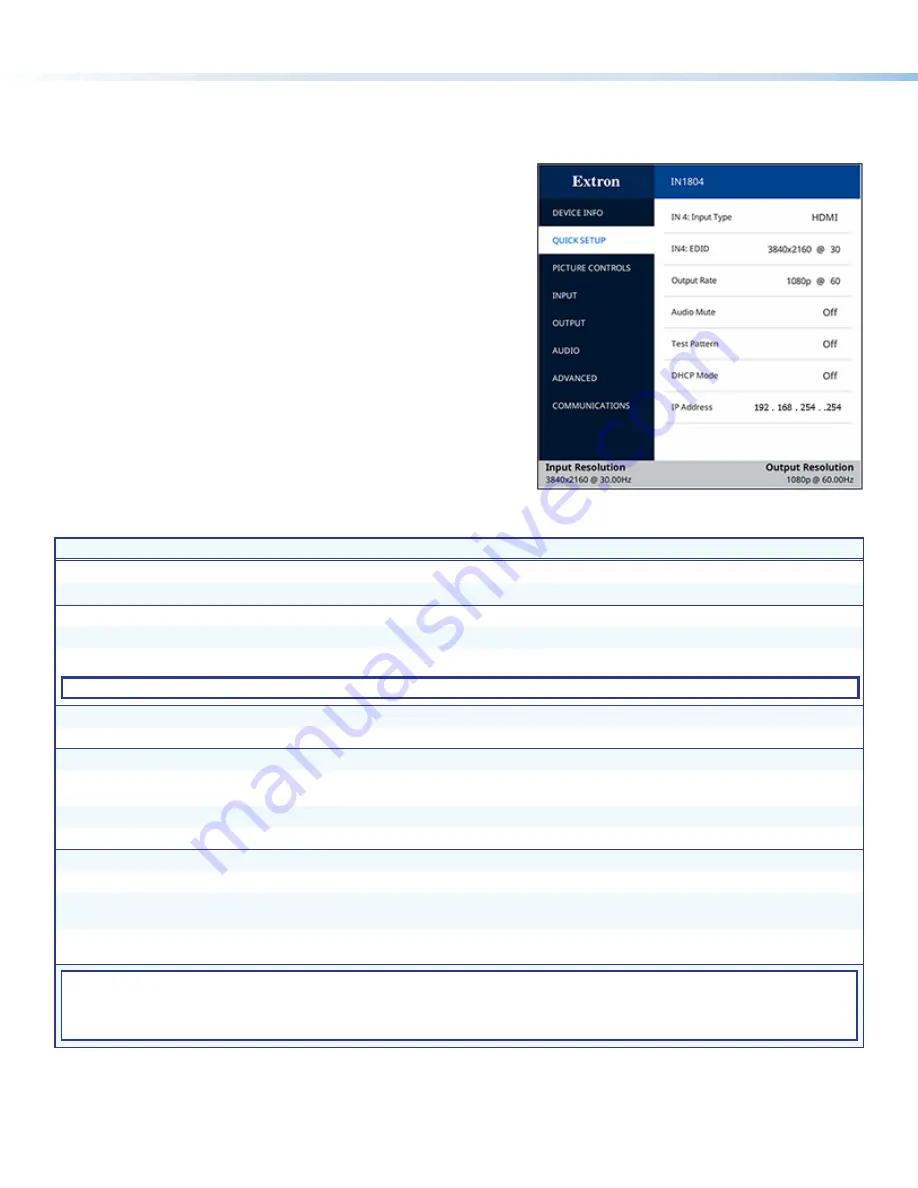
Configuring the IN1804 Series
On-screen Display (OSD) Menu System
To configure IN1804 scalers using the
OSD
menu, connect a display device
and press the
MENU
button to open the
OSD
menu. The
OSD
menu consists
of eight submenus accessed using the front panel
MENU
or
ENTER
button.
Extron Product Configuration Software
To configure IN1804 scalers using PCS, install the software (available on
the Extron website,
) to a PC connected to the scaler
via Ethernet or front panel USB Config port. After the installation, start the
program. For full instructions, press <
F1
> on the keyboard or click the
?
button in the software and select
Help
File
.
Basic SIS Commands
To configure IN1804 scalers with specific SIS commands via an
RS-232, USB, or Ethernet connection, use the Extron DataViewer utility
or a control system to send and receive SIS commands. The table
below lists a selection of SIS commands. For a full list of SIS commands and variables, see the
IN1804 Series User Guide
at
Command
ASCII Command
Response
Additional Description
Select video input
X!
!
In
X!•
All
]
Select video and audio from input
X!
.
View current input
!
X!]
View currently selected source
X!
.
Mute video (global)
1B
Vmt1
]
Mute the video on all outputs.
Mute video and sync (global)
2B
Vmt2
]
Mute the video and sync on all outputs.
Unmute video and sync (global)
0B
Vmt0
]
Unmute the video and sync on all outputs.
NOTE:
By default, video is unmuted after a power cycle.
Enable global output audio mute
1Z
Amt1
]
Mute the audio on all outputs.
Disable global audio mute
0Z
Amt0
]
Unmute the audio on all outputs.
Enable front panel lock mode 1
1X
Exe1
]
Lock the entire front panel.
Enable front panel lock mode 2
2X
Exe2
]
Lock the front panel except input switching, Auto-Image,
and output resolution reset (via down arrow button only).
Enable front panel lock mode 3
3X
Exe3
]
Lock the front panel except input switching.
Disable front panel lock mode
0X
Exe0
]
Allow all front panel adjustments and selections.
Set Auto-Switch mode
EX3)
AUSW
}
Ausw
X3)]
Select Auto-Switch mode
X3)
.
View Auto-Switch mode
E
AUSW
}
X3)]
View the current Auto-Switch mode.
Set user Auto-Switch priority
E
P
X3!
1
...
X3!
4
AUSW
}
Ausw
P
X3!
1
...
X3!
4
]
Set priority
X3!
for auto-input switching. Lists inputs in
order of priority, from highest to lowest.
View user Auto-Switch priority
E
P
AUSW
}
X3!
1
...
X3!
4
]
View user Auto-Switch priority. Lists inputs in order of
priority, from highest to lowest.
KEY:
X!
=
Input selection (
1-4)
X3)
= Auto-Switch mode:
0
= disabled (default),
1
= user defined priority,
2
= input memory priority (most recently detected input)
X3!
= Input numbers for Auto-Switch priority:
1
= input 1,
2
= input 2,
3
= input 3,
4
= input 4
Firmware Updates
Download firmware updates from the Extron website and upload them via the internal web pages, PCS, or the Extron Firmware
Loader program.
©
2019 Extron Electronics All rights reserved. All trademarks mentioned are the property of their respective owners.


