


382100-EU-EN v2.2 07/13
10
4.0 Measurement Preparation
4-1 Opening Screen
1. When the meter is powered up the initialization screen appears asking the user to “please wait”.
2. The meter will also check for an inserted SD memory card. ‘SD check’ will appear on the screen.
If an SD card is inserted, the blinking display will switch off after several seconds. When no card
is inserted the display will show ‘No disk’.
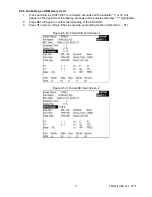
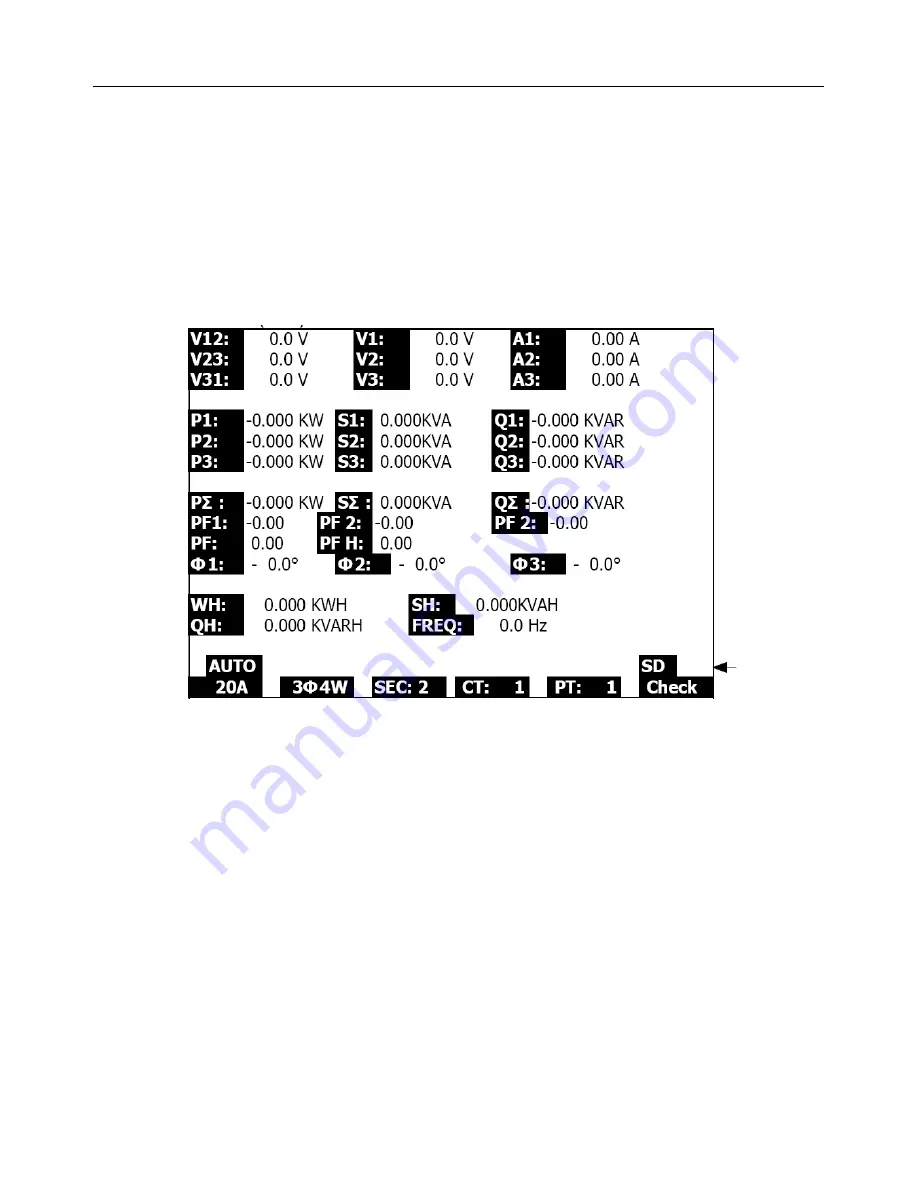
4-2 Main Screen
The main screen displays all of the power measurement data.
Figure 4-2: Main Screen
4.3 Keypad layout
1. POWER KEY (3-7, Fig. 1): Press to turn the instrument ON/OFF
2. 1
Φ
3
Φ
(phase/wire) KEY (3-2, Fig. 1): Press to select (1P/2W, 1P/3W, 3P/3W, 3P/4W)
measurement function
3. A (current) RANGE KEY (3-10, Fig. 1): Press to change from AUTO RANGE to MANUAL
RANGE mode for current
4. REC KEY (3-9, Fig. 1): The data record key for the SD Memory Card
5. HOLD KEY (3-5, Fig. 1): Press to freeze the displayed reading
6. BACKLIGHT KEY (3-6, Fig. 1): Press to switch LCD backlight ON/OFF
7. SETUP KEY (3-12, Fig. 1): Press to setup a function before measuring
8. EXIT KEY (3-8, Fig. 1): Press to exit the set-up screen
9. SHIFT KEY (3-11, Fig. 1): Used for programming the functions on the set-up screen
10. UP (
▲
) KEY (3-3, Fig. 1): Press to move the cursor up
11. DOWN (
▼
) KEY (3-4, Fig. 1): Press to move the cursor down
Distributed by MicroDAQ.com, Ltd. www.MicroDAQ.com (603) 746-5524