6
5
Die EX
-
1328 ist mit einem USB 3.0 A
-
Stecker zum Anschluss an den PC und einem RJ45 Port
ausgestattet. Die EX
-
1328 ermöglicht Ihnen auf einfachste Weise Ihren Desktop PC oder Ihr
Notebook in ein 10/100/1000Mbps Netzwerk einzubinden oder ein Endgerät anzuschließen. Er
unterstützt alle USB Anschlüsse von 1.1 bis 3.0. Die EX
-
1328 gewährleistet eine sichere Daten-
übertragung und exzellente Performance von bis zu 5Gbit pro Sekunde auf der USB Schnittstel-
le! Der RJ45 Anschluss wird durch einen ASIX Chipset unterstützt. Er unterstützt den Bus
Powered Modus. Es ist nicht möglich die I/O Adressen und Interrupts manuell einzustellen, da
die Einstellungen vom System (BIOS) und beim installieren des Betriebssystems automatisch
vorgenommen werden.
Kompatibilität:
USB 1.1, 2.0 & 3.0 / TCP/IP 10/100/1000
Betriebssysteme:
Windows XP/ Vista/ 7/ 8.x/ 10/ Server 20xx/ Mac OS/ Linux
Anschlüsse:
1x USB 3.0 A
-
Stecker, 1x RJ45 Gigabit Ethernet Anschluss
Lieferumfang:
EX
-
1328, USB A auf USB C Adapter, Anleitung
Zertifikate:
CE
/
FCC / RoHS / WEEE DE97424562 / WHQL
1
ANSCHLÜSSE
BESCHREIBUNG & TECHNISCHE DATEN
AUFBAU
Anleitung
Vers. 1.0 / 07.09.16
EX
-
1328
Adapter USB A auf USB C
For cleaning please use only a dry fluff less cloth and remove the dirt with gently pressure. In
the area of the connectors please make sure that no fibres from the cloth remain in the connect-
ors.
Attention! Never use a moist or wet cloth for cleaning!
CLEANING
HARDWARE
INSTALLATION
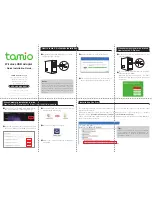
Because there are large differences between PC’s, we can give you only a general installation
guide for the EX
-
1328. Please refer your computer’s reference manual whenever in doubt.
1.
Connect the EX
-
1328 to the USB A
-
Port or with the USB A to USB C adapter to a USB C
-
Port at your PC.
2.
Now you can connect a network cable at the EX
-
1328.
DRIVER INSTALLATION
RJ45 Anschluss
USB 3.0 A
-
Stecker
zum Anschluss an PC
RJ45 Anschluss:
Pin
Signal
Pin
Signal
Pin
Signal
1
BI_DA+
4
BI_DC+
7
BI_DD+
2
BI_DA
-
5
BI_DC
-
8
BI_DD
-
3
BI_DB+
6
BI_DB
-
RJ45 Anschluss
Windows XP/ Vista/ 7/ 8.x/ 10/ Server 20xx/ Mac OS/ Linux
After the hardware installation Windows will recognize the device automatically and install the
drivers. If the driver shoul not be installed automatically, please insert the Driver CD into your
CD
-
Rom drive (e.g. Drive D:) and open the folder for your operating system which is in the
folder
„AX88179“
(see picture).
Now start the
„setup“
file which is in the „AX88179“ folder. Follow the installation instructions
and complete the installation.
CHECK INSTALLED DRIVER
Open the
>Device manager<
. Now you should see at
„Ethernet Adapter“
the following new
entry:
If you see this or a similar information the device is installed correctly.


