Exinda Network Orchestrator
4 Settings
|
386
NOTE
Ensure that the firewall on the server running the Exinda AD Connector is configured to allow inbound and
outbound traffic on the configured port.
Changing the Exinda AD Connector port number
If necessary, you can change the AD Connector port number using the following instructions. Changing the port
number requires that you do this on both the server hosting the AD Connector, and each of the Exinda appliances.
To change the port number on the Exinda AD Connector
1.
Launch the
Exinda AD Configuration Utility
.
2.
Select the
Exinda Appliances
tab.
3.
Type a new port number in the field. The default port number is 8015.
To change the port number on each Exinda Appliance
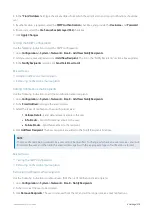
1.
Log into the Exinda Web UI.
2.
Click
Configuration
, and from the System group, select
Network > Active Directory
.
3.
Type the same port number you set above in the Exinda AD Configuration Utility.
4.
Apply the changes.
5.
Repeat these steps for each Exinda Appliance that communicates with this instance of the Exinda AD Connector.
To determine if the port change was successful on the Exinda Appliance
Wait a few moments to ensure the information on the Active Directory tab updates with new information:
IP Address
– The IP address of the server running the Exinda AD Connector.
Windows Version
– The version of Windows on the Active Directory server.
Version
– The Exinda AD Connector version.
Agent Name
– The Exinda AD Connector name.
Last Contact
– The last time the Active Directory server was contacted.
Select the information sent between the Exinda appliance and the Active Directory server
Specify what information is sent between the Active Directory server and the Exinda appliance. When you first install the
Exinda AD Connector, it may take a while to complete all user to IP address mappings as each user needs to logon.
NOTE
User accounts that have been disabled on the Active Directory server are not included in the data sent to the Exinda
Appliances
1.
In the Exinda AD Connector, switch to the
AD Server
tab.
2.
To send a list of users and groups to Exinda appliances when the service starts, select
Send Active Directory user and
group information to Exinda appliances
. The list of users and groups that is sent to the appliance can be used to cre-
ate user or group-based policy. If this is not selected, only logged on users will be available to your Exinda appliances.
Summary of Contents for EXNV-10063
Page 369: ...Exinda Network Orchestrator 4 Settings 369 ...
Page 411: ...Exinda Network Orchestrator 4 Settings 411 Screenshot 168 P2P OverflowVirtualCircuit ...
Page 420: ...Exinda Network Orchestrator 4 Settings 420 Screenshot 175 Students OverflowVirtualCircuit ...

