background image


Design and function 

MIG/MAG welding 


099-005507-EW501 

13.09.2018


35


5.4.3 

Definition of MIG/MAG welding tasks 

This machine series offers user-friendly operation and a multitude of features. 
•  Various welding tasks (JOBs) consisting of welding procedure, material type, wire diameter and 

shielding gas type have been predefined

 > see 11.1 chapter

•  The system calculates the required process parameters depending on the operating point specified 

(one-knob operation via wire feed speed rotary transducer). 

•  You can adjust additional parameters at the machine control or using the PC300.NET welding 

parameter software, if required. 

Phoenix Expert machine series: 

The welding task is set at the power source control; refer to the relevant system documentation. 
If required, the predefined special welding tasks SP1 = JOB 129 / SP2 = JOB130 / SP3 = JOB 131 only 
can be selected at the wire feeder control. The special JOBs are selected by pressing the welding task 
selection push-button for a longer period. The special JOBs are switched by pressing the push-button 
briefly. 

5.4.4 

Welding task selection 

The following steps have to be carried out to select the welding job: 
•  Select basic parameters (material type, wire diameter and shielding gas type) and welding procedures 

(select and enter JOB number by means of JOB-List

 > see 11.1 chapter

). 

•  Select operating and welding type 
•  Adjust welding power 
•  Correct arc length and dynamics if necessary 
•  Adjust expert parameters for special applications 

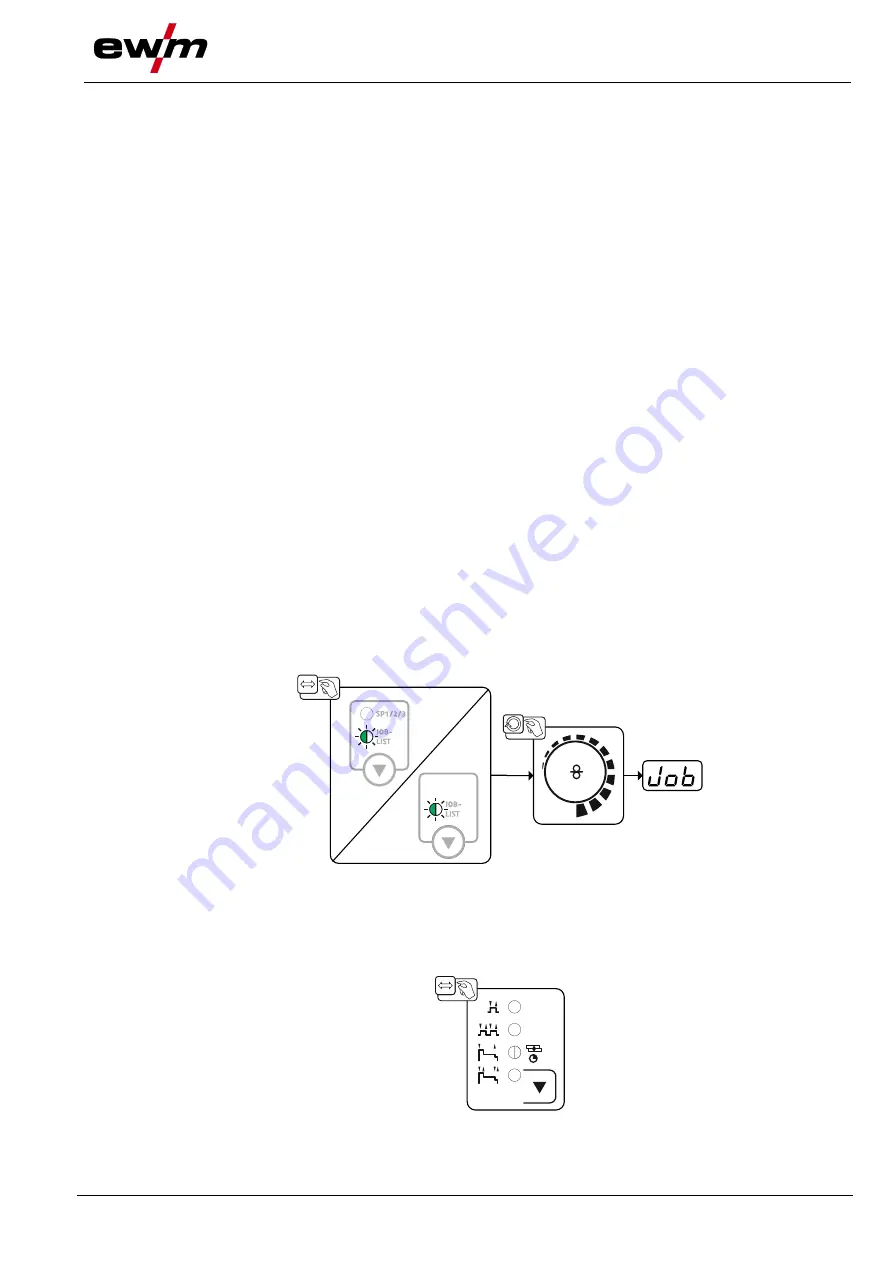
5.4.4.1  Basic welding parameters 

The user must first determine the basic parameters (material type, wire diameter and shielding gas type) 
of the welding system. These basic parameters are then compared with the welding job list (JOB-LIST). 
The combination of the basic parameters gives a JOB number, which must now be entered on the control 
unit. This basic setting must be rechecked or adjusted only when changing the wire or gas. 

You can only change the JOB number when no welding current is flowing. 


Figure 5-16 


5.4.4.2  Operating mode 

The operating mode determines the process sequence controlled by the welding torch. Detailed 
descriptions of the operating modes

 > see 5.4.10 chapter


Figure 5-17 


Summary of Contents for drive 4X IC D EX

Page 1: ...Operating instructions EN Wire feed unit drive 4X IC D HP 099 005507 EW501 Observe additional system documents 13 09 2018 ...

Page 2: ...authorised sales partners can be found at www ewm group com en specialist dealers Liability relating to the operation of this equipment is restricted solely to the function of the equipment No other form of liability regardless of type shall be accepted This exclusion of liability shall be deemed accepted by the user on commissioning the equipment The manufacturer is unable to monitor whether or n...

Page 3: ... Maximal hose package length 21 5 1 4 Notes on the installation of welding current leads 22 5 1 5 Stray welding currents 23 5 1 6 Intermediate hose package connection 24 5 1 7 Shielding gas supply shielding gas cylinder for welding machine 25 5 1 7 1 Shielding gas volume settings 25 5 1 7 2 Gas test 25 5 1 7 3 Purge hose package 26 5 2 Welding data display 26 5 3 Basic settings for operation with ...

Page 4: ... torch 62 5 4 14 MIG MAG special torches 62 5 4 14 1 Program and up down operation 62 5 4 14 2 Switching between Push Pull and intermediate drive 62 5 4 15 Expert menu MIG MAG 63 5 4 15 1 Selection 63 5 4 15 2 Burn back 64 5 4 15 3 Programme limit 65 5 5 TIG welding 65 5 5 1 Welding torch connection 65 5 5 2 Welding task selection 66 5 5 2 1 Welding current setting 66 5 5 3 TIG arc ignition 67 5 5...

Page 5: ... selection in Expert mode P25 86 5 10 3 23Nominal value wire heater P26 86 5 10 3 24Mode switching at welding start P27 86 5 10 3 25Error threshold electronic gas flow control P28 86 5 10 3 26Units system P29 86 5 10 3 27Selection option Program sequence with welding power rotary knob P30 86 5 11 Machine configuration menu 87 5 11 1 Aligning the cable resistance 88 5 11 2 Power saving mode Standby...

Page 6: ...Contents Notes on the use of these operating instructions 6 099 005507 EW501 13 09 2018 ...

Page 7: ... serious and even fatal injuries Safety notes include the WARNING keyword in the heading with a general warning symbol The hazard is also highlighted using a symbol in the page margin CAUTION Working or operating procedures which must be closely observed to prevent possible minor personal injury The safety information includes the CAUTION keyword in its heading with a general warning symbol The ri...

Page 8: ...itch off machine Release Switch on machine Press and hold Switch Incorrect Invalid Turn Correct Valid Numerical value adjustable Input Signal light lights up in green Navigation Signal light flashes green Output Signal light lights up in red Time representation e g wait 4 s actuate Signal light flashes red Interruption in the menu display other setting options possible Tool not required do not use...

Page 9: ...r parts of these instructions Read and observe the operating instructions for all system components especially the safety instructions The illustration shows a general example of a welding system Figure 2 1 The illustration shows a general example of a welding system Item Documentation A 1 Wire feeder A 2 Controller A 3 Remote adjuster A 4 Options conversion instructions A 5 Welding torch A 6 Powe...

Page 10: ...ocess Secondary process Standard MIG MAG welding Pulsed MIG MAG welding TIG welding lift arc MMA welding Gouging forceArc rootArc coldArc pipeSolution forceArc puls rootArc puls coldArc puls alpha Q puls MM Phoenix puls MM Taurus Synergic S MM possible not possible 3 2 Use and operation solely with the following machines A suitable power source system component is required in order to operate the ...

Page 11: ...laration of conformity is included with every product 3 3 3 Service documents spare parts and circuit diagrams WARNING Do not carry out any unauthorised repairs or modifications To avoid injury and equipment damage the unit must only be repaired or modified by specialist skilled persons The warranty becomes null and void in the event of unauthorised interference Appoint only skilled persons for re...

Page 12: ...Machine description quick overview Front view side view from the right 12 099 005507 EW501 13 09 2018 4 Machine description quick overview 4 1 Front view side view from the right Figure 4 1 ...

Page 13: ...ntrol lead etc 5 Quick connect coupling blue Coolant forward flow to the welding torch 6 Quick connect coupling red Coolant return from welding torch 7 Welding torch connection Euro or Dinse torch connector Welding current shielding gas and torch trigger integrated 8 Protective cap Cover for the wire feed mechanism and other operating elements Depending on the machine series additional stickers wi...

Page 14: ...ing mode and with MMA or TIG welding the lighting is switched off 4 Welding torch function changeover switch special welding torch required Welding power infinitely adjustable Change over programs or JOBs 5 Wire feed unit 6 Quick connect coupling red Coolant return 7 Intermediate hose package strain relief see 5 1 6 chapter 8 Quick connect coupling blue Coolant feed 9 Connector plug welding curren...

Page 15: ...ding power infinitely adjustable Change over programs or JOBs 3 Connecting nipple G shielding gas connection 4 Wire spool holder 5 Wire feed unit 6 Lighting inside In power saving mode and with MMA or TIG welding the lighting is switched off 7 Key switch for protection against unauthorised use see 5 9 chapter changes possible G front drive 4x EX changes not possible 8 Wire inching push button For ...

Page 16: ...t The list can be found inside the protective cap of the wire feed mechanism and in the appendix to these operating instructions 3 Display left Welding current material thickness wire speed hold values 4 Push button parameter selection left power saving mode AMP Welding current Material thickness see 5 4 4 4 chapter Wire feed speed Hold After welding the values used last are shown from the main pr...

Page 17: ...is softer and wider 10 Arc length correction selection of welding program rotary dial Correction of the arc length from 9 9 V to 9 9 V Selection of welding programs 0 to 15 not possible if accessory components such as program torches are connected 11 Button Parameter selection right VOLT Welding voltage Prog Program number kW Welding performance display Gas flow quantity optional 12 Display right ...

Page 18: ...program PA Setting range 0 1 s to 20 0 s 0 1 s increments Used e g in connection with the super pulse function 8 Signal light reduced main program PB Wire speed 1 to 200 of the main program PA Correction of the arc length 9 9 V to 9 9 V 9 sec Signal light duration reduced main program PB Setting range 0 0 s to 20 0 s 0 1 s increments Used e g in connection with the super pulse function 10 sec Sign...

Page 19: ...ed in the open air and must only be set up and operated on a suitable stable and level base The operator must ensure that the ground is non slip and level and provide sufficient lighting for the place of work Safe operation of the machine must be guaranteed at all times Equipment damage due to contamination Unusually high amounts of dust acids corrosive gases or substances can damage the machine o...

Page 20: ...t up operation Observe the safety instructions on transport and positioning as well as on lifting by crane in the operating instructions for the power source Do not apply tractive force to the torch tube package If there is any possibility that tractive force may be unavoidable the wire feed must be removed from the support The press arbor bracket must not be used even with a single wire feed Figu...

Page 21: ...he coolant the entire volume of liquid must be changed Dispose of the coolant in accordance with local regulations and the material safety data sheets 5 1 3 1 Approved coolants overview Coolant Temperature range KF 23E Standard 10 C up to 40 C 14 F up to 104 F KF 37E 20 C up to 30 C 4 F up to 86 F 5 1 3 2 Maximal hose package length All information relates to the total hose package length of the c...

Page 22: ... with HF igniter TIG for as long as possible in parallel with a distance of 20 cm to avoid HF sparkover Always keep a distance of at least 20 cm to leads of other power sources to avoid interferences Always keep leads as short as possible For optimum welding results max 30 m welding lead intermediate hose package torch lead Figure 5 2 Use an individual welding lead to the workpiece for each weldin...

Page 23: ... Check that all welding current connections are firmly secured and electrical connections are in perfect condition Set up attach or suspend all conductive power source components such as casing transport vehicles and crane frames so they are insulated Do not place any other electronic devices such as drills or angle grinders on the power source transport vehicle or crane frames unless they are ins...

Page 24: ...ription 0 1 Power source 2 Intermediate hose package 3 G connecting nipple shielding gas connection Shielding gas supply to the central connection of the second welding torch 4 Quick connect coupling blue Coolant feed 5 Quick connect coupling red Coolant return 6 Connector plug welding current Welding current connection on wire feed unit 7 7 pole connection socket digital Control lead for wire fee...

Page 25: ... Shielding gas volume settings If the shielding gas setting is too low or too high this can introduce air to the weld pool and may cause pores to form Adjust the shielding gas quantity to suit the welding task Slowly open the gas cylinder valve Open the pressure regulator Switch on the power source at the main switch Trigger gas test see 5 1 7 2 chapter function welding voltage and wire feed motor...

Page 26: ... reached the system starts again from the beginning Figure 5 9 The display shows Nominal values before welding Actual values during welding Hold values after welding MIG MAG Parameter Nominal values Actual values Hold values Welding current Material thickness Wire feed speed Welding voltage Welding performance TIG Parameter Nominal values Actual values Hold values Welding current Welding voltage W...

Page 27: ... a wire feed unit or welding machine to Master and set special parameter P10 on the other wire feed unit to Slave The Master or Slave setting does not mean a difference in function The unit configured as the master is active after switching on Tapping the torch trigger on the inactive unit will change over units Welding with both wire feeders at the same time is not possible 5 3 1 Switching betwee...

Page 28: ...ner with the correct inner diameter must be inserted in the torch Recommendation Use a steel liner when welding hard unalloyed wire electrodes steel Use a chrome nickel liner when welding hard high alloy wire electrodes CrNi Use a plastic or teflon liner when welding or brazing soft wire electrodes high alloy wire electrodes or aluminium materials Preparation for connecting welding torches with a ...

Page 29: ...arts which can trap hands hair clothing or tools and thus injure persons Do not reach into rotating or moving parts or drive components Keep casing covers or protective caps closed during operation Risk of injury due to welding wire escaping in an unpredictable manner Welding wire can be conveyed at very high speeds and if conveyed incorrectly may escape in an uncontrolled manner and injure person...

Page 30: ...using standardised basket coils DIN 8559 see 9 chapter Figure 5 11 Item Symbol Description 0 1 Carrier pin For fixing the wire spool 2 Knurled nut For fixing the wire spool Loosen knurled nut from spool holder Fix welding wire reel onto the spool holder so that the carrier pin locks into the spool bore Fasten wire spool using knurled nut ...

Page 31: ...ixing the clamping unit and setting the pressure 4 Clamping unit 5 Wire feed roller see the Wire feed roller overview table Rotate the tommy by 90 clockwise or anti clockwise tommy locks into place Fold the closure brackets outwards by 90 Unfasten pressure units and fold out clamping units and pressure rollers will automatically flip upwards Remove the wire feed rollers from the roller support Sel...

Page 32: ...white 0 8 0 9 1 0 030 035 040 bicolour white blue 1 0 1 2 040 045 blue red 1 4 052 monochrome green 1 6 060 black 2 0 080 grey 2 4 095 brown 2 8 110 light green 3 2 125 purple Aluminium 0 8 030 bicolour white yellow U groove 0 9 1 0 035 040 blue 1 2 045 red 1 6 060 black 2 0 080 grey 2 4 095 brown 2 8 110 light green 3 2 125 purple Flux cored wire 0 8 030 bicolour white orange V groove knurled 0 9...

Page 33: ...re inching push button and turning the wire speed rotary knob The left display shows the wire feed speed selected the right display shows the current motor current of the wire feed mechanism Depending on the design of the device the wire feed mechanism may be reversed Figure 5 13 Item Symbol Description 0 1 Welding wire 2 Wire feed nipple 3 Guide tube 4 Adjusting nut Extend and lay out the torch h...

Page 34: ...be found on a sticker near the wire drive Version 1 left hand mounting Version 2 right hand mounting Figure 5 14 Automatic inching stop Touch the welding torch against the workpiece during inching Inching of the welding wire will stop as soon it touches the workpiece 5 4 2 5 Spool brake setting Figure 5 15 Item Symbol Description 0 1 Allen screw Securing the wire spool retainer and adjustment of t...

Page 35: ...iod The special JOBs are switched by pressing the push button briefly 5 4 4 Welding task selection The following steps have to be carried out to select the welding job Select basic parameters material type wire diameter and shielding gas type and welding procedures select and enter JOB number by means of JOB List see 11 1 chapter Select operating and welding type Adjust welding power Correct arc l...

Page 36: ...sted according to the principle of one knob operation The user can set their operating point optionally as wire feed speed welding current or material thickness The optimum welding voltage for the operating point is calculated and set by the welding machine If necessary the user can correct this welding voltage see 5 4 4 6 chapter Figure 5 19 5 4 4 5 Accessory components for operating point settin...

Page 37: ...duced main program PB This function is e g used for thin sheet welding to reduce the heat input in a controlled manner or for positional welding without the need for weaving The welding power can be represented as average value ex works or solely as program A value If the average value display is activated the signal lights of the main PA and reduced main program PB are illuminated simultaneously ...

Page 38: ...hange the JOB number when no welding current is flowing Wire feed speed and welding voltage can be configured independently in two performance ranges For wire feed speeds below 8 m min select JOB 188 For wire feed speeds above 8 m min select JOB 187 8m min 8m min EXIT 3s Figure 5 23 5 4 5 1 Setting the operating point welding output Figure 5 24 ...

Page 39: ...ce Set the measured value e g 5 mm at the machine control This set value corresponds to a specific wire feed speed Switching the display to this parameter will show the associated value In this example a material thickness of 5 mm corresponds to a wire feed speed of 8 4 m min The material thickness details in the welding programs generally refer to fillet welds in the PB welding position They shou...

Page 40: ...abled with the PC300 NET software See operating instructions for the software 5 4 7 forceArc forceArc puls Heat reduced directionally stable and powerful arc with deep fusion penetration for the upper power range Figure 5 28 Smaller included angle due to deep penetration and directionally stable arc Excellent root and sidewall fusion Secure welding also with very long stick outs Reduced undercuts ...

Page 41: ...ons Unstable arc Welding current cables that are not fully unrolled can cause faults in the arc flickering Fully unroll welding current cables torch hose packages and if applicable intermediate hose packages Avoid loops 5 4 9 pipeSolution Reduced energy MAG welding X ray proof welding of pipelines and pipework without lack of fusion Root pass and fill and final pass with or without air gap Low and...

Page 42: ...rigger Tap torch trigger press briefly and release Shielding gas flowing I Welding output Wire electrode is being conveyed Wire creep Wire burn back Gas pre flows Gas post flows Non latched Special non latched Latched Special latched t Time PSTART Ignition program PA Main program PB Reduced main program PEND End program t2 Spot time 5 4 10 2 Automatic cut out The welding machine ends the ignition ...

Page 43: ...ng gas is expelled gas pre flows Wire feed motor runs at creep speed Arc ignites after the wire electrode makes contact with the workpiece welding current flows Change over to pre selected wire speed Step 2 Release torch trigger WF motor stops Arc is extinguished after the preselected wire burn back time expires Gas post flow time elapses ...

Page 44: ...rc ignites after the wire electrode makes contact with the workpiece welding current flows Start the super pulse function beginning with main program PA The welding parameters change at the specified times between main program PA and the reduced main program PB Step 2 Release torch trigger Super pulse function is ended WF motor stops Arc is extinguished after the preselected wire burn back time ex...

Page 45: ...e feed motor runs at creep speed Arc ignites after the wire electrode makes contact with the workpiece welding current is flowing start program PSTART for the time tstart Slope to main program PA Step 2 Release torch trigger Slope to end program PEND for the time tend WF motor stops Arc is extinguished after the preselected wire burn back time expires Gas post flow time elapses ...

Page 46: ...re electrode makes contact with the workpiece welding current is flowing start program PSTART spot time starts Slope to main program PA After the set spot time elapses slope goes to end program PEND Wire feed motor stop welding Arc is extinguished after the pre selected wire burn back time elapses Gas post flow time elapses 2nd cycle Release torch trigger Releasing the torch trigger step 2 interru...

Page 47: ...workpiece welding current is flowing start program PSTART for the time tstart Slope on main program PA Start the super pulse function beginning with main program PA The welding parameters change at the specified times between main program PA and the reduced main program PB Step 2 Release torch trigger Super pulse function is ended Slope to end program PEND for the time tend WF motor stops Arc is e...

Page 48: ...r runs at creep speed Arc ignites after the wire electrode makes contact with the workpiece welding current flows Change over to pre selected WF speed main program PA Step 2 Release torch trigger no effect Step 3 Press torch trigger no effect Step 4 Release torch trigger WF motor stops Arc is extinguished after the preselected wire burn back time expires Gas post flow time elapses ...

Page 49: ...ontact with the workpiece welding current flows Start the super pulse function beginning with main program PA The welding parameters change at the specified times between main program PA and the reduced main program PB Step 2 Release torch trigger no effect Step 3 Press torch trigger no effect Step 4 Release torch trigger Super pulse function is ended WF motor stops Arc is extinguished after the p...

Page 50: ...n the process PA stored in the JOB and the opposite process PB at the specified times t2 and t3 If a standard process is stored in the JOB this means that there is a permanent alternation between the processes starting with the standard process and followed by the pulse process The same applies if the situation is reversed 2nd cycle Release torch trigger no effect 3rd cycle Press torch trigger no ...

Page 51: ...t time tSTART elapses and at the latest when the torch trigger is released Tapping1 can be used to change over to the reduced main program PB Repeated tapping will switch back to the main program PA Step 3 Press and hold torch trigger Slope to end program PEND Step 4 Release torch trigger WF motor stops Arc is extinguished after the preselected wire burn back time expires Gas post flow time elapse...

Page 52: ... slope on main program PA is given at the earliest after the set time tSTART elapses and at the latest when the torch trigger is released Tapping pressing the torch trigger for less than 0 3 sec changes over the welding process PB If a standard process has been defined in the main program tapping changes to the pulse process and tapping again will return to the standard process etc 3rd cycle Press...

Page 53: ... the JOB and the opposite process PB at the specified times t2 and t3 If a standard process is stored in the JOB this means that there is a permanent alternation between the processes starting with the standard process and followed by the pulse process The same applies if the situation is reversed 3rd cycle Press the torch trigger Super pulse function is ended Slope in the end program PEND for the...

Page 54: ...ng start program PSTART for the time tstart Step 2 Release torch trigger Slope on main program PA Start the super pulse function beginning with main program PA The welding parameters change at the specified times between main program PA and the reduced main program PB Step 3 Press the torch trigger Super pulse function is ended Slope in the end program PEND for the time tend Step 4 Release torch t...

Page 55: ...D avoidance of end craters by targeted heat reduction The programs contain parameters such as wire feed speed operating point correction of arc length slope times program duration etc Figure 5 43 In every JOB separate settings can be made for the ignition program reduced main program and end program as to whether or not to alternate with the pulse process These properties are stored on the welding...

Page 56: ...ion from PSTART to PA 0 0s to 20 0s 5 PA Wire speed absolute 0 5 m min to 25 m min 6 Duration spot time and superpulse 0 01s to 20 0s 7 PB Wire speed relative Arc length correction relative 1 to 200 9 9V to 9 9V 8 Duration 0 01s to 20 0s 9 Slope duration from PA to PEND 0 0s to 20s 10 PEND Wire speed relative Arc length correction 1 to 200 9 9V to 9 9V 11 Duration superpulse 0 0s to 20s 12 Gas pos...

Page 57: ...s to 20 0s RUECK Wire burn back length 2 to 500 PSTART start program Welding parameter Meaning explanation Setting range DVstart Wire speed 0 to 200 Ustart Arc length correction 9 9V to 9 9V tstart Duration 0 0s to 20s PA main program Welding parameter Meaning explanation Setting range Setting the wire speed PEND end crater program Welding parameter Meaning explanation Setting range DVend Wire spe...

Page 58: ...ation Setting range DVstart Wire speed 0 to 200 ustart Arc length correction 9 9V to 9 9V tstart Duration 0 0s to 20s PA main program Welding parameter Meaning explanation Setting range Setting the wire speed PB reduced main program Welding parameter Meaning explanation Setting range DV3 Wire speed 0 to 200 U3 Arc length correction 9 9V to 9 9V PEND end crater program Welding parameter Meaning exp...

Page 59: ...ation 0 0s to 20s PA main program Welding parameter Meaning explanation Setting range tS1 Slope duration from PSTART to PA 0 0s to 20s DV3 Setting the wire speed 0 to 200 t2 Duration 0 1s to 20s tS3 Slope duration from PB to PA 0 0s to 20s PB reduced main program Welding parameter Meaning explanation Setting range tS2 Slope duration from PA to PB 0 0s to 20s DV3 Wire speed 0 to 200 U3 Arc length c...

Page 60: ...mponents Program switching JOB switching Program Operating mode Welding process superPuls Wire speed Voltage correction Dynamics M3 7x Wire feeder control Yes Yes P0 Yes Yes Yes P1 15 Yes R20 Remote control Yes No P0 No Yes No P1 9 Yes 1 R40 Remote control Yes No P0 No Yes Yes No No R50 Remote control Yes No P0 Yes Yes P1 15 PC 300 NET Software No No P0 Yes No P1 15 Yes Up Down Welding torch Yes N...

Page 61: ...latched or latched special Figure 5 52 Up to 16 programs PA0 to PA15 can be defined An operating point wire speed arc length correction dynamics choke effect can be defined permanently in each program Program P0 is an exception the settings for operating points are made manually here Changes to the welding parameters are saved immediately 5 4 12 1 Selecting parameters program A Changes to the weld...

Page 62: ... 54 Item Symbol Description 0 1 Welding torch function changeover switch special welding torch required Changing over programs or JOBs Infinite adjustment of welding performance 5 4 14 2 Switching between Push Pull and intermediate drive WARNING Do not carry out any unauthorised repairs or modifications To avoid injury and equipment damage the unit must only be repaired or modified by specialist s...

Page 63: ...5 3 chapter 1 No JOB dependent program limit 2 9 JOB dependent program limit for max selectable programs For machine versions with pulsed arc welding procedures only Change welding process process switching With this function activated the welding process switches from standard arc welding to pulse arc welding Switching is effected by either tapping the torch trigger special latched or by activati...

Page 64: ...2 Arc ignition with wire return for non push pull applications Slope time main current to secondary current Slope time main current to secondary current 5 4 15 2 Burn back The wire burn back parameter prevents the sticking of the wire electrode in the weld pool or at the contact tip at the end of the welding process The value is optimally preset for a variety of applications but can be adjusted if...

Page 65: ...ger in the main program see the special parameters description 5 5 TIG welding 5 5 1 Welding torch connection TIG welding torches to be connected to a Euro torch connector are available in two versions TIG combi welding torches are connected to the Euro torch connector of the wire feeder and to the welding current plug of the power source TIG welding torches of the EZA version are connected to the...

Page 66: ...nt plug of the combi welding torch into the welding current connection socket and lock into place by turning to the right only in case of a separate welding current connection Lock connecting nipples of the cooling water tubes into the corresponding quick connect couplings Return line red to quick connect coupling red coolant return and supply line blue to quick connect coupling blue coolant suppl...

Page 67: ...igger liftarc current flowing regardless of the main current set b Incline the torch over the torch gas nozzle to produce a gap of approx 2 3 mm between the electrode tip and the workpiece The arc ignites and the welding current is increased depending on the operating mode set to the ignition or main current set c Lift off the torch and swivel to the normal position Ending the welding process Rele...

Page 68: ...lowing I Welding output Gas pre flows Gas post flows Non latched Special non latched Latched Special latched t Time PSTART Ignition program PA Main program PB Reduced main program PEND End program tS1 Slope duration from PSTART to PA 5 5 4 2 Automatic cut out The welding machine ends the ignition process or the welding process with an ignition fault no welding current flows within 5 s after the st...

Page 69: ...ecial non latched Figure 5 61 Selection Select non latched special mode Step 1 Press and hold torch trigger Shielding gas is expelled gas pre flows The arc is ignited using liftarc Welding gas flows with pre selected setting in start program PSTART After the tstart ignition current time elapses the welding current rises with the set upslope time tS1 to the main program PA Step 2 Release torch trig...

Page 70: ...ating mode Step 1 Press and hold torch trigger Shielding gas is expelled gas pre flows The arc is ignited using liftarc Welding current flows with pre selected setting Step 2 Release torch trigger no effect Step 3 Press torch trigger no effect Step 4 Release torch trigger Arc is extinguished Gas post flow time elapses ...

Page 71: ...tting in start program PSTART Step 2 Release torch trigger Slope on main program PA The slope on main program PA is given at the earliest after the set time tSTART elapses and at the latest when the torch trigger is released Tapping can be used to switch to the reduced main program PB Repeated tapping will switch back to the main program PA Step 3 Press the torch trigger Slope to end program PEND ...

Page 72: ... Welding current absolute 5 A to 550 A 6 Duration PA 0 01 s to 20 0 s 7 PB reduced main program Welding current 1 to 100 8 Duration reduced main program 0 01 s to 20 0 s 9 Slope duration from PA to PEND 0 s to 20 s 10 PEND end program Welding current 1 to 100 11 Duration end program 0 s to 20 s 12 Gas post flow time 0 s to 20 s 13 superPuls on off PSTART PB and PEND are relative programs whose wel...

Page 73: ...inning of the welding process The ignition takes place here with increased current hot start current over a certain time hot start time For parameter setting see 5 4 15 chapter A Hot start current B Hot start time C Main current I Current t Time Figure 5 68 5 6 4 Antistick The Antistick feature prevents the electrode from annealing Should the electrode stick despite the Arcforce feature the machin...

Page 74: ...m and accessory components 5 8 Interfaces for automation WARNING Do not carry out any unauthorised repairs or modifications To avoid injury and equipment damage the unit must only be repaired or modified by specialist skilled persons The warranty becomes null and void in the event of unauthorised interference Appoint only skilled persons for repair work trained service personnel Accessory componen...

Page 75: ...with the aid of a key switch In key switch position 1 all functions and parameters can be set without restriction In key switch position 0 the following functions and parameters cannot be changed No adjustment of the operating point welding performance in programs 1 15 No change of welding or operating mode in programs 1 15 The welding parameters can be displayed but not changed in the control s f...

Page 76: ... ex works program number welding power 0 9 1 display toggles between program number welding type Program limitation Programs 1 to max 15 Ex works 15 Special cycle in the special latched and non latched operating modes 0 normal previous non latched latched Ex works 1 WF3 cycle for non latched latched Enable special jobs SP1 to SP3 0 no enabling Ex works 1 enabling of Sp1 3 Correction operation thre...

Page 77: ...ed Ex works 1 Block JOB mode enabled Program selection with standard torch trigger 0 no program selection Ex works 1 program selection possible Switching the operating mode and welding type using the wire feed control 0 Switching the operating mode and welding type using the wire feed control and program 0 factory setting 1 Switching the operating mode and welding type using the wire feed control ...

Page 78: ...bled Error threshold of electronic gas flow control see 5 10 3 25 chapter Error output in case of gas nominal value deviation Unit system see 5 10 3 26 chapter 0 metric system ex works 1 Imperial system Selection option for program sequence with rotary knob see 5 10 3 27 chapter 0 Not enabled 1 Enabled ex works 5 10 2 Reset to factory settings All special parameters saved by the user will be overw...

Page 79: ... is not connected it is only possible to switch programs by means of the arc length correction select welding program rotary dial see 4 4 chapter 5 10 3 5 Special cycle in the operating modes special latched and non latched P5 With the special sequence activated the start of the welding process changes as follows Sequence for special non latched mode special latched mode Start program PSTART Main ...

Page 80: ...allow the welder also to perform wire and voltage correction in program mode the correction mode must be switched on and limit values for wire and voltage must be specified Setting of the correction limit value WFlimit 20 Ulimit 1 9 V Now the wire speed can be corrected by 20 8 0 up to 12 0 m min and the welding voltage by 1 9 V 3 8 V In the example the wire speed is set on 11 0 m min This corresp...

Page 81: ...the t3 time has elapsed The program then switches automatically to absolute program 4 Accessory components such as remote controls or special torches may not be connected Program switching at the wire feed unit control is disabled Figure 5 76 Specific latched special n cycle In the n cycle program sequence the unit starts in the 1st cycle with start program Pstart from P1 In the second cycle the m...

Page 82: ...t operating mode it is possible to switch straight to the second step by tapping the torch trigger it is not necessary for current to be flowing The welding can be halted by pressing the torch trigger for a second time 5 10 3 9 Single or dual operation P10 setting If the system is fitted with two wire feeds no further accessory components may be operated on the 7 pole connection socket digital Thi...

Page 83: ...in which switching with accessory components such as a function torch between JOBs is possible is created Set special parameters P12 to 2 Set switch Program or Up Down Function to Up Down position Select existing JOB which comes as close as possible to the desired result Copy JOB to one or more destination JOB numbers If JOB parameters still need to be adjusted select destination JOBs one after th...

Page 84: ...lock JOB mode Switch the Program or Up Down function changeover switch to Program Set the JOB list to actual JOB list special parameter P12 1 Enable block JOB mode special parameter P16 1 Change to block JOB mode by selecting one of the special JOBs 129 130 or 131 Simultaneous operation with interfaces such as RINT X12 BUSINT X11 DVINT X11 or digital accessory components such as is the R40 remote ...

Page 85: ...e from program A PA and program B PB is shown on the display ex factory Function inactive P19 0 Only the performance of program A is displayed for superPuls If the function is enabled and only 000 is shown on the machine display this is a rare case of an incompatible system set up Solution Disable special parameter P19 5 10 3 17Predefined execution of the pulsed arc welding process in the PA progr...

Page 86: ...Special mode the user can determine by the time of the torch trigger operation in which operating mode 4 cycle or 4 cycle Special the program sequence shall be carried out Hold torch trigger longer than 300 ms Program sequence with operating mode 4 cycle Special standard Tap torch trigger Device changes to operating mode 4 cycle 5 10 3 25Error threshold electronic gas flow control P28 The set perc...

Page 87: ...0 mΩ 8 mΩ ex works Lead resistance 2 Lead resistance for the second welding circuit 0 mΩ 60 mΩ 8 mΩ ex works Only qualified service personnel may change the parameters Only qualified service personnel may change the parameters Time based power saving mode see 5 11 2 chapter Time to activation of the power saving mode in case of inactivity Setting disabled or numerical value 5 60 min ex works 20 Se...

Page 88: ...d welding torch With other hose package lengths it is necessary to carry out a voltage correction to optimise welding properties The voltage correction value can be set close to zero by means of realigning the cable resistance It is recommended to align the electric cable resistance after replacing accessories such as torches or intermediate hose packages In case a second wire feeder is used the r...

Page 89: ...nment measurement Applying slight pressure put the welding torch in place with the contact tip on a clean purged location on the workpiece and then press the torch trigger for approx 2 seconds A short circuit current will flow briefly which is used to determine and display the cable resistance The value can be between 0 mΩ and 40 mΩ The new value is immediately saved without requiring further conf...

Page 90: ...right to claim under warranty is void In all service matters always consult the dealer who supplied the machine Return deliveries of defective equipment subject to warranty may only be made through your dealer When replacing parts use only original spare parts When ordering spare parts please quote the machine type serial number and item number of the machine as well as the type designation and it...

Page 91: ...tly tighten if necessary Remove any spatter Clean the wire feed rollers on a regular basis depending on the degree of soiling 6 3 2 Monthly maintenance tasks Visual inspection Casing damage front rear and side walls Wheels and their securing elements Transport elements strap lifting lugs handle Check coolant tubes and their connections for impurities Functional test Selector switches command devic...

Page 92: ...er on wheels indicates that the equipment must be collected separately This machine has to be disposed of or recycled in accordance with the waste separation systems in use According to German law law governing the distribution taking back and environmentally correct disposal of electric and electronic equipment ElektroG used machines are to be placed in a collection system separate from unsorted ...

Page 93: ... Setting the spool brake see 5 4 2 5 chapter Check settings and correct if necessary Setting pressure units see 5 4 2 4 chapter Check settings and correct if necessary Worn wire rolls Check and replace if necessary Wire feed motor without supply voltage automatic cutout triggered by overloading Reset triggered fuse rear of the power source by pressing the key button Kinked hose packages Extend and...

Page 94: ...ding gas error Check shielding gas supply for machines with shielding gas monitoring 7 x Secondary overvoltage Inverter error inform Service 8 x Wire error Separate the electrical connection between welding wire and casing or an earthed object 9 x Quick shut down Rectify error on robot Interface for automated welding 10 x Arc interruption Check wire feeding Interface for automated welding 11 x Ign...

Page 95: ...age can be reset by pressing a push button Welding machine control Push button RC1 RC2 Expert Expert 2 0 Expert XQ 2 0 CarExpert Progress M3 11 alpha Q Concept Basic Basic S Synergic Synergic S Progress M3 71 Picomig 355 not possible c The error message can only be reset by switching the machine off and on again The shielding gas error Err 6 can be reset by pressing the Welding parameters key butt...

Page 96: ...ctory installed roll equipment 1 0 1 2 mm for steel wire Drive 4 rollers 37 mm Wire spool diameter Standardised wire spools up to 300 mm Welding torch connection Euro torch connector Protection classification IP 23 Ambient temperature 2 25 C up to 40 C EMC class A Safety marking Standards used See declaration of conformity appliance documents Dimensions 633 x 457 x 496 mm 24 9 x 18 0 x 19 5 inch W...

Page 97: ...OL 0 5 m Extension connecting cable 092 000201 00004 FRV 7POL 1 m Extension connecting cable 092 000201 00002 FRV 7POL 5 m Extension connecting cable 092 000201 00003 FRV 7POL 10 m Extension connecting cable 092 000201 00000 FRV 7POL 20 m Extension connecting cable 092 000201 00001 FRV 7POL 25M Extension connecting cable 092 000201 00007 9 2 2 19 pole connection Type Designation Item no R10 19POL ...

Page 98: ...ove for steel stainless steel and brazing 092 002770 00020 FE 4R 2 4 MM 0 095 INCH BROWN Drive roll set 37 mm 4 rolls V groove for steel stainless steel and brazing 092 002770 00024 FE 4R 2 8 MM 0 11 INCH LIGHT GREEN Drive roll set 37 mm 4 rolls V groove for steel stainless steel and brazing 092 002770 00028 FE 4R 3 2 MM 0 12 INCH VIOLET Drive roll set 37 mm 4 rolls V groove for steel stainless st...

Page 99: ... 00014 FUEL 4R 1 6 MM 0 06 INCH BLACK ORANGE Drive roll set 37 mm 4 rolls V groove knurled for flux cored wire 092 002848 00016 FUEL 4R 2 0 MM 0 08 INCH GREY ORANGE Drive roll set 37 mm 4 rolls V groove knurled for flux cored wire 092 002848 00020 FUEL 4R 2 4 MM 0 095 INCH BROWN ORANGE Drive roll set 37 mm 4 rolls V groove knurled for flux cored wire 092 002848 00024 10 1 4 Wire guide Type Designa...

Page 100: ... 1 4370 Ar 97 5 CO2 2 5 M12 0 8 31 Standard GMAW puls CrNi 18 8 1 4370 Ar 97 5 CO2 2 5 M12 1 0 32 Standard GMAW puls CrNi 18 8 1 4370 Ar 97 5 CO2 2 5 M12 1 2 33 Standard GMAW puls CrNi 18 8 1 4370 Ar 97 5 CO2 2 5 M12 1 6 34 Standard GMAW puls CrNi 19 9 1 4316 Ar 97 5 CO2 2 5 M12 0 8 35 Standard GMAW puls CrNi 19 9 1 4316 Ar 97 5 CO2 2 5 M12 1 0 36 Standard GMAW puls CrNi 19 9 1 4316 Ar 97 5 CO2 2 ...

Page 101: ...tandard GMAW puls AlMg Ar 70 He 30 I3 1 6 82 Standard GMAW puls AlSi Ar 100 I1 0 8 83 Standard GMAW puls AlSi Ar 100 I1 1 0 84 Standard GMAW puls AlSi Ar 100 I1 1 2 85 Standard GMAW puls AlSi Ar 100 I1 1 6 86 Standard GMAW puls AlSi Ar 70 He 30 I3 0 8 87 Standard GMAW puls AlSi Ar 70 He 30 I3 1 0 88 Standard GMAW puls AlSi Ar 70 He 30 I3 1 2 89 Standard GMAW puls AlSi Ar 70 He 30 I3 1 6 90 Standar...

Page 102: ...22 Brazing CuAl Ar 100 I1 0 8 123 Brazing CuAl Ar 100 I1 1 0 124 Brazing CuAl Ar 100 I1 1 2 125 Brazing CuAl Ar 100 I1 1 6 126 Gouging 127 TIG Liftarc 128 MMA 129 Special JOB 1 Free JOB 130 Special JOB 2 Free JOB 131 Special JOB 3 Free JOB 132 Free JOB 133 Free JOB 134 Free JOB 135 Free JOB 136 Free JOB 137 Free JOB 138 Free JOB 139 Free JOB 140 Block 1 JOB1 141 Block 1 JOB2 142 Block 1 JOB3 143 B...

Page 103: ...87 Standard GMAW puls G3Si1 G4Si1 Ar 82 CO2 18 M21 188 Standard GMAW puls G3Si1 G4Si1 Ar 82 CO2 18 M21 189 forceArc forceArc puls G3Si1 G4Si1 Ar 82 CO2 18 M21 0 8 190 forceArc forceArc puls G3Si1 G4Si1 Ar 82 CO2 18 M21 0 8 191 coldArc coldArc puls G3Si1 G4Si1 Ar 82 CO2 18 M21 0 8 193 coldArc coldArc puls G3Si1 G4Si1 Ar 82 CO2 18 M21 1 0 194 coldArc coldArc puls G3Si1 G4Si1 Ar 82 CO2 18 M21 1 2 195...

Page 104: ... 0 238 Metal flux cored wire G3Si1 G4Si1 Ar 82 CO2 18 M21 1 2 239 Metal flux cored wire G3Si1 G4Si1 Ar 82 CO2 18 M21 1 6 240 Rutile basic flux cored wire G3Si1 G4Si1 Ar 82 CO2 18 M21 0 8 242 Rutile basic flux cored wire G3Si1 G4Si1 Ar 82 CO2 18 M21 1 0 243 Rutile basic flux cored wire G3Si1 G4Si1 Ar 82 CO2 18 M21 1 2 244 Rutile basic flux cored wire G3Si1 G4Si1 Ar 82 CO2 18 M21 1 6 245 forceArc fo...

Page 105: ... pulsea G3Si1 G4Si1 Ar 82 CO2 18 M21 0 8 295 forceArc pulse G3Si1 G4Si1 Ar 82 CO2 18 M21 1 0 296 forceArc pulse G3Si1 G4Si1 Ar 82 CO2 18 M21 1 2 297 forceArc pulse G3Si1 G4Si1 Ar 82 CO2 18 M21 1 6 298 forceArc pulse G3Si1 G4Si1 Ar 90 CO2 10 M20 0 8 299 forceArc pulse G3Si1 G4Si1 Ar 90 CO2 10 M20 1 0 300 forceArc pulse G3Si1 G4Si1 Ar 90 CO2 10 M20 1 2 301 forceArc pulse G3Si1 G4Si1 Ar 90 CO2 10 M20...

Page 106: ... Ar 97 5 CO2 2 5 M12 0 8 331 coldArc coldArc puls CrNi 18 8 Mn 1 4370 Ar 97 5 CO2 2 5 M12 1 0 332 coldArc coldArc puls CrNi 18 8 Mn 1 4370 Ar 97 5 CO2 2 5 M12 1 2 333 coldArc coldArc puls CrNi 18 8 Mn 1 4370 Ar 97 5 CO2 2 5 M12 1 6 334 coldArc coldArc puls CrNi 19 12 3 1 4430 Ar 97 5 CO2 2 5 M12 0 8 335 coldArc coldArc puls CrNi 19 12 3 1 4430 Ar 97 5 CO2 2 5 M12 1 0 336 coldArc coldArc puls CrNi ...

Page 107: ...ix B Searching for a dealer 099 005507 EW501 13 09 2018 107 12 Appendix B 12 1 Searching for a dealer Sales service parteners www ewm group com en specialist dealers More than 400 EWM sales partners worldwide ...

Reviews: