


8
www.evolutionpowertools.com
e) Do not attach a saw chain, woodcarving
blade, segmented diamond wheel with a
peripheral gap greater than 10 mm or
toothed saw blade.
Such blades create
frequent kickback and loss of control.
f) Do not “jam” the wheel or apply excessive
pressure.
Do not attempt to make an excessive
depth of cut. Overstressing the wheel increases
the loading and susceptibility to twisting
or binding of the wheel in the cut and the
possibility of kickback or wheel breakage.
g) When wheel is binding or when
interrupting a cut for any reason, switch
off the power tool and hold the power
tool motionless until the wheel comes to a
complete stop.
Never attempt to remove the
wheel from the cut while the wheel is in motion
otherwise kickback may occur. Investigate and
take corrective action to eliminate the cause of
wheel binding.
h) Do not restart the cutting operation in the
workpiece.
Let the wheel reach full speed and
carefully re-enter the cut. The wheel may bind,
walk up or kickback if the power tool is restarted
in the workpiece.
i) Support panels or any oversized
workpiece to minimize the risk of wheel
pinching and kickback.
Large workpieces tend
to sag under their own weight. Supports must
be placed under the workpiece near the line of
cut and near the edge of the workpiece on both
sides of the wheel.
j) Use extra caution when making a “pocket
cut” into existing walls or other blind areas.
The protruding wheel may cut gas or water
pipes, electrical wiring or objects that can cause
kickback.
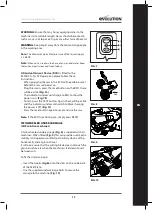
(2.7) HEALTH ADVICE
WARNING:
When using this machine, dust
particles may be produced. In some instances,
depending on the materials you are working
with, this dust can be particularly harmful. If you
suspect that paint on the surface of material
you wish to cut contains lead, seek professional
advice. Lead based paints should only be
removed by a professional and you should not
attempt to remove it yourself. Once the dust
has been deposited on surfaces, hand to mouth
contact can result in the ingestion of lead.
Exposure to even low levels of lead can cause
irreversible brain and nervous system damage.
The young and unborn children are particularly
vulnerable.
You are advised to consider the risks associated
with the materials you are working with and to
reduce the risk of exposure. As some materials
can produce dust that may be hazardous to your
health, we recommend the use of an approved
face mask with replaceable filters when using this
machine.
You should always:
• Work in a well-ventilated area.
• Work with approved safety equipment, such
as dust masks that are specially designed to
filter microscopic particles.
(2.8)
WARNING:
the operation of any power
tool can result in foreign objects being thrown
towards your eyes, which could result in severe
eye damage. Before beginning power tool
operation, always wear safety goggles or safety
glasses with side shield or a full face shield where
necessary.
ADDITIONAL SAFETY INSTRUCTIONS
WARNING:
Always disconnect the Concrete
Cutting Saw from the mains supply before
cleaning, carrying out maintenance or changing
blades.
• Keep your hands away from cutting area
or the blade. If both your hands are holding
the machines handles, they cannot come into
contact with the diamond cutting blade.
• Never engage the spindle lock button
while the machine is running. Serious
damage could occur to the machine and a
potentially dangerous situation could arise for
the operator.
• Only use cutting blades or other approved
cutting blades as specified by the
manufacturer.
• Visually check the cutting blade before
starting the machine. If it is cracked, broken
or bent, do not use it. Carefully start the
machine and check for any unusual noises,
vibration or other abnormalities.
• Be careful when cutting metal. Using the
diamond blade to cut metal (reinforcing rods
embedded in concrete) will shorten its service
life. Use a specialist metal cutting blade where
possible.
• Allow the cutting blade to reach full speed
before beginning a cut. Start working only
when maximum speed is reached.
• Do not use excessive force. Excessive force
overloads the motor and reduces working
efficiency and service life.
• Only cut concrete, tile or stone to a
maximum cutting depth of 50mm or less.
If the cutting depth ultimately required is
greater than 50mm, cut the workpiece 2 or 3
times. If a cutting depth of more than 50mm
is attempted in one pass the service life of the
cutting blade could be reduced and motor
damage occur.
• Install the dust extraction port cover when
a dust collection hose is not in use. During
cutting operations sparks could be generated.
Cover the dust extraction port with its rubber
cap and be sure to wear protective glasses.
• Never use a damaged or incorrect arbor
bolt or blade flanges. The blade flanges