background image

ThermalRite Blast Chiller Easy Touch Screen Manual 

Rev02132016 


4.3.1


Touch Screen Software Update 


This functions allows software enhancement updates related to the Touch Screen Display 
only. To do a 

Touch Screen Update 

please contact the manufacturer service support 

team for the necessary files. These files will come in a zipped folder with a tar.gz 
extension. 
Their names are: 


update_db.tar.gz 


update_tft.tar.gz 

A.


Once the files are downloaded onto a pc. 

B.


Use a PC to copy the above files onto an empty formatted 2GB USB drive. 

C.


Remove the USB drive from the PC and insert it into the 

Touch Screen USB 

port. 

D.


Select the USB function and press the tab 

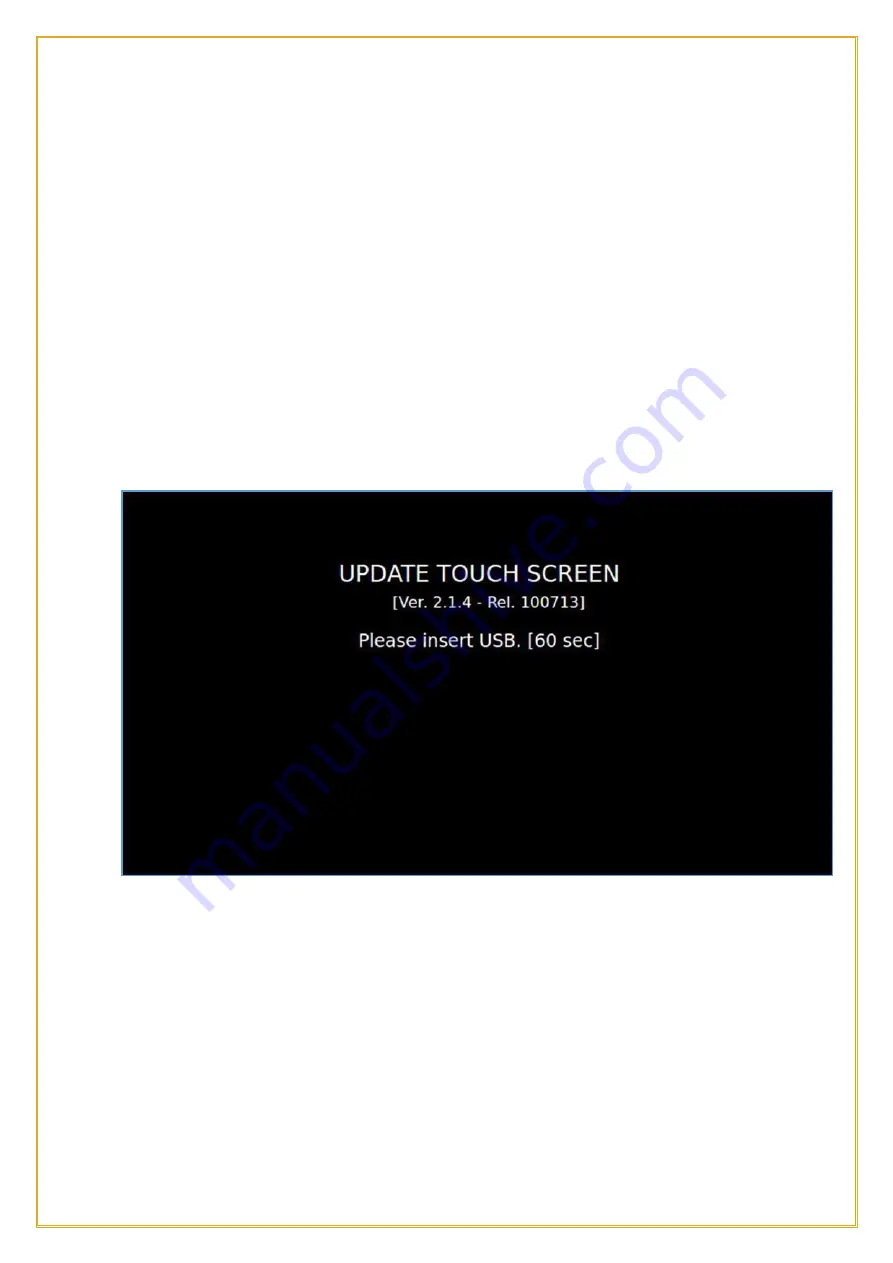
TOUCH SCREEN UPDATE


The 

Display 

will show the above screen and will restart at the end of the procedure. 


4.3.2


Firmware Update 


This functions allows a firmware enhancement update related to the Power Relay Board. 
To do a 

Firmware Update 

please contact the manufacturer service support team for the 

necessary files. These files will come in a zipped folder, containing the following files; 


CHILL.emi 


indexemi.arg 

NOTE

: the file 

index.arg 

changes according to the type of 

Software Update 

(

Software

Parameters 

or both 

Software 

and 

Parameters

). 

18 

Summary of Contents for Thermalrite

Page 1: ...ThermalRiteBlastChillerEasyTouchScreenManual Blast Chiller Touch Screen Operation and Care Manual Rev02132016 THERMALRITE...

Page 2: ...3 2 Firmware Update 18 4 3 3 Software Update Parameters Only 22 4 3 4 Software Update Both Softwareand Parameters 28 4 4 Alarm List 34 4 5 Defrost List 35 4 6 HAACP 37 4 6 1 Download HACCP Data 38 4 6...

Page 3: ...rviceMenu 74 7 1 How to Changea Parameter 75 7 2 Parameter List 77 7 3 Parameters Restore 82 7 4 Door Openings 84 7 5 Scanner 85 7 6 Serial Number 87 7 7 Optional Menu 88 7 8 Maintenance Menu 89 7 9 C...

Page 4: ...r Button for 5 seconds until you see the Status Bar move to the right and it will say Please wait The control will initialize and load the software please allow 15 seconds for it to complete This the...

Page 5: ...ime This will allow you to accurately provide data for troubleshooting and HAACP documentation Language Options 4 0 Date and Time Options 4 1 Display Options 4 2 3 The More Screen From this screen you...

Page 6: ...ir Temperature tab the tab will turn Blue and you can select a temperature from 40 F 40 C to 48 F 8 C Once you have selected a temperature press OK and the cycle will begin If no temperature is select...

Page 7: ...during the HOLD cycle This cycle will run until the Red Stop icon is pushed and the cycle is stopped 3 1 Thawing Mode The Thawing function when applicable will provide a gentle heating of the cabinet...

Page 8: ...e based cycle providing a visual notification from the display when the product is thawed Or it can be set to run a time based cycle for a predetermined time Press the Green Start icon to start the pr...

Page 9: ...uct Probe or the Time has expired the unit will then switch to the Hold mode This cycle will run until the Red Stop icon is pushed and the cycle is stopped 3 2 Sterililization Mode The Sterilization c...

Page 10: ...n for 300 seconds 5 minutes or untill the Red Stop icon is pushed 3 3 Manual Defrost Mode You can select a Manual Defrost from this screen by pressing on the Manual Defrost tab The Manual Defrost cycl...

Page 11: ...me or Temperature the screen will return automatically to the Home screen or it can be terminated at any time by pressing the Red Stop button 3 4 Heated Probe The Heated Probe function is an option an...

Page 12: ...mainly dedicated to technicians to aid in troubleshooting Access to service functions is password protected to avoid improper changes of crucial settings and prevent damage to the equipment Even if yo...

Page 13: ...Option Screen 4 0 Language To set the Language press the More icon and the screen will switch to the Options menu Press the Language icon and you will have the ability to change the language The langu...

Page 14: ...and Date Time and Date settings are important to track the HACCP data correctly Press the Date Time icon to show the Time setting screen To set the proper date first set the day then the month and fi...

Page 15: ...oper date and time is set press the Return arrow to go back to the Options screen or press the Home icon to return the Home screen 4 2 The Display Menu Press the Display icon to adjust the screen brig...

Page 16: ...arrow to return to the Options screen or press the Home icon to return the Home screen 4 3 USB Port Through the USB port located on the right side of the Touch Screen frame it s possible both to impo...

Page 17: ...tChillerEasyTouchScreenManual The main active functions of the USB Mode are Touch Screen Firmware Update Software Update software parameters both software and parameters Download HACCP Data Future fun...

Page 18: ...empty formatted 2GB USB drive C Remove the USB drive from the PC and insert it into the Touch Screen USB port D Select the USB function and press the tab TOUCH SCREEN UPDATE The Display will show the...

Page 19: ...named CHILL emi in the CHILL folder E Close the folder and on the same USB drive copy the files indexemi arg and Desm_Blastchiller_900_0251_11A bin F The USB drive will show the following A Remove the...

Page 20: ...EasyTouchScreenManual Once the USB key is detected and the files are read the screen will show CHILL on the upper left hand corner Press on CHILL to begin the update When this screen appears press the...

Page 21: ...d of the procedure the screen will show UPDATE FINISHED Press the HOME icon on the right bottom side to confirm and then press the HOME icon again After pressing the Home icon twice the next screen wi...

Page 22: ...x arg changes according to the type of Software Update Software Parameters or both Software and Parameters parA fac A Download the files onto a Pc B Connect an empty formatted USB drive to it C On the...

Page 23: ...23 Rev02132016 ThermalRiteBlastChillerEasyTouchScreenManual Once the USB key is detected the screen will show CHILL in the upper left hand corner Press on CHILL to begin the update...

Page 24: ...At the end of the procedure the screen will show UPDATE FINISHED Press the HOME icon on the right bottom side to confirm and then press the HOME icon again After pressing the Home icon twice the next...

Page 25: ...25 Rev02132016 ThermalRiteBlastChillerEasyTouchScreenManual To enable the new updated Parameter settings a PARAMETER RESTORE is needed From the Home screen press the MORE icon...

Page 26: ...6 Rev02132016 ThermalRiteBlastChillerEasyTouchScreenManual Press Service icon Insert the password provided to you by the manufacturer service team member and press OK Press the Parameters Restore icon...

Page 27: ...27 Rev02132016 ThermalRiteBlastChillerEasyTouchScreenManual Confirm by pressing the Green Checkmark Once the Parameters have been updated the control will return to the Home screen...

Page 28: ...h Software and Parameters Desm_BlastChiller_900_0251_11A bin parA fac A Download the files onto a Pc B Connect an empty formatted USB drive to it C On the USB drive create a folder and name it CHILL D...

Page 29: ...29 Rev02132016 ThermalRiteBlastChillerEasyTouchScreenManual Once the USB key is detected the screen will show CHILL in the upper left hand corner Press on CHILL to begin the update...

Page 30: ...At the end of the procedure the screen will show UPDATE FINISHED Press the HOME icon on the right bottom side to confirm and then press the HOME icon again After pressing the Home icon twice the next...

Page 31: ...31 Rev02132016 ThermalRiteBlastChillerEasyTouchScreenManual To enable the new updated Parameter settings a PARAMETER RESTORE is needed From the Home screen press the MORE icon...

Page 32: ...32 Rev02132016 ThermalRiteBlastChillerEasyTouchScreenManual Next press Service icon A Insert the password provided to you by the manufacturer service team member and press OK...

Page 33: ...6 ThermalRiteBlastChillerEasyTouchScreenManual B Next press the Parameters Restore icon C Confirm by pressing the Green Checkmark D Once the Parameters have been updated the control will return to the...

Page 34: ...larm List This stores a list of any alarms that may occur during operation and is useful for diagnosing an issue with the equipment It provides a description of the alarm date and time they occurred T...

Page 35: ...ell you the type of alarm the date it happened the time it happened and if it was a critical temperature alarm and one that may affect food safety 4 5 Defrost List This stores the Defrost List of any...

Page 36: ...016 ThermalRiteBlastChillerEasyTouchScreenManual Next press the Defrost List icon It provides a description of the defrost cycle date and time they occurred Use the up and down arrows to scroll throug...

Page 37: ...ChillerEasyTouchScreenManual 4 6 HACCP This screen will provide you with a graph showing the HACCP data for the cycles made in the selected date To access this function from the Home screen press More...

Page 38: ...te to view Once date is selected press SEARCH DATA to pop up on the windows cycle graph 4 6 1 Download HACCP Data The ThermalRite Easy Touch Screen Controller is capable to export HACCP information to...

Page 39: ...erEasyTouchScreenManual This function will export the HACCP date in a zipped file named haccp zip on an empty formatted USB drive Depending on what type of zip software is installed on your PC the fil...

Page 40: ...ored at the following path haccp home root haccp and will be contained in the csv files format Comma Separated Values They will be normally be loaded into an Excel file like shown in the below example...

Page 41: ...NOTE Do not open db and lib folders but only run BlastChillerTracer The Tracer software is a Java executable file Java Virtual Machine JVM is a very common software and is normally preinstalled into...

Page 42: ...n looking for the file indexCycle arg in the HACCP folder This is the folder extracted from the haccp zip file downloaded from the USB download data function Click on the folder name to go through all...

Page 43: ...from the right column choosing the date starting hour and cycle code you wish to see see encoding scheme above See example of cycle graph at the following page Right click on the graph to print or sa...

Page 44: ...44 Rev02132016 ThermalRiteBlastChillerEasyTouchScreenManual...

Page 45: ...the Blast Chiller memory Access the csv files directly from the haccp extracted folder Open the selected cycle with Excel or an equivalent spreadsheet software Double click on the BlastChiller Tracer...

Page 46: ...places to 0 Next page will show an example of how the rows should appear and how to read the information Food Probe Food Probe Food Probe Air Probe Probe Not Used 1 2 3 4 4 7 Input Outputs The Input...

Page 47: ...47 Rev02132016 ThermalRiteBlastChillerEasyTouchScreenManual Press the I O icon This screen will show real time temperatures position of door switch s relay outputs and fan speed...

Page 48: ...change the password for recipes from the factory default 0000 WARNING If the password is changed or a chef s password is set up the factory cannot access the new password if diagnostic service is requ...

Page 49: ...Enter the new password you wish to setup and press ok After pressing ok press the Home icon to exit this screen Once this action is performed you will be the only one to access that function 4 9 Help...

Page 50: ...iest conditions Product temperature before and after a Chilling Cycle While the product starting temperature depends on the cooking or finishing process which the product went through its target tempe...

Page 51: ...ss time depending on the product weight density thickness starting temperature and so on to reach the set core temperature In either mode once the time has elapsed or the food probe temperature is rea...

Page 52: ...asyTouchScreenManual The Blast Chiller is now in the Pre Chill mode and will run until the temperature reaches 23 F However you can push the Green Start icon to go directly to the Recipe selection scr...

Page 53: ...one of the Product categories 5 1 Blast Chilling Manual Program To access the Manual program press Manual icon in the recipe selection screen To set the time push the TIME tab and set the time of the...

Page 54: ...g Automatic Recipes The pre programmed recipe categories do not require the user to enter any cycle setting as these recipes come with pre programmed settings that will provide the most efficient chil...

Page 55: ...now in the Pre Chill mode and will run until the temperature reaches 23 F 5 C However you can push the Green Start icon to go directly to the Recipe selection screen and skip the Pre Chill cycle In t...

Page 56: ...ins such as fatty lean roast or thin cut Once a product is selected the cycle will start immediately after pressing the specific category left side of the screen one out of the 4 tabs Once the tab is...

Page 57: ...Temperature In an automatic recipe this is the first step of the product core temperature target Once this temperature is reached in the product core the cycle will switch to next step Air set The cav...

Page 58: ...nging the set temperature to a higher Air Temperature towards the end of the cycle to prevent freezing of the outer surface A pastry items will be probably chilled in a higher Air Temperature above 38...

Page 59: ...he Pre Chill mode and will continue until the Air Temperature reaches 23 F 5 C Pressing the red Stop icon will cancel the Pre chill mode and return to the Home screen Pressing the Green Start icon wil...

Page 60: ...on the Product Probe is now being used The Time tab will be faded indicating that the cycle will run until the Product Probe is satisfied Next set the cavity Air Temperature you wish to Chill at Then...

Page 61: ...tab will turn Red The values for each tab are listed and the user must select a value in that range Once all recipe values are set Time Temperature or Product Probe Fan Speed Hold Temperature then pr...

Page 62: ...robe mode was selected the screen will prompt you to insert the Product Probe if you haven t already done so You have 600 seconds or 10 minutes to do so or if it is already inserted the control will r...

Page 63: ...e Stop button If the door s are opened the fans and compressor will turn off The compressor has a 1 minute delay on start up The graph can chart the various probes and can be customized to the user s...

Page 64: ...ier and crowded the graph will become By pressing on PARAMETERS icon the Parameter screen will appear and it allows the user or service technician to check all the control Parameter settings These par...

Page 65: ...the 4 pages of parameters by using the Forward or Back arrow icons and can return to the previous screen by using the Return icon Pressing the Home icon will return the user to the Home screen and te...

Page 66: ...now and if they were a critical alarm that will shut down the unit There will also be an alarm indicator in the upper left corner of the graph screen Pressing on the Return icon will take the user bac...

Page 67: ...compared to the current Set point temperature There is a differential parameter LBT that states the maximum gap that should exist between Set point temperature and Evaporator temperature This alarm i...

Page 68: ...e Chiller call service CONDENSER PROBE S3 Condenser sensor failure Allow the Chiller to cool down check the condenser filter and clean as needed Check to ensure condenser fan is working that there is...

Page 69: ...I O icon it will bring up the next screen This function allows the user or service technician to monitor in real time the input values of each of the following multi point Product Probe Evaporator pr...

Page 70: ...output status and the Fan Speed By pressing the Return icon you will return to the previous screen 5 7 Energy Menu The ENERGY tab allows monitoring the actual voltage power consumption and status of...

Page 71: ...atic Holding Cycle The Hold mode will start automatically From left to right the screen will show you the upper temperature limit to trigger a High Temperature alarm the cavity Air Temperature during...

Page 72: ...ct target temperature in a freeze cycle is 0 F 18 C and HACCP regulations state this temperature must be reached within 240 minutes The lowest air temperature that can be set is 40 F 40 C Just like in...

Page 73: ...ller will Pre Chill the cavity to 22 F 30 C Once it is Pre chilled press the Green arrow icon to proceed to the Product category screen After this point all modes pre programmed recipes custom recipes...

Page 74: ...ord protected to avoid changes to the parameter settings and to prevent damage to the Blast Chiller Even when provided the password do not access the Service Menu and make any changes unless you are d...

Page 75: ...y the manufacturer service team and hit OK to enter the menu 7 1 How to Change a Parameter Pressing on PARAMETERS it is possible to check or change all the internal parameters of the Blast Chiller The...

Page 76: ...v02132016 ThermalRiteBlastChillerEasyTouchScreenManual The service technician can use the right or left arrows to advance the screens Pressing the left arrow multiple times will return to the service...

Page 77: ...confirm the change Press the Return icon to return to the previous screen or press the Home icon to return to the Home screen 7 2 Parameter List The following table of Parameter settings is for refere...

Page 78: ...er start min 180 180 180 ADF temperature alarm delay after defrost min 120 120 120 HYH upper differential cooling action C F 2 2 2 HYL lower differential cooling action C F 0 0 0 MNT number of trays o...

Page 79: ...denser temp Alarm min 30 30 30 DTE defrost ending temp related to evap Probe C F 41 41 41 DRP dripping time after defrost sec 60 60 60 DTO defrost timeout min 10 10 10 ITD interval between two consecu...

Page 80: ...be point 4 offset C F 0 0 0 OF8 core probe point 5 offset C F 0 0 0 SLL not used 40 40 40 SLH not used 3 3 3 RHU cabinet RH set point settable num 80 80 80 MNS mains voltage alarm limit 20 20 20 MAL v...

Page 81: ...reshold V 10 11 1 11 1 11 1 VRE end battery charging threshold V 10 11 3 11 3 11 3 VRT battery voltage at ending charging for max duration V 10 9 8 9 8 9 8 VBR minimum battery voltage for disabling ba...

Page 82: ...10 CPR not used 10 10 10 CIN not used 0 0 0 SPS not used 7 7 7 TBC not used 5 5 5 LPT not used 0 0 0 POF not used 0 0 0 7 3 Parameters Restore At any time is possible to restore the original Paramete...

Page 83: ...ThermalRiteBlastChillerEasyTouchScreenManual Please wait until the screen returns to the Service menu 83 Rev02132016...

Page 84: ...NGS Door Openings 7 4 Door Openings Use this function to check door opening events date opening duration and critical events in which air temperature exceeded the threshold value Use the Up Down arrow...

Page 85: ...ScreenManual 7 5 Scanner This is one of the most advanced service functions which allows to force each board relay to activate and deactivate Press the PLAY button to activate relay 1 U1 After pressin...

Page 86: ...in the field ENERGY to monitor if there is any load by the component supplied by relay 1 and how much the wattage used is Press the Return icon to return to the Service menu or the Home icon to retur...

Page 87: ...chScreenManual 7 6 Serial Number Press on the Serial Number icon Enter the serial number of the Blast Chiller Press OK to confirm Press the Return icon to return to the Service menu or the Home icon t...

Page 88: ...ast Freezing cycle or Celsius C or Fahrenheit F To access this screen press the Optional icon This screen will appear Press the icon next to the function you wish to activate or deactivate A Green Che...

Page 89: ...stChillerEasyTouchScreenManual 7 8 Manteinance This function will allow the useror service technician to reset either the lifetime counter of the machine or the alarm list To access the Maintenance me...

Page 90: ...stChillerEasyTouchScreenManual Press the related icon and confirm the reset 7 9 Cal Display Calibration The display calibration allows the user to optimize the touch screen performance ensuring precis...

Page 91: ...r press there the Cross will move to the lower left hand corner press there and finally the Cross will move to the lower right hand corner press there Press on the Green Checkmark the calibration is n...

Page 92: ...eenManual Press on each of the 4 targets and verify that target identification in the center of the screen is consistent with the target pressed Press the Return icon to return to the Service menu the...

Page 93: ...93 Rev02132016 ThermalRiteBlastChillerEasyTouchScreenManual NOTES Thermalrite 1560037th Avenue N Suite 100 Plymouth MN Every step of the way...

Reviews: