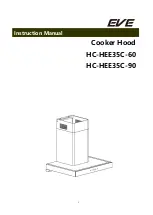
EVE HC-HEE35C-60 Instruction Manual Download Page 9


Insufficient suction 

The distance between the 
cooker hood and the gas top is 
too far 

Refit the cooker hood to the 
correct distance. 

The Cooker hood 
inclines 

The fixing screw is not tight 
enough 

Tighten the hanging screw and 
make it horizontal. 

NOTE:  

Any electrical repairs to this appliance must conform to your local, state and 
federal laws.Please contact the service centre if in any doubt before 

undertaking any of the above.Always disconnect the unit from the power source when 
opening the unit. 


MAINTENANCE AND CLEANING


Caution:


• Before maintenance or cleaning is carried out, the cooker 

hood should be disconnected from the mains power supply. 
Ensure that the cooker hood is switched off at the wall 
socket and the plug removed. 

 
• External surfaces are susceptible to scratches and abrasions, so please follow the 

cleaning instructions to ensure the best possible result is achieved without damage. 

 
GENERAL 

Cleaning and maintenance should be carried out with the appliance cold especially 
when cleaning.Avoid leaving alkaline or acid substances (lemon juice, vinegar etc.) on 
the surfaces. 


STAINLESS STEEL 

The stainless steel must be cleaned regularly (e.g.weekly) to ensure a long life 
expectancy.Dry with a clean soft cloth. A specialized stainless steel cleaning fluid may 
be used.


NOTE:  

Ensure that wiping is done along with the grain of the stainless steel to prevent any 
unsightly crisscross scratching patterns from appearing. 


CONTROL PANEL SURFACE 

The inlay control panel can be cleaned using warm soapy water. Ensure the cloth is 
clean and well wrung before cleaning. Use a dry soft cloth to remove any excess 
moisture left after cleaning. 

Important 

Using neutral detergents and avoid using harsh cleaning chemicals, strong household 
detergents or products containing abrasives,as this will affect the appearance of the  
appliance and potentially remove any printing of artwork on the control panel and will 
void manufactures warrantee. 


Summary of Contents for HC-HEE35C-60

Page 1: ...1 Cooker Hood HC HEE35C 60 HC HEE35C 90 Instruction Manual...

Page 2: ...2 Content 1 Safety instructions 2 Installation 3 Start using your cooker hood 4 Troubleshooting 5 Maintenance and cleaning 6 Environment protection...

Page 3: ...r fuels Range hoods and other cooking fume extractors may adversely affect the safe operation of appliances burning gas or other fuels including those in other rooms due to back flow of combustion gas...

Page 4: ...made by children without supervision Always to do Caution The appliance and its accessible parts can become hot during operation Be careful to avoid touching the heating elements Children younger than...

Page 5: ...body 6 the pin 3 should be top oriented the axis 4 should be inserted into the holes 5 on the body repeat all the operations for the 2nd half part INSTALLATION If you have an outlet to the outside you...

Page 6: ...8mm screws Then install the expansion pipe onto the outlet and fix it with a cable tie Hang the hood on the hanging screws See pic 3 5 Fix the outside chimney bracket on the outside chimney with 2 pcs...

Page 7: ...be carried out by a qualified electrician or competent person Do not connect the ducting system of the hood to any existing ventilation system which is being used for any other appliance such as warm...

Page 8: ...d will go into the status of acquiescent working acquiescent time is 9mins and then LED display will be shown 9 8 7 6 decreasing by 1 when time is up the hood will be off automatically and the lamp wi...

Page 9: ...sult is achieved without damage GENERAL Cleaning and maintenance should be carried out with the appliance cold especially when cleaning Avoid leaving alkaline or acid substances lemon juice vinegar et...

Page 10: ...able not to use rinse aid Refer to the below picture to remove the grease mesh filters INSTALLING GREASE MESH FILTERS To install filters for the following four steps Angle the filter into slots at the...

Page 11: ...hen take off the cover plate Use a tool or the hand to press the spring splinter of both sides of LED light to the inside until the light is pressed out Then slightly pull the light connecting wire ou...

Page 12: ...information please contact your local or regional authorities NOTE The following shows how to reduce total environmental impact e g energy use of the cooking process 1 Install the cooker hood in a pro...

Reviews: