19
Prodigy FlyPipe Installation Guide
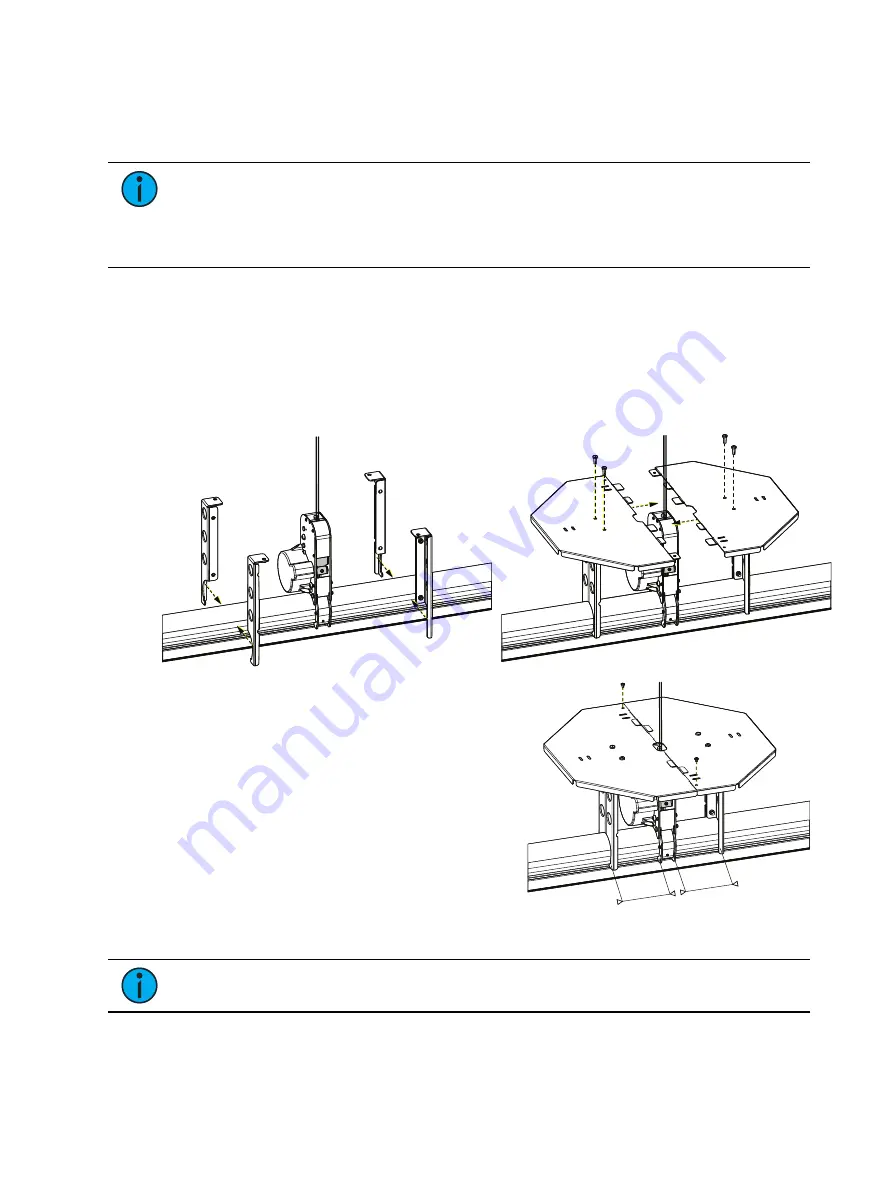
Attach the Platter to the Hoist
In these steps you attach the helix cable management platter to the hoist to provide a resting
location for the cable assembly.
Note:
If you have not yet terminated your TwinLine pair of lift lines to the hoist drum
for the helix cable management section of the hoist, it is recommended that you do so
before attaching the platter to the hoist. If you choose to terminate the lift lines after
attaching the platter, you will need to separate the two platter halves so you can
remove and access the SafeStop device.
1. Locate the two platter pieces, brackets and hardware in the same box in which the cable
assembly shipped.
2. Take the halves of the brackets and fit them around the hoist so there is one full bracket
on each side of the SafeStop device.
3. Using a Phillips screwdriver and the hardware provided, loosely connect both bracket
sides.
4. Take the two halves of the platter and loosely connect them to the bracketed sides using
the four 6 mm screws provided.
Combine Bracket Halves
Secure Halves to Brackets and Join Together
111 mm (
4.37 in
)
111 mm (
4.37 in
)
5. Adjust the position of the brackets until the
two halves of the platter are joined.
6. Secure the platter pieces together using the
two 4 mm screws provided.
7. Tighten the four loose screws securing the
bracket sides to the hoist and the four screws
securing the platter to the brackets.
Note:
The brackets are positioned approximately 111 mm (4.37 in) from each side.


